A general’s death is a tragedy. 23 large corps shattering is a statistic.
Type: Single-player, Multiplayer
Genre: Turn-Based Strategy, Wargame
Developer: Kraken Studios
Publisher: Slitherine Ltd., Matrix Games
Release date: 24 Oct, 2019

Intro
Alternate gag intro line: “Gee, Slitherine, what war do you want to set your wargame in tonight?” “The same war we set it in every night, audience – the Axis trying to TAKE OVER THE WORLD!”
I’m a fairly dedicated strategy gamer, but there’s a few sub-genres of the strategy genre that I tend to have trouble getting into. The one most relevant to WarPlan is the very dry and technical, micromanagement-heavy “Beer and Pretzels” wargame. (Or as I tend to call it, “Dad strategy games”… although at this point, most of you would be calling it “Grandpa games”, but that’s just me making myself feel old again.) WarPlan sells itself as “a balance of realism and playability incorporating the best from 50 years of World War II board wargaming.” Since computer strategy games didn’t exist back then, this obviously refers more back to the cardboard token era of Avalon Hill “Bookshelf Game” strategy games I still have in one of my closets, gathering dust and being even older than me.
I’m burying the lead a little with this, but I can more-or-less agree with the statement made above. Many wargames that try to be “realistic” often put what the player can actually make strategic decisions about to a far backseat behind all the self-seriousness of the “realism” that is most certainly serious business, and if you don’t appreciate rote micromanagement for several hours per turn, you just aren’t a big enough serious boy to enjoy such deep and complex serious big boy games like this. WarPlan manages to strip out nearly all of the pointless number crunching that doesn’t actually impact strategic gameplay any thanks to its developer’s aversion to micromanagement, and incorporates several of the best ideas I wish other strategy games used to make what is one of the best versions of this kind of high-level hands-off strategic military simulation. In spite of its hex-and-cardboard-token appearance, this game honestly is most comparable to a game series like Hearts of Iron than Gary Grigsby’s War in the East/West.
The problems I have with the game, meanwhile have a lot to do with presentation… or at least, what the game fails to present to the player adequately. This is a game which likes to streamline its interface too much for its own good, and often winds up failing to tell the player critical information to the point that the player can easily feel like they aren’t in control of what’s going on, or why their actions don’t seem to get the results they think they should without doing a lot more digging than should be necessary.
Hex Warfare
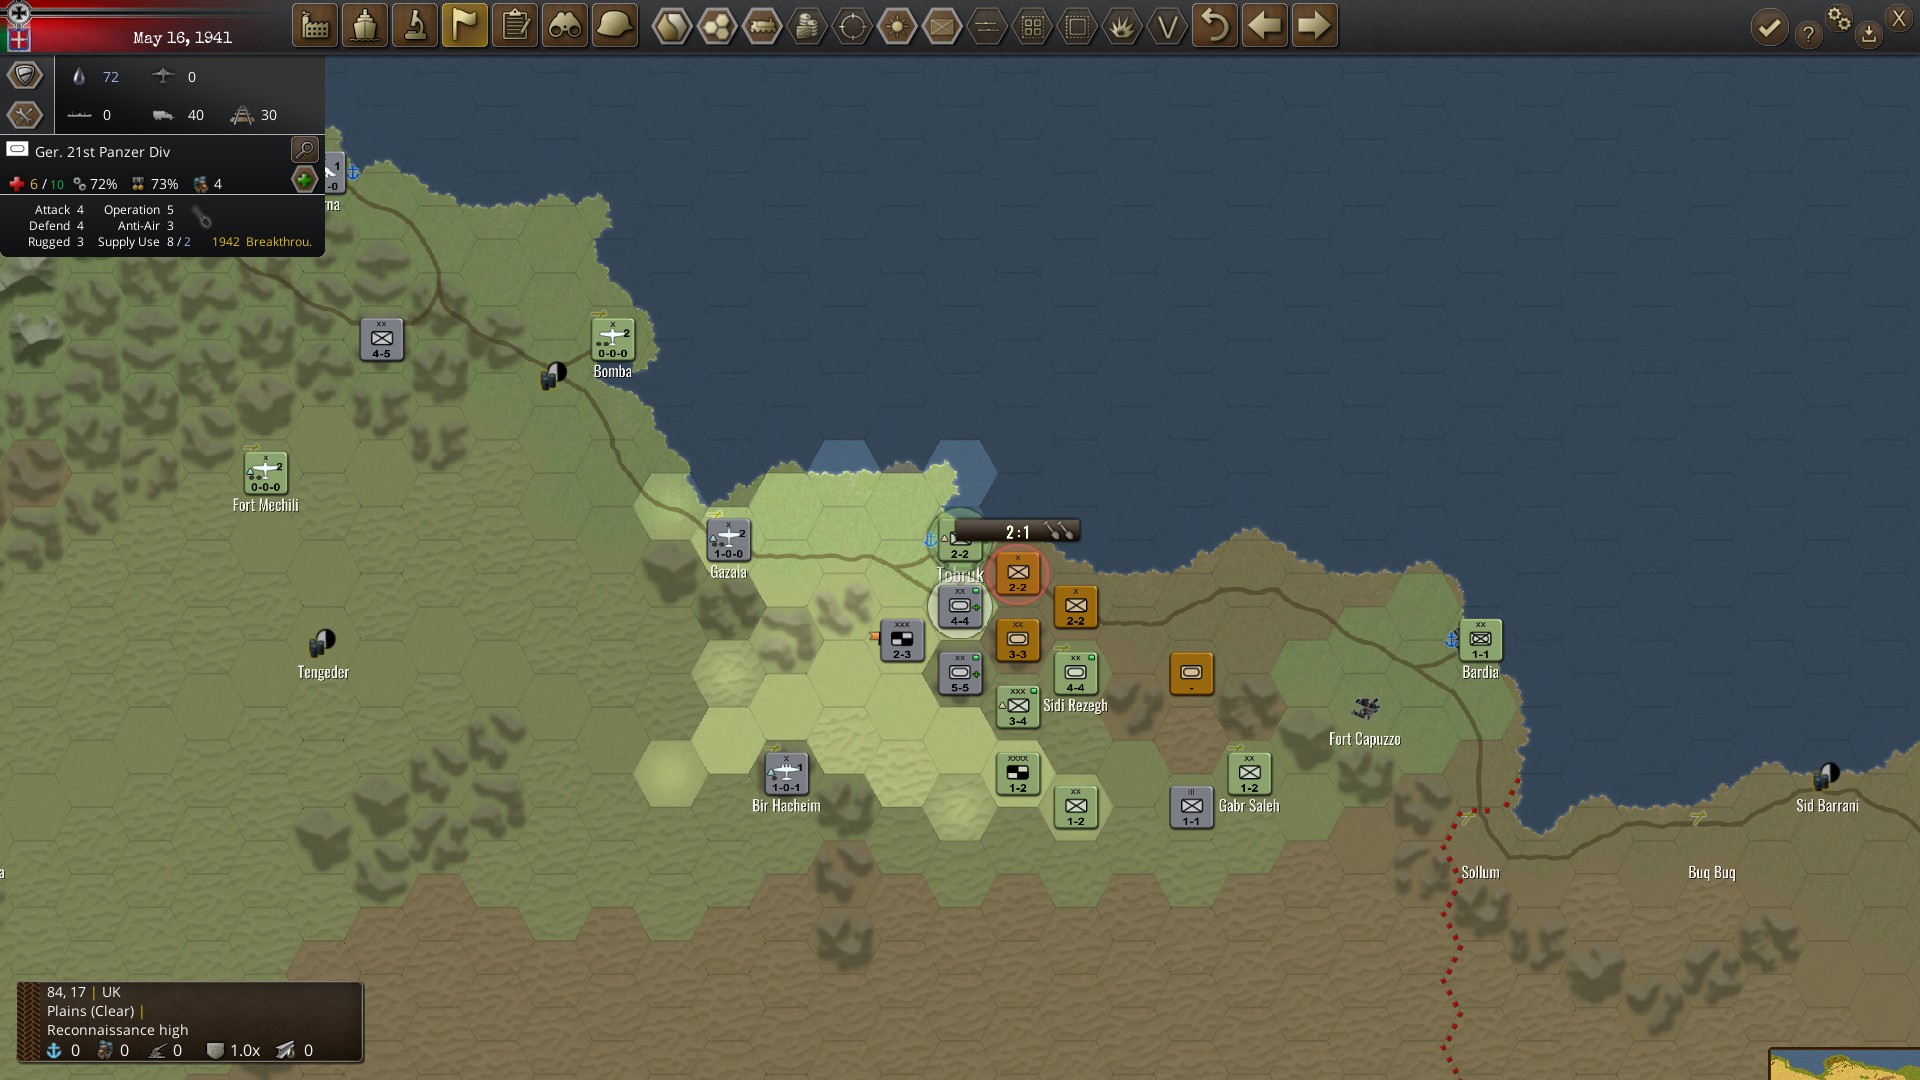
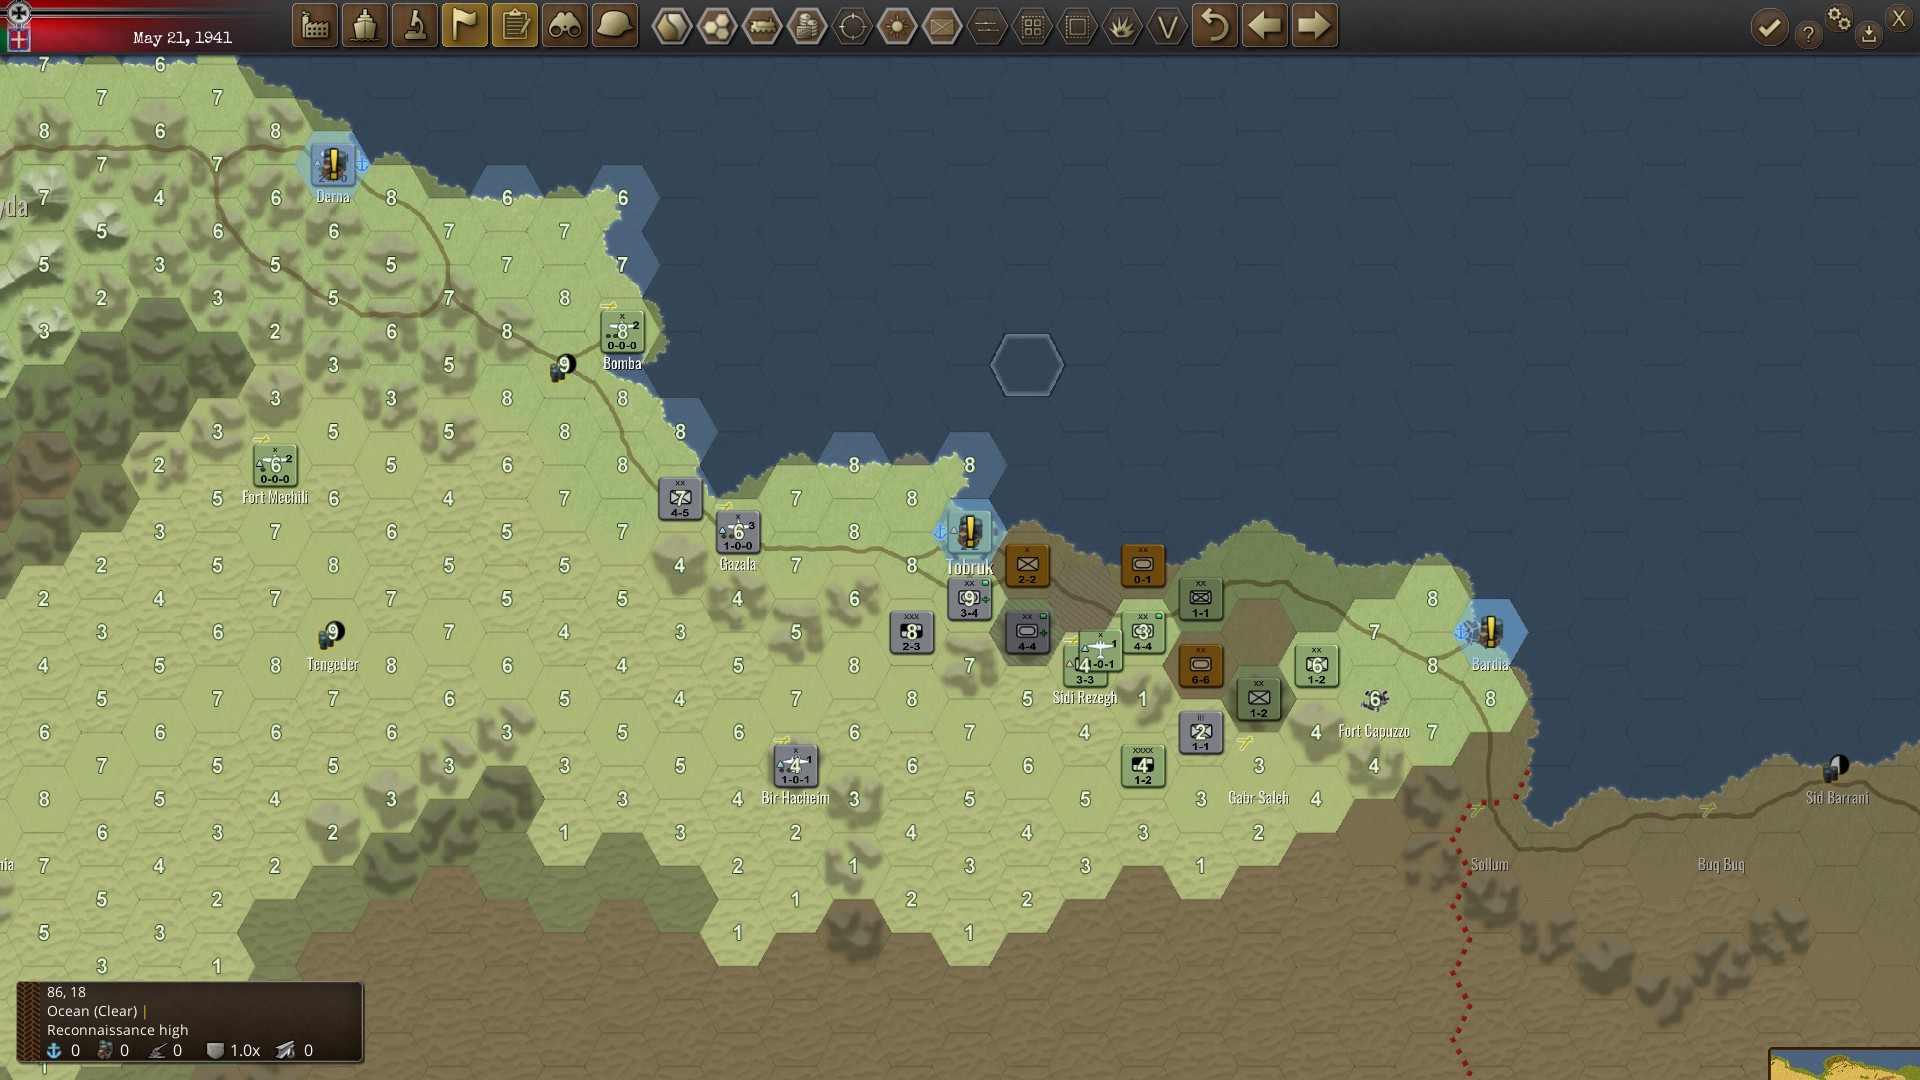
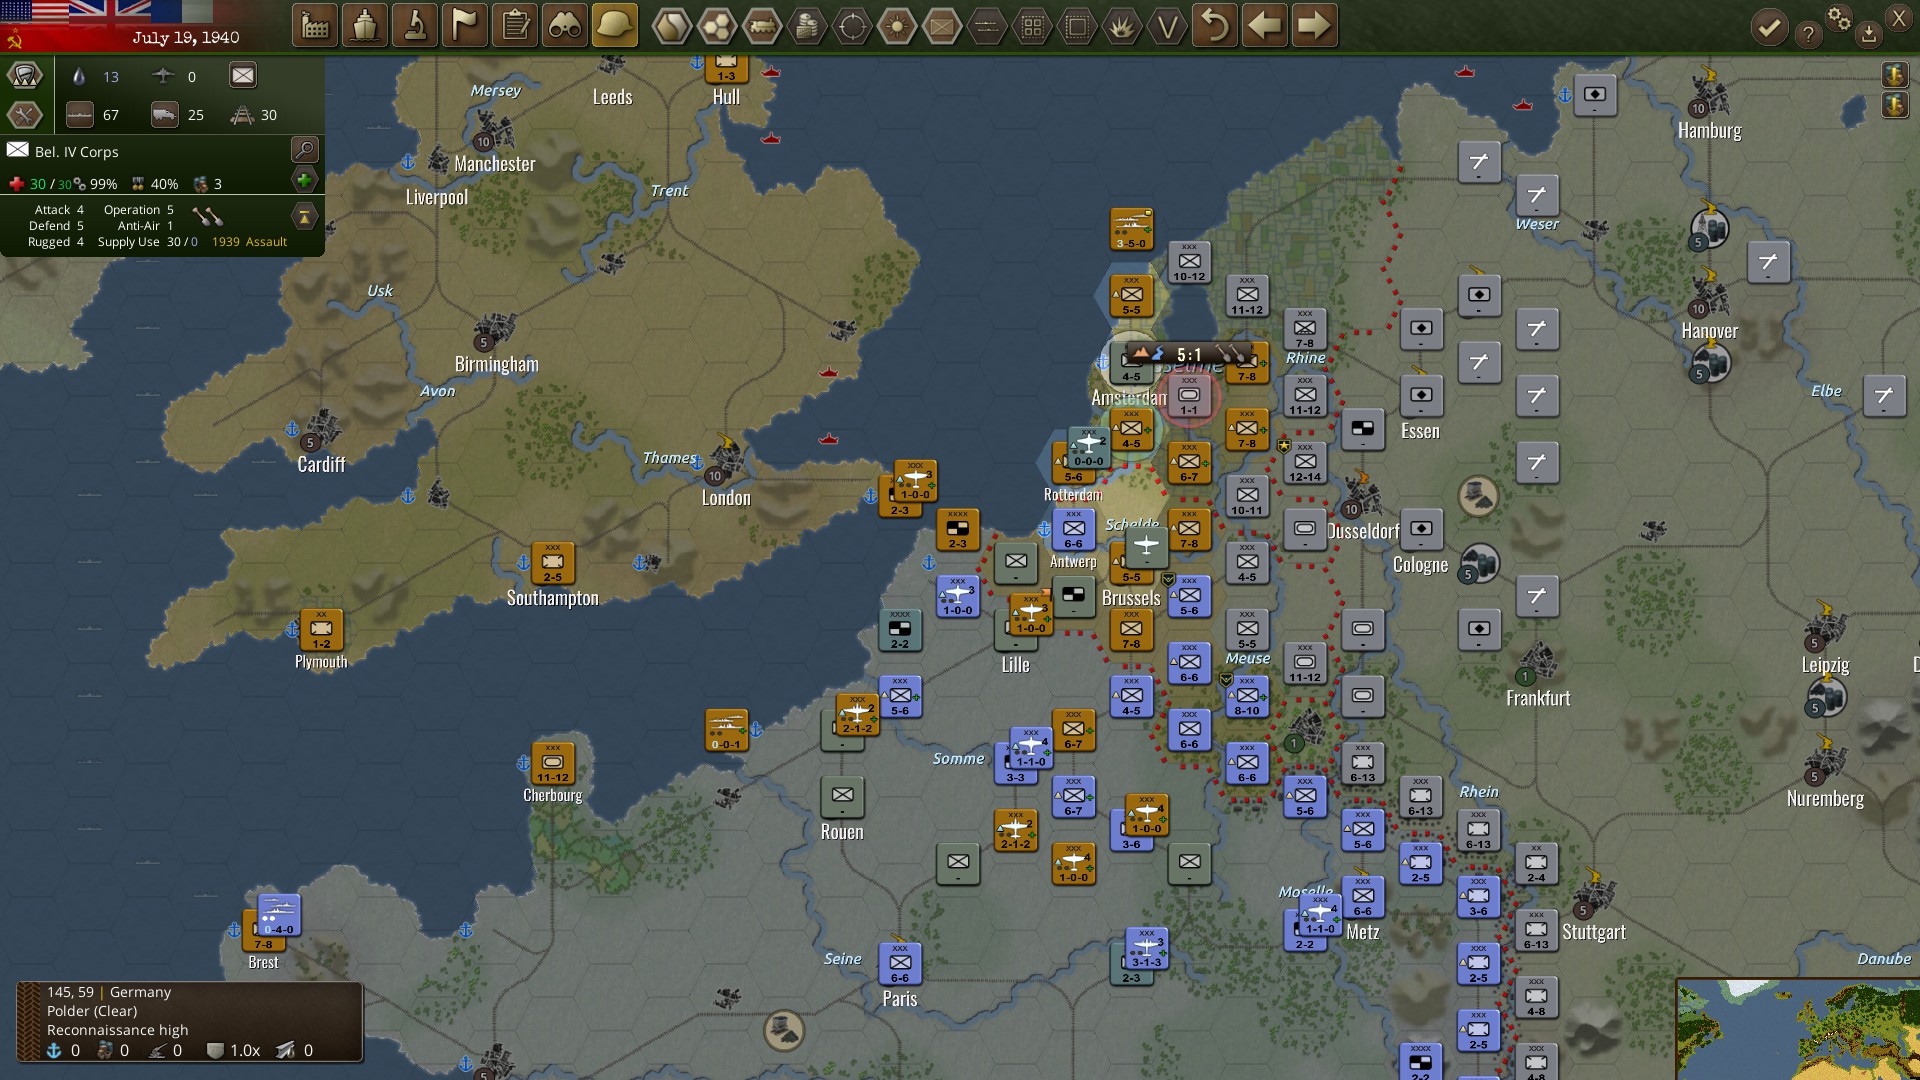
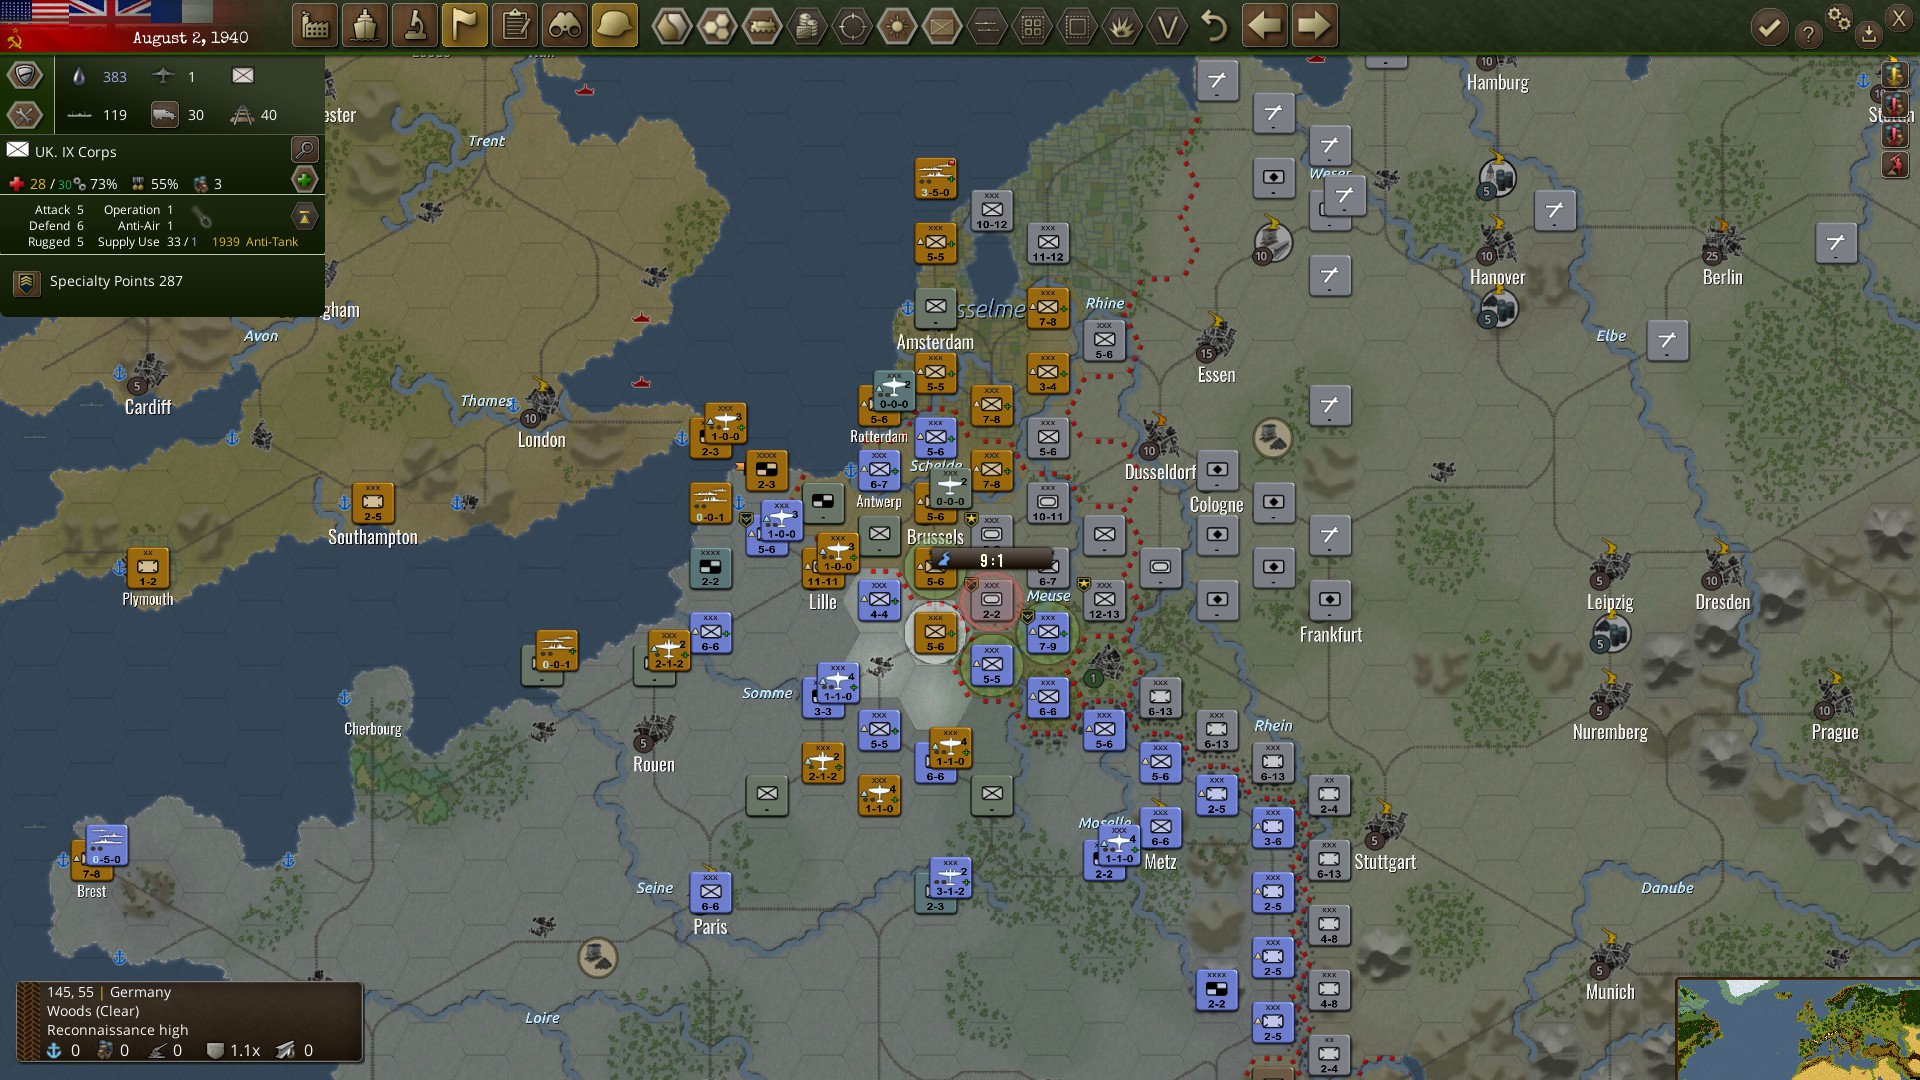
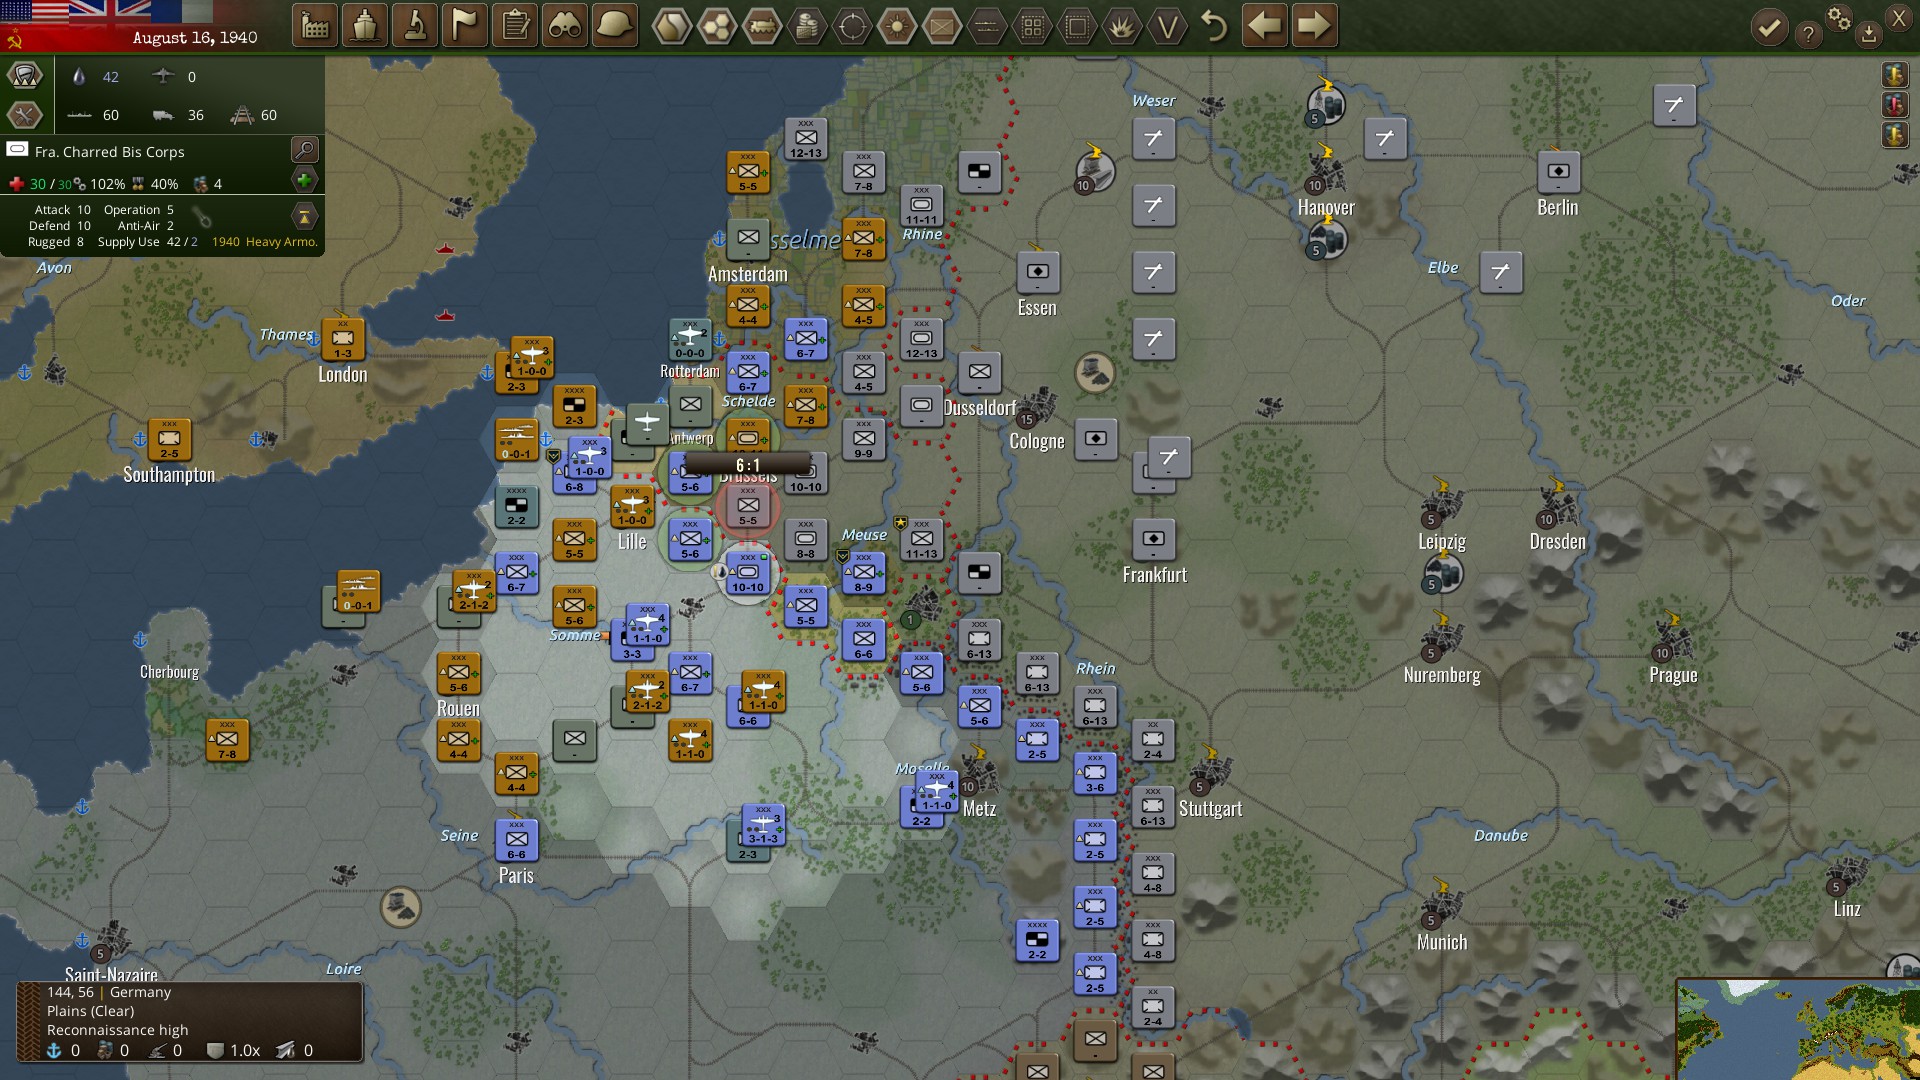
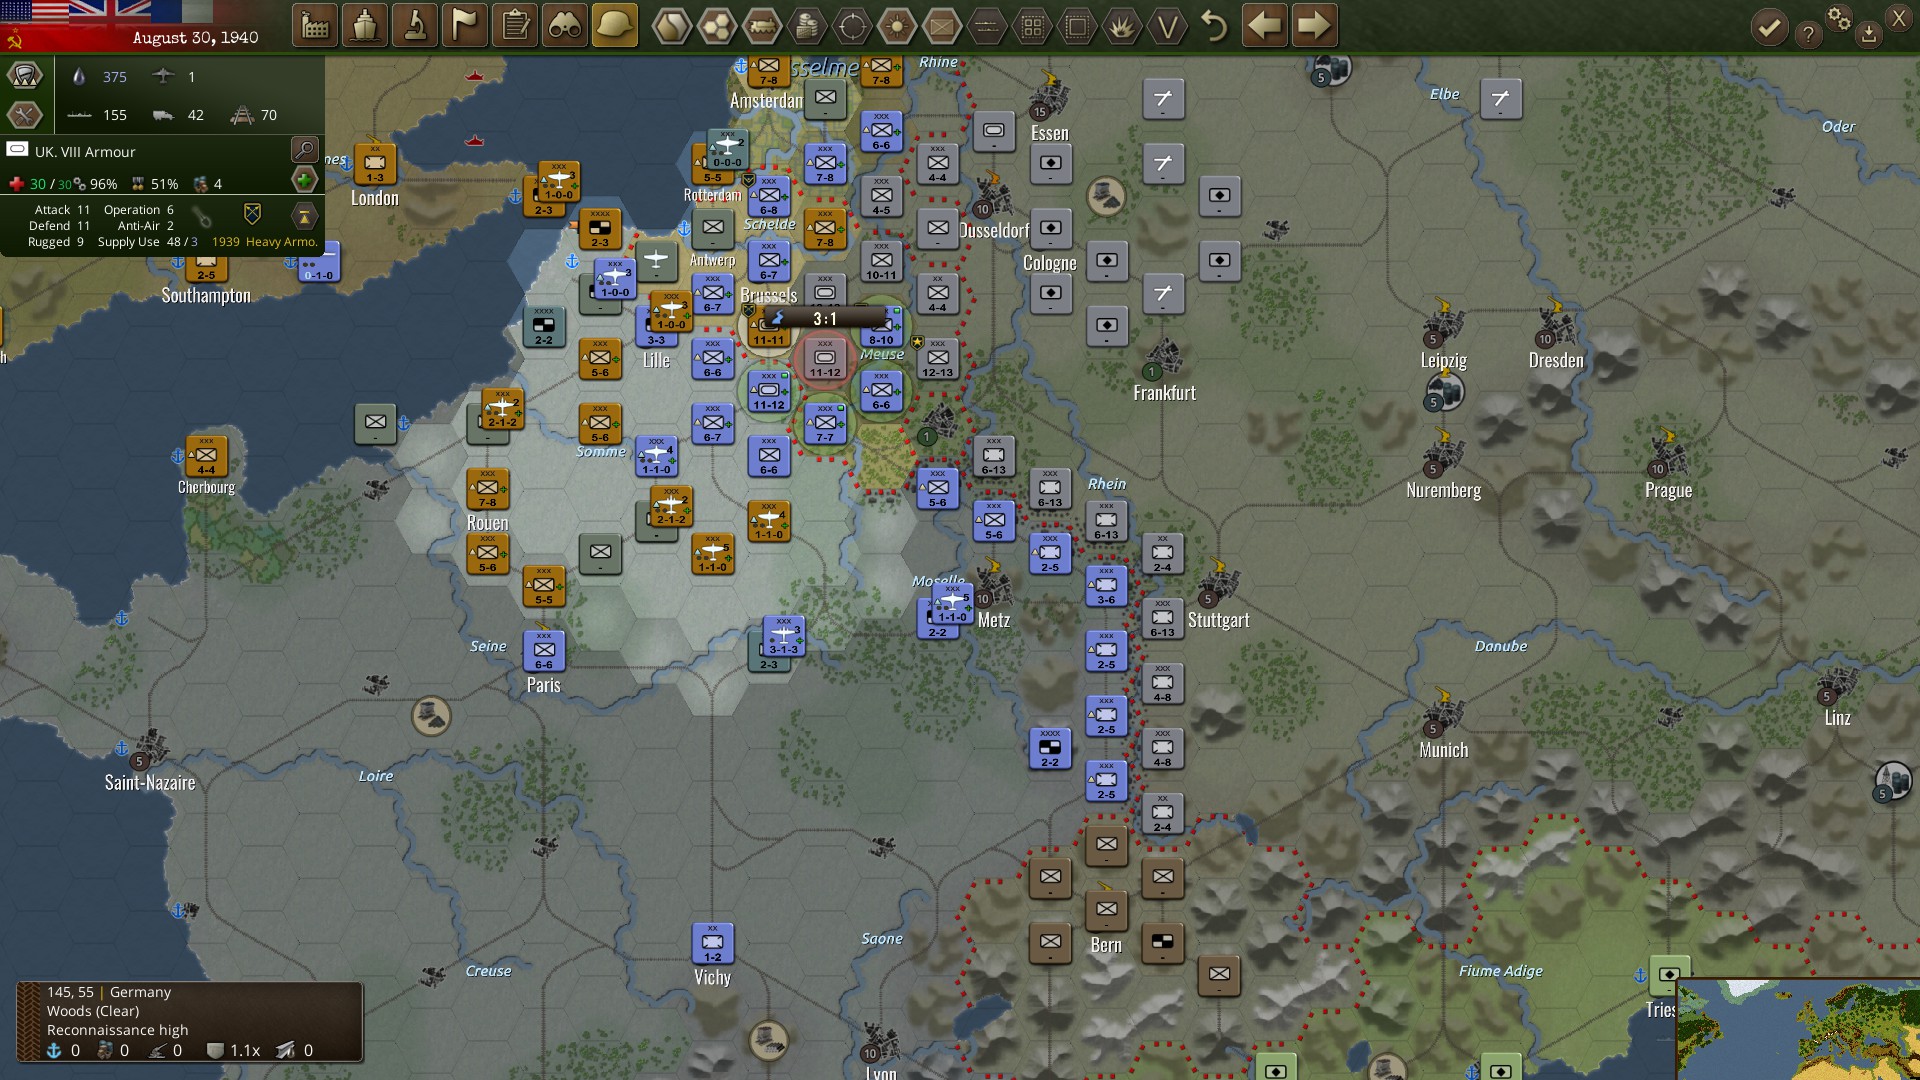
Land combat in WarPlan heavily favors the defender. It is a general rule of thumb that an attacker wants to have 3-to-1 odds to keep casualties acceptable during combat in nearly any era of warfare, but in this game, that’s still not enough, as the game counts your advantages but pretends not to know all the defender’s advantages and lies to you about your actual odds.

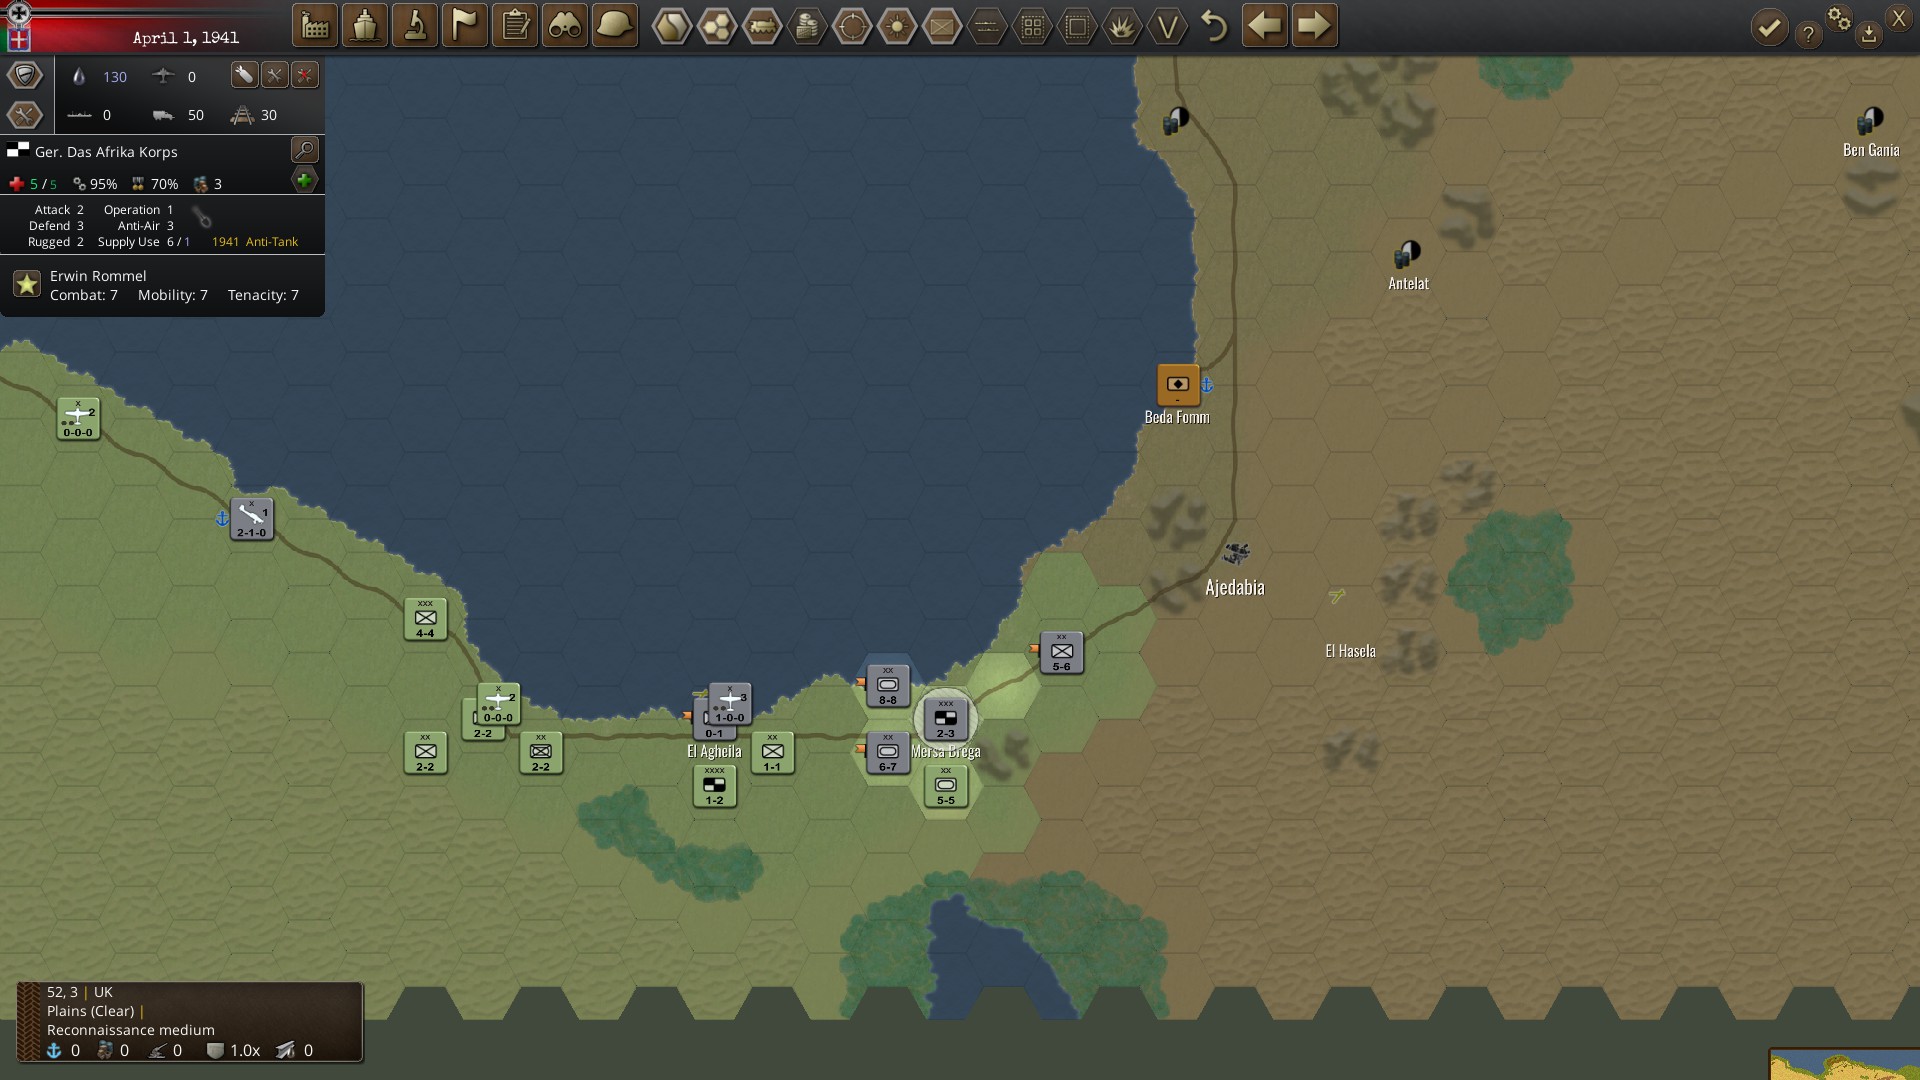
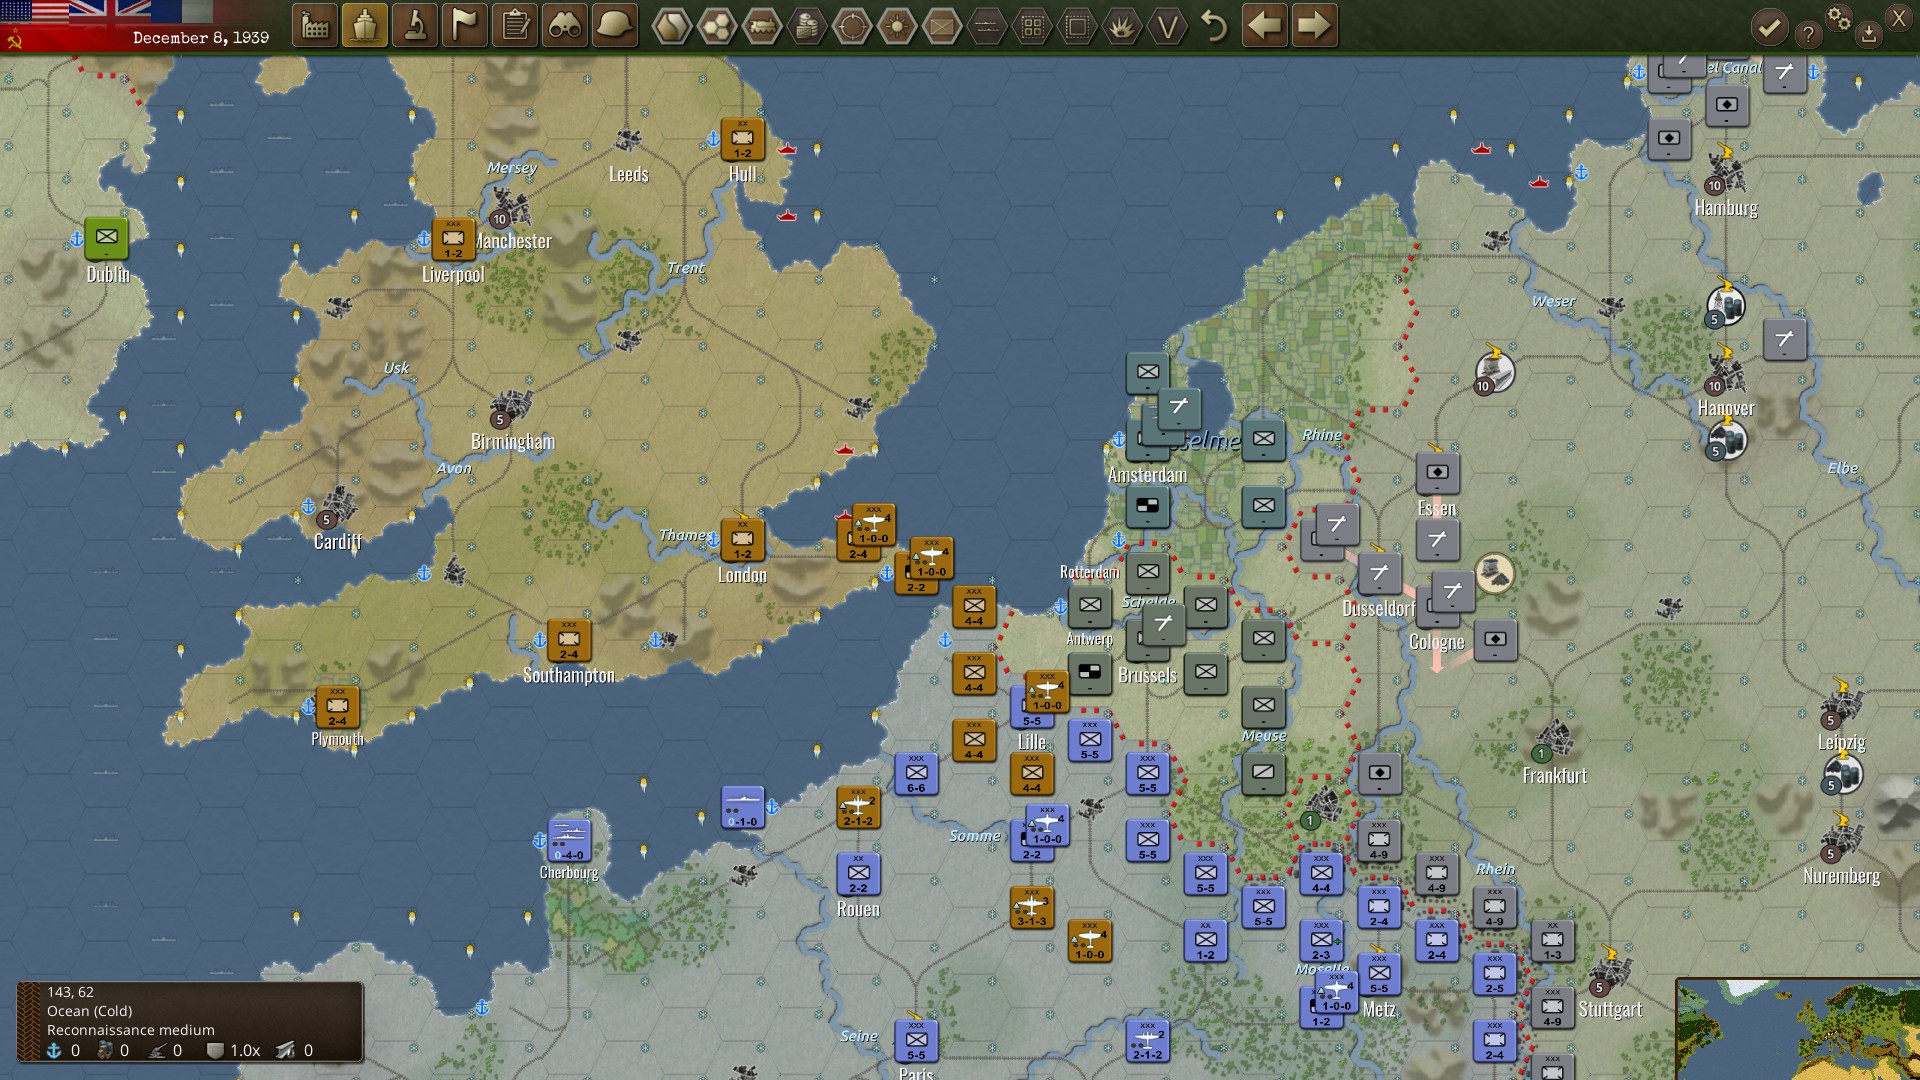
Somewhat like games in the Panzer General vein, but not like some of the other “simulated cardboard token” games, you cannot allow land units to share hexes with other land units. One thing you can do, however, is hold control or shift to select multiple units for a coordinated assault. (Unlike other strategy games, the scale is too large to have individual artillery units, so artillery is just part of regular infantry or armor units, and there is no way to order extra shelling before an assault.)
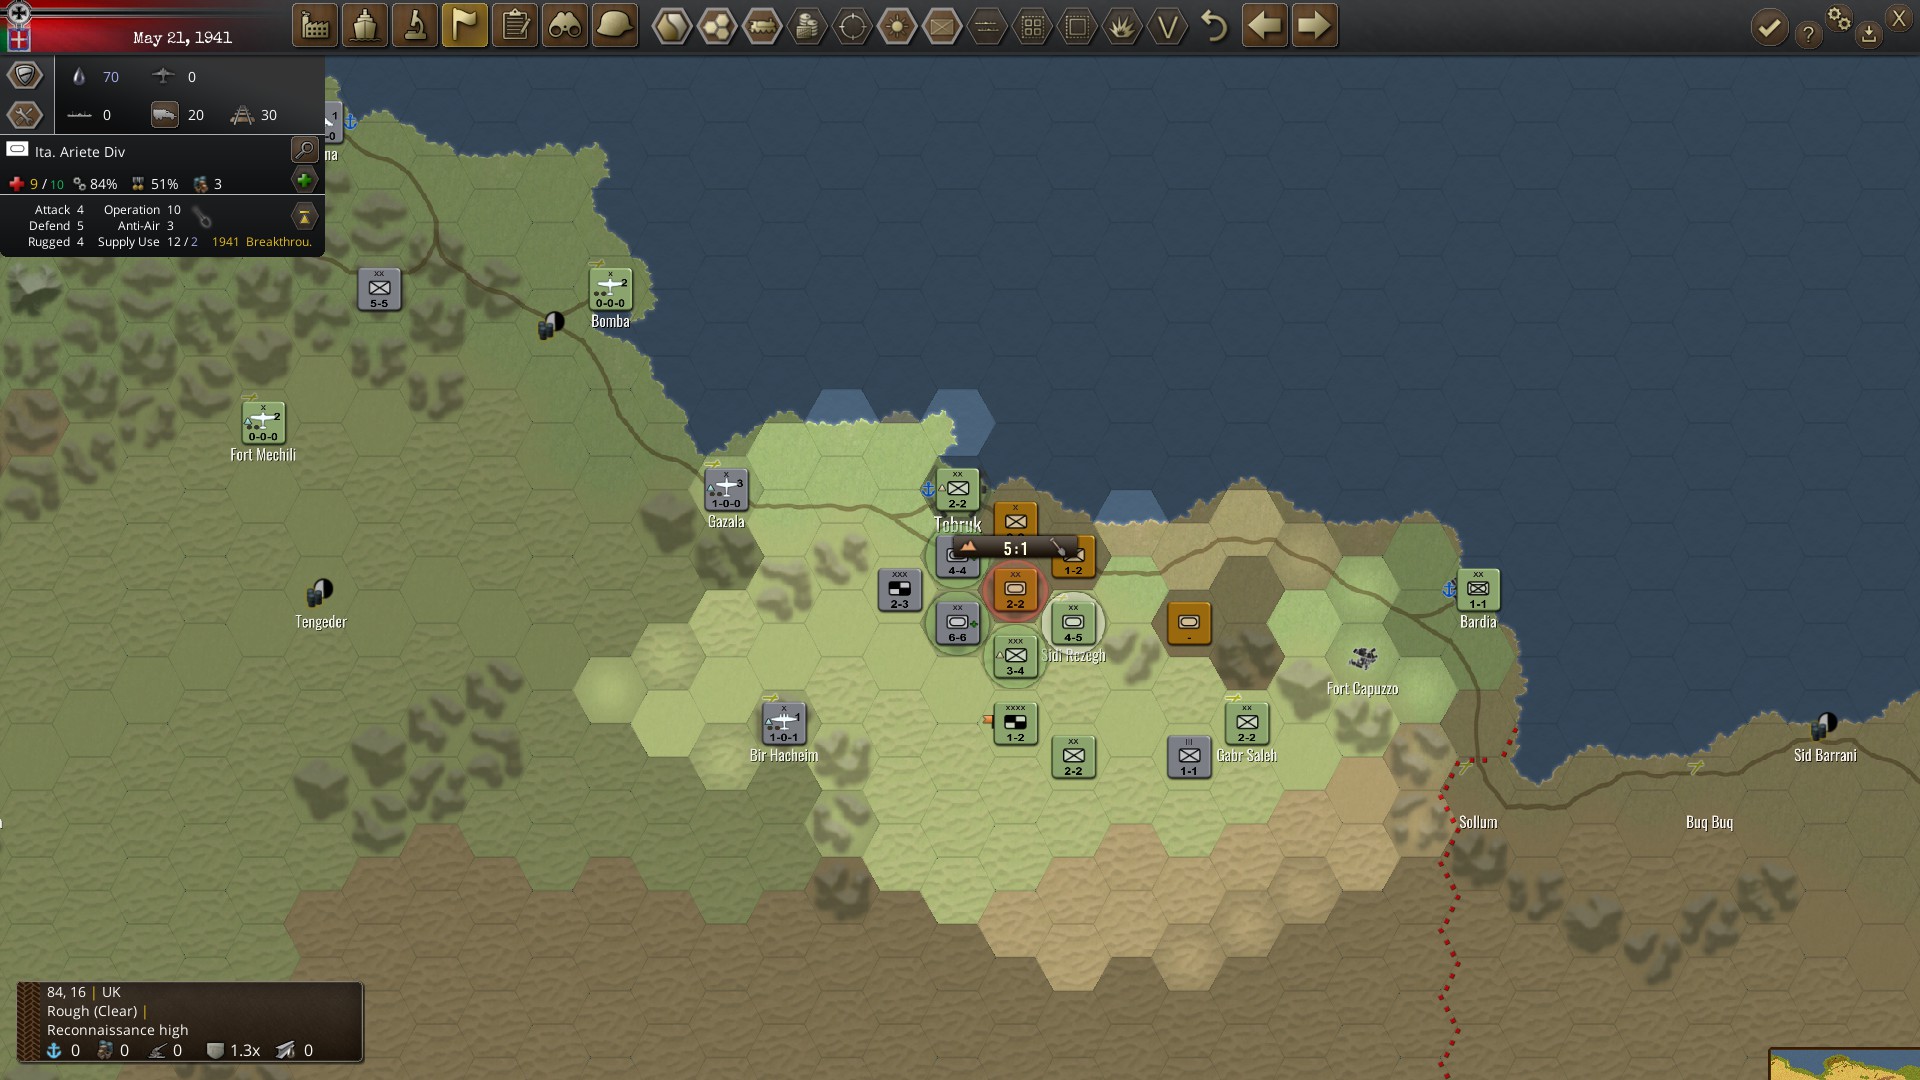
One notable, and key aspect of combat is also effectiveness and experience. There are (extremely vaguely described) stats for every unit like Firearms, Guns, and Tanks for every nation’s version of a type of unit (units of the same nominal type are different from nation to nation – American large infantry corps have 1 Tank in them, while most nations have 0 Tanks), as well as effectiveness, experience, and a strength rating that effectively states how many soldiers are in that unit. (Considering the organizational size of units in this game, 1 strength seems to equate to 1,500 soldiers.) Effectiveness and experience are presented as percentages, and effectiveness, experience and strength all seem to directly multiply the power of those vague stats like Firearms. Experience is based upon nation (with nations like Russia and the BeNeLux countries having serious penalties, while Germany has a massive advantage to give them early-game dominance), but every unit has a random chance per time they fight to gain 1% of experience, and low-experience countries can gradually make their base experience for new units increase if their units participate in enough combat.
Effectiveness, however, is constantly in flux. Effectiveness depletes after combat or movement or simply having bad weather, while it rises gradually for being in supply. This means that units in heavy combat become exhausted and ineffective and need to be replaced with fresher units, even if they haven’t been taking much damage.
Effectiveness in a way takes the same role as Suppression does in Order of Battle, but in Order of Battle, a concentrated artillery barrage and bombing campaign would inflict massive suppression that only lasts for one turn (suppression decreases the effective combat strength, so that 3 suppression would make 3 of the unit’s strength still be alive, but unable to fight), while effectiveness loss is hard to inflict as one big shock, yet lasts significantly longer. I somewhat prefer the suppression of Order of Battle both in terms of “realism”, as saturation bombing should have more of a shock and awe effect, and also in gameplay terms, as suppression is something you actively inflict on opponents, while effectiveness is more something your enemy inflicts on its own units more than you can inflict it on your enemy, so you feel less involved in the effectiveness loss of enemy units.
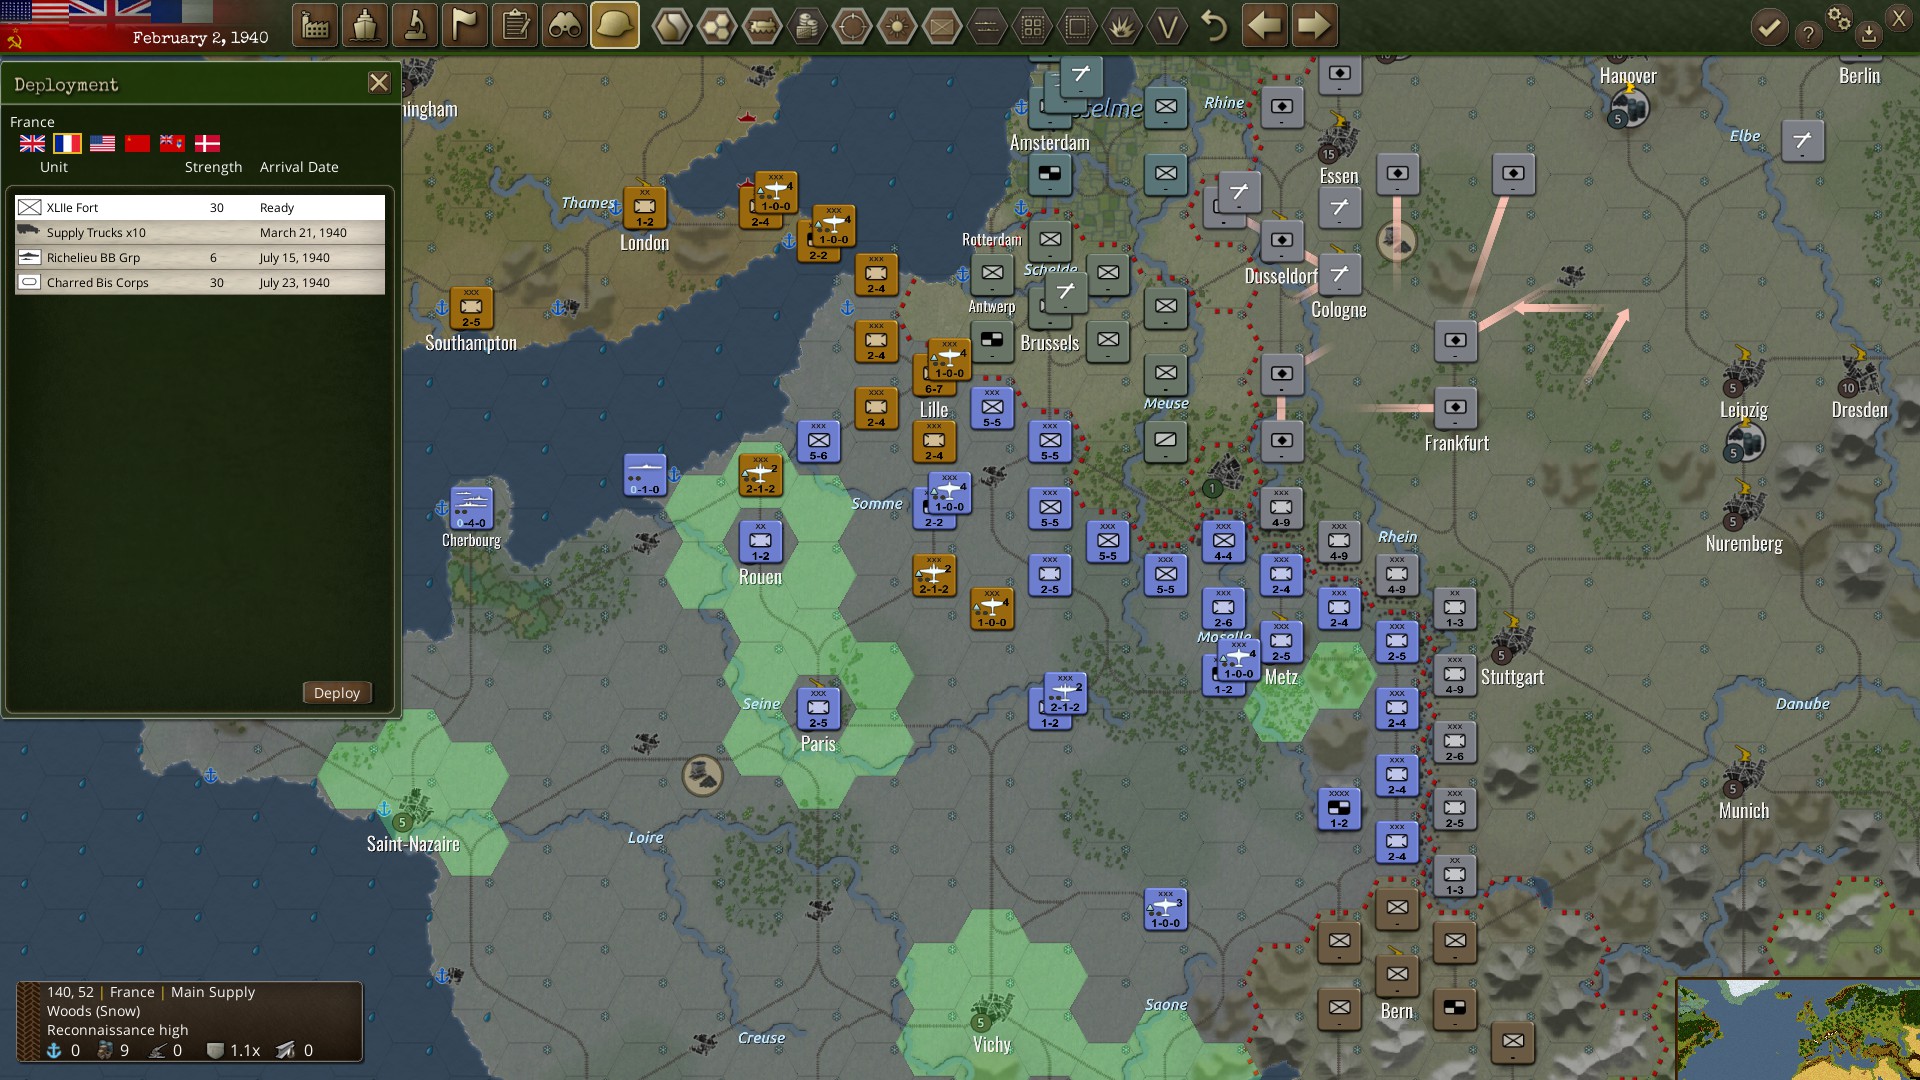
Supply trucks, for example, can be used to give a quick boost to the effectiveness of a unit. These are built like units, but can be deployed to units that have yet to move as a type of consumable power-up to give extra… (Relief? More chocolate rations? They didn’t let them drink, and I don’t think a shipment of extra Coca-Cola is gonna do it…) morale and ammo to the troops when you need to give one of your combat units a shot in the arm. Keeping units out of combat will restore effectiveness while continuous combat drops effectiveness to the point they are in danger of shattering or surrendering without being taken off the front lines to rest, but having a button you can punch to increase the effectiveness of troops at a cost of a limited resource is a nice way to give the player some involvement.

Unlike games such as Panzer Corps or Order of Battle, you do not have specific types of units such as a company of Matildas or Panzer IVs, you simply have infantry corps (or divisions if you want a garrison unit or just want to get them killed since they will have less concentrated firepower), or armor corps, with a couple slightly specialized units like marines, paratroopers, and mountain corps that are more expensive but have an advantage in amphibious landings, can paradrop, or gain a bonus on mountain terrain, respectively.
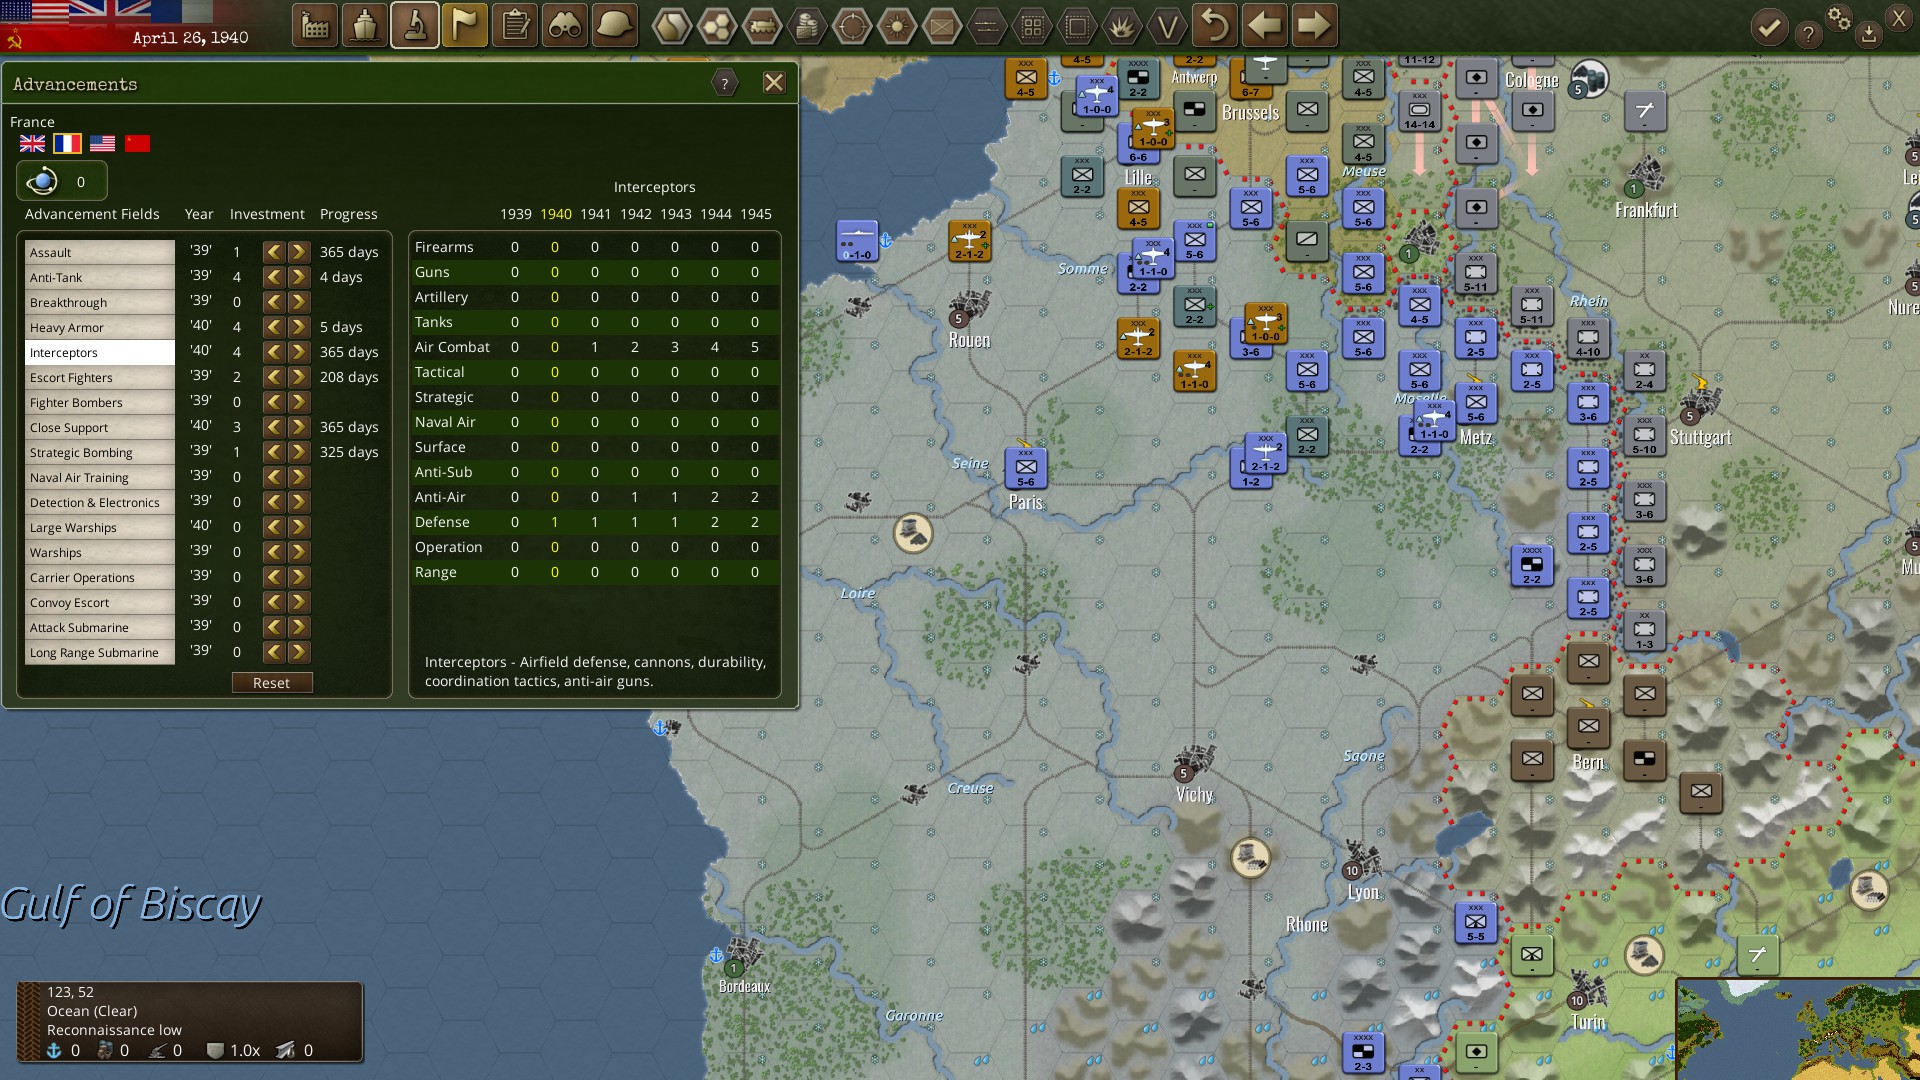
Instead, there are two different ways that you can change the composition of a token of a given type. One is that there is a “unit advancement” that is a choice between specializations (but we don’t call it that in this game), with infantry, for example, having an “assault” advancement that means they have more Firearms value to attack other infantry more effectively, while the “anti-tank” advancement gives them more anti-tank Guns value to fight back against tanks.
The other way to add specialization to units is with the Specialization function, something you gradually gain points to do over the course of the game without any seeming impact from anything else happening. (12% per turn for the UK, for example. Keep in mind, the game is 156 turns long, so you get 9 of these, total for the British for the whole game.) These super-rarities allow you to partially overcome some sort of challenge in the game. For example, the Heavy Artillery specialization gives a unit the ability to ignore one point of entrenchment, while the Engineers specialization allows you to halve the penalty for attacking across rivers (which halves your combat power). If you can’t think of anything better to do with this bonus, the Elite specialization just gives you +10% effectiveness.
All told, I find that specializations in particular reminds me of the attachments of Unity of Command, and this is one place where Unity of Command is the better game. Unity of Command also had very vague and generic unit types, such as just plain infantry, or a general panzer unit, but you could move attachments around to add things like extra AA guns to a specific infantry unit or a heavy tank company to an infantry or armor unit to give it a little more offensive power when trying to punch through the line. It isn’t that different from Specializations in this game, but they weren’t absurdly stingy with the attachments in Unity of Command, you could trade attachments between units as the situation changed, and they weren’t as extremely narrow in their uses. (An NKVD attachment to Soviet infantry in Unity of Command would reduce the chance of retreat while increasing damage taken, but they are also still an extra HP of infantry and can fight. A specialization in Engineers only takes effect when crossing rivers.)
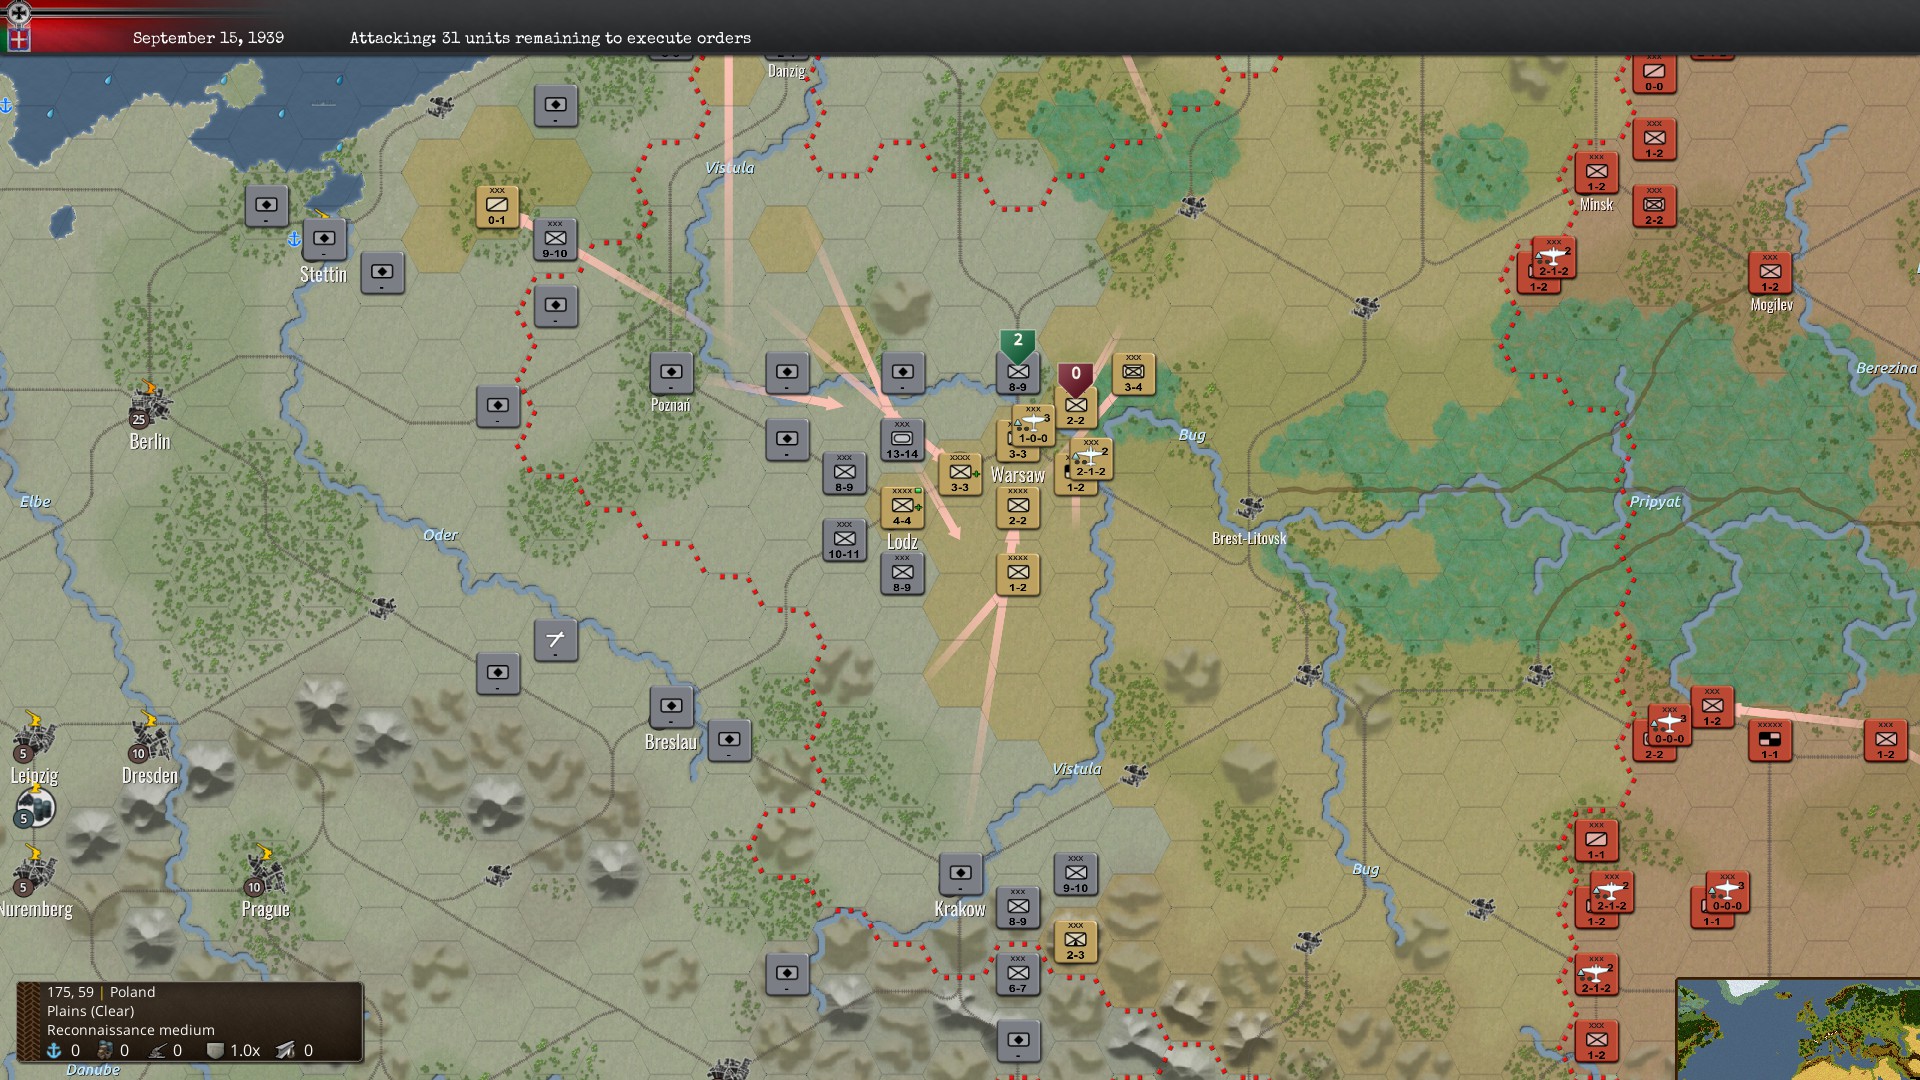
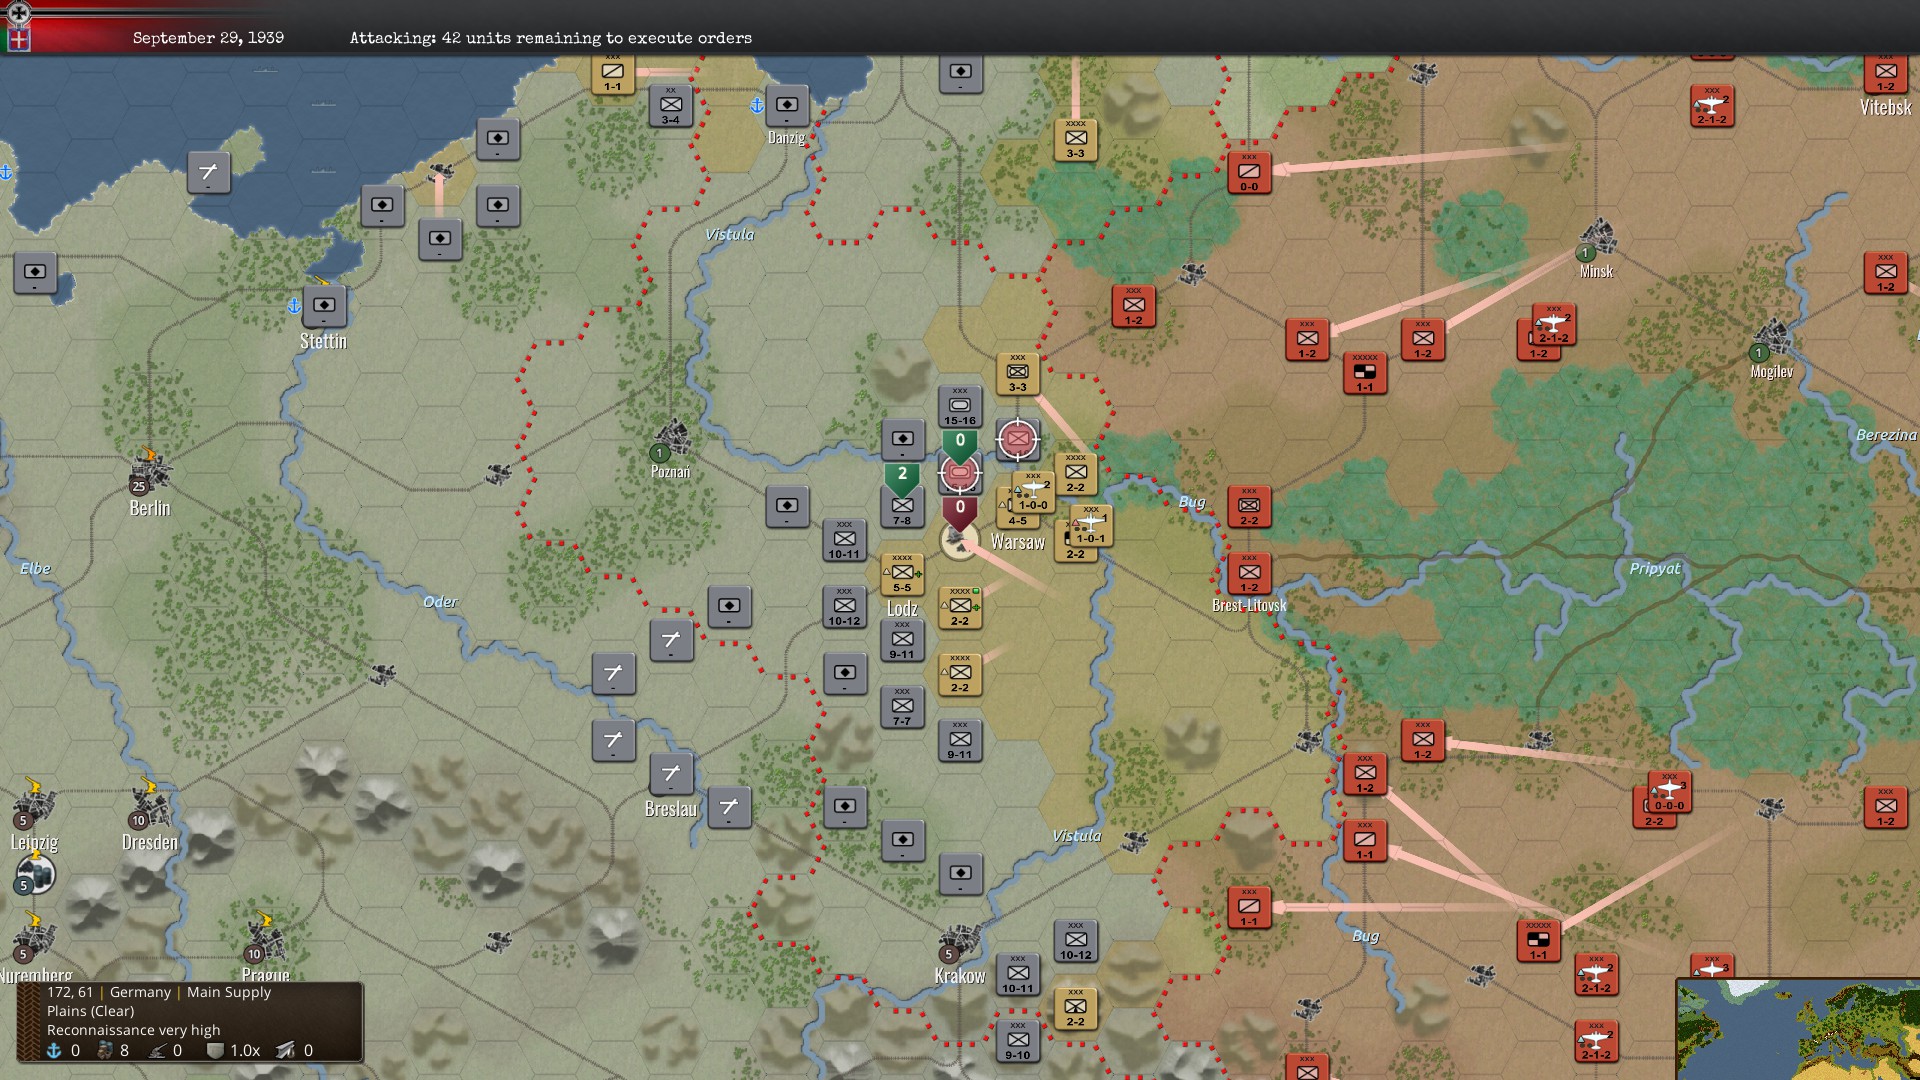
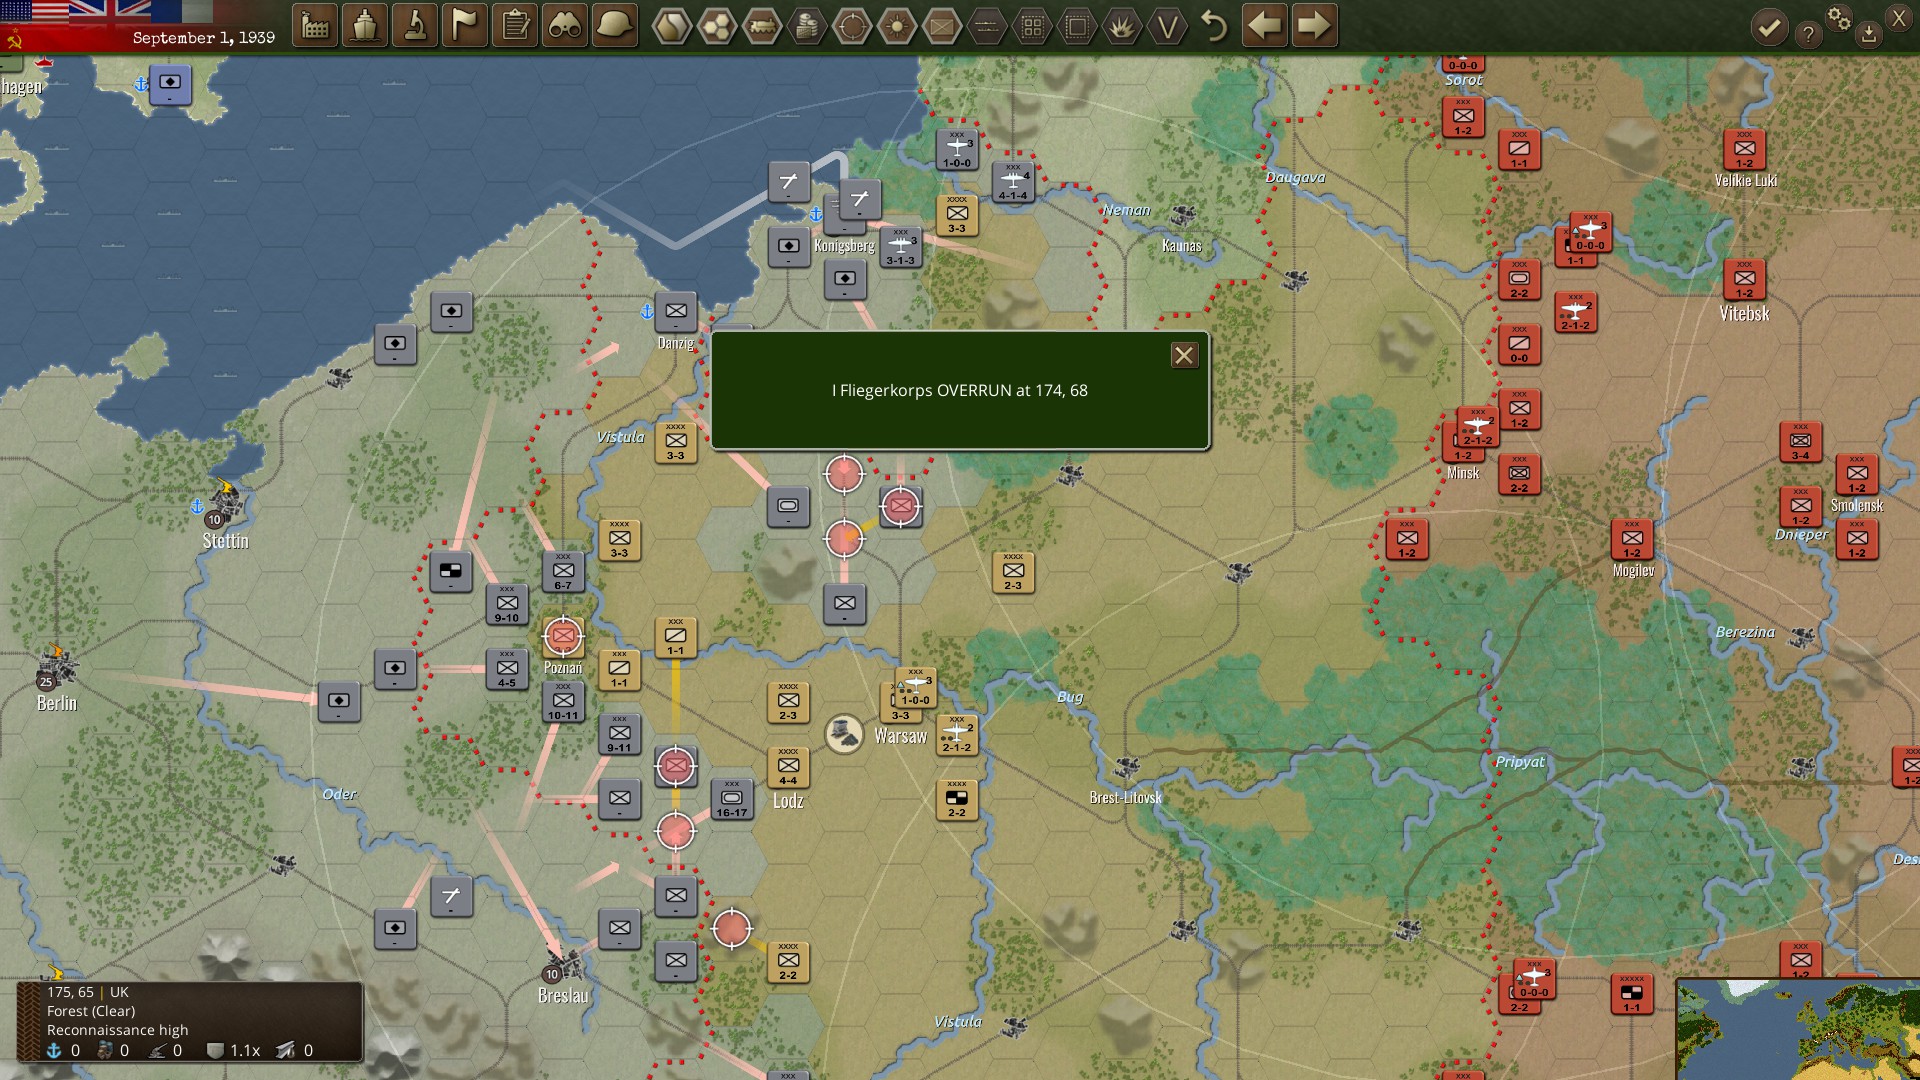
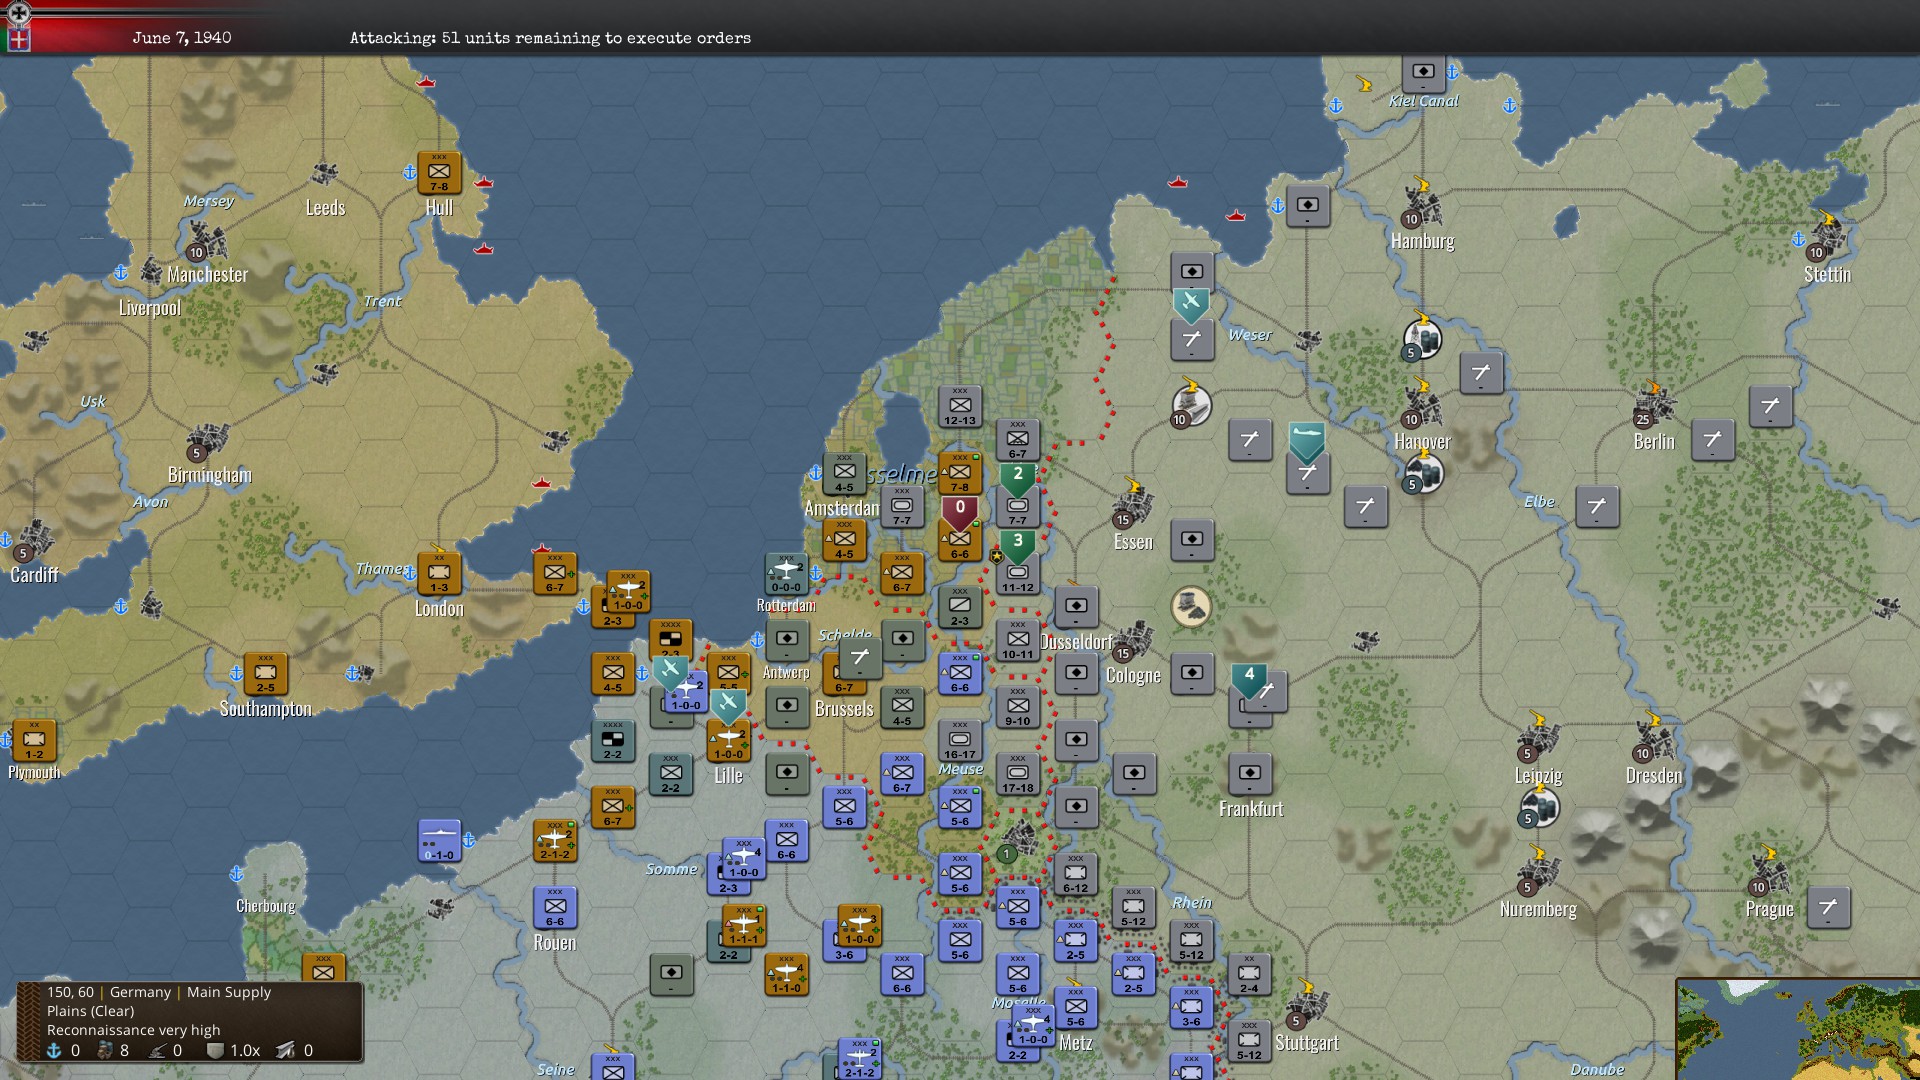
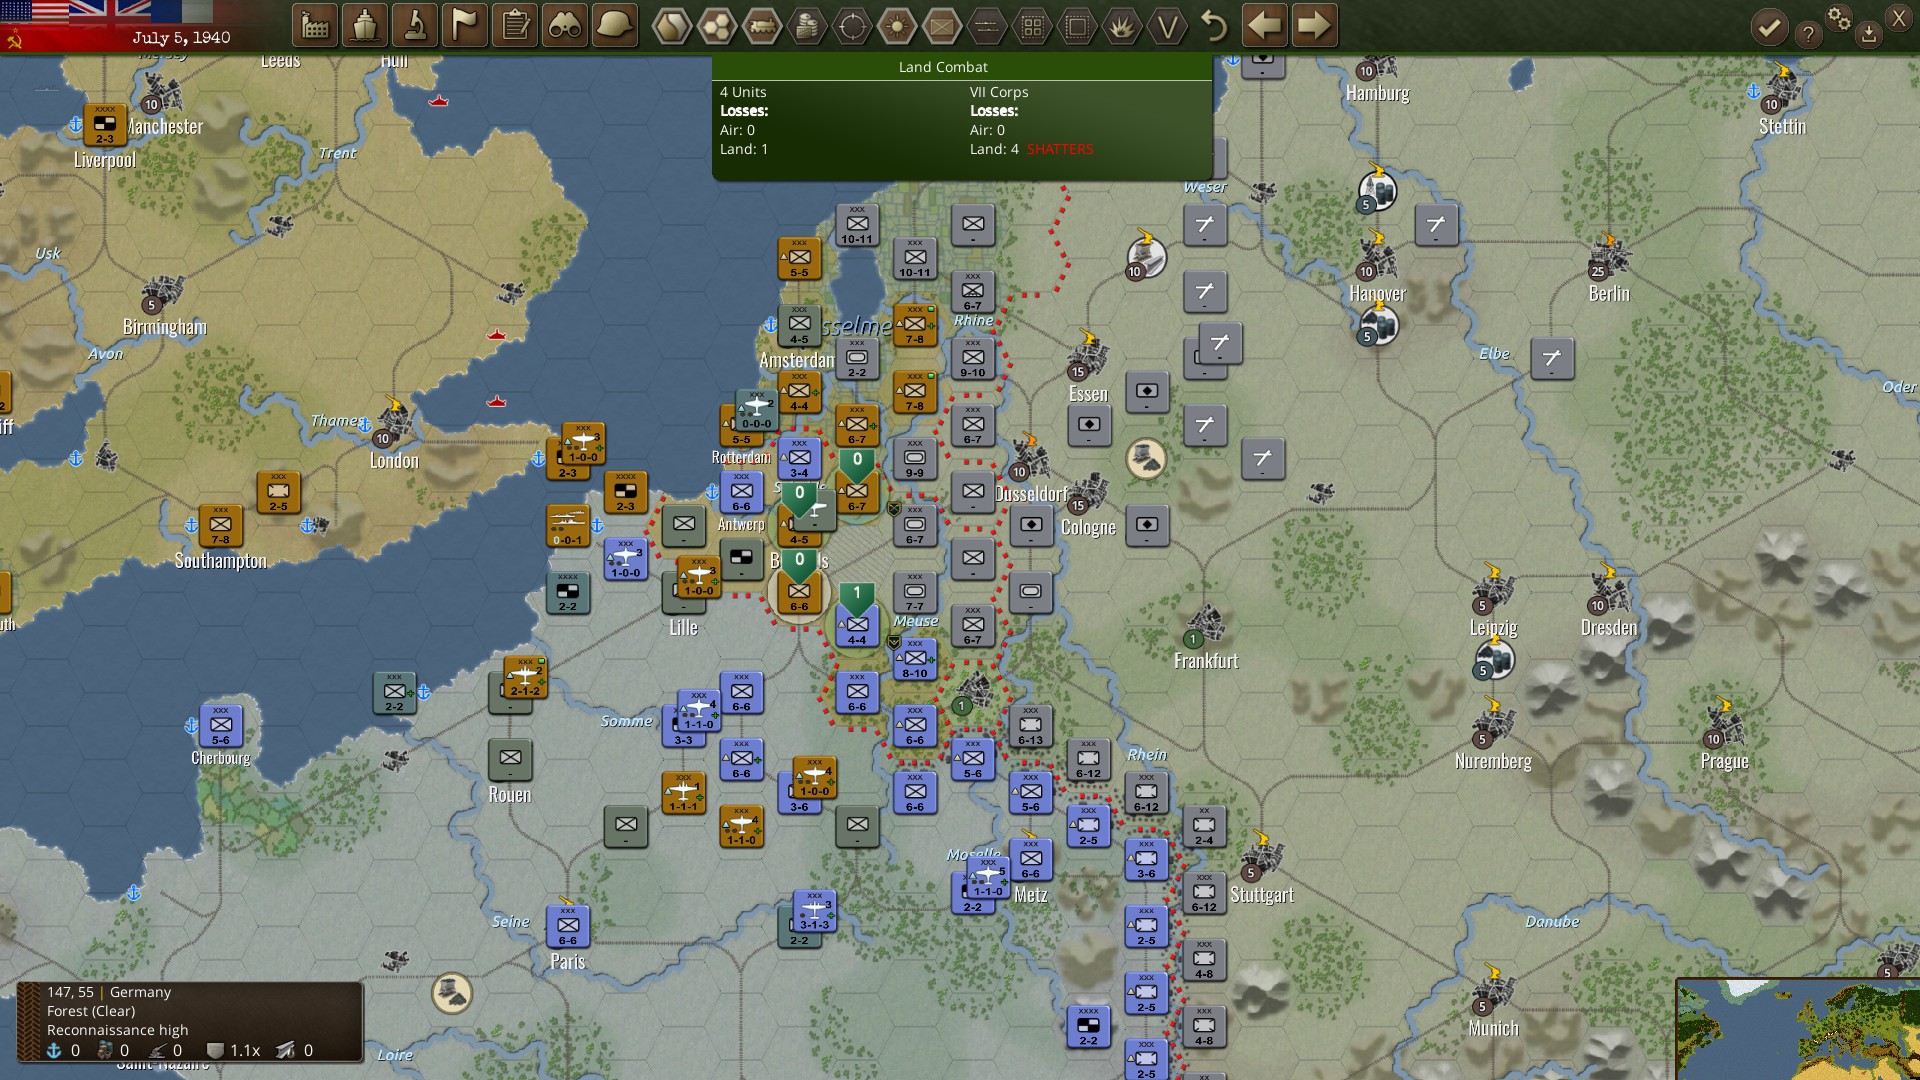
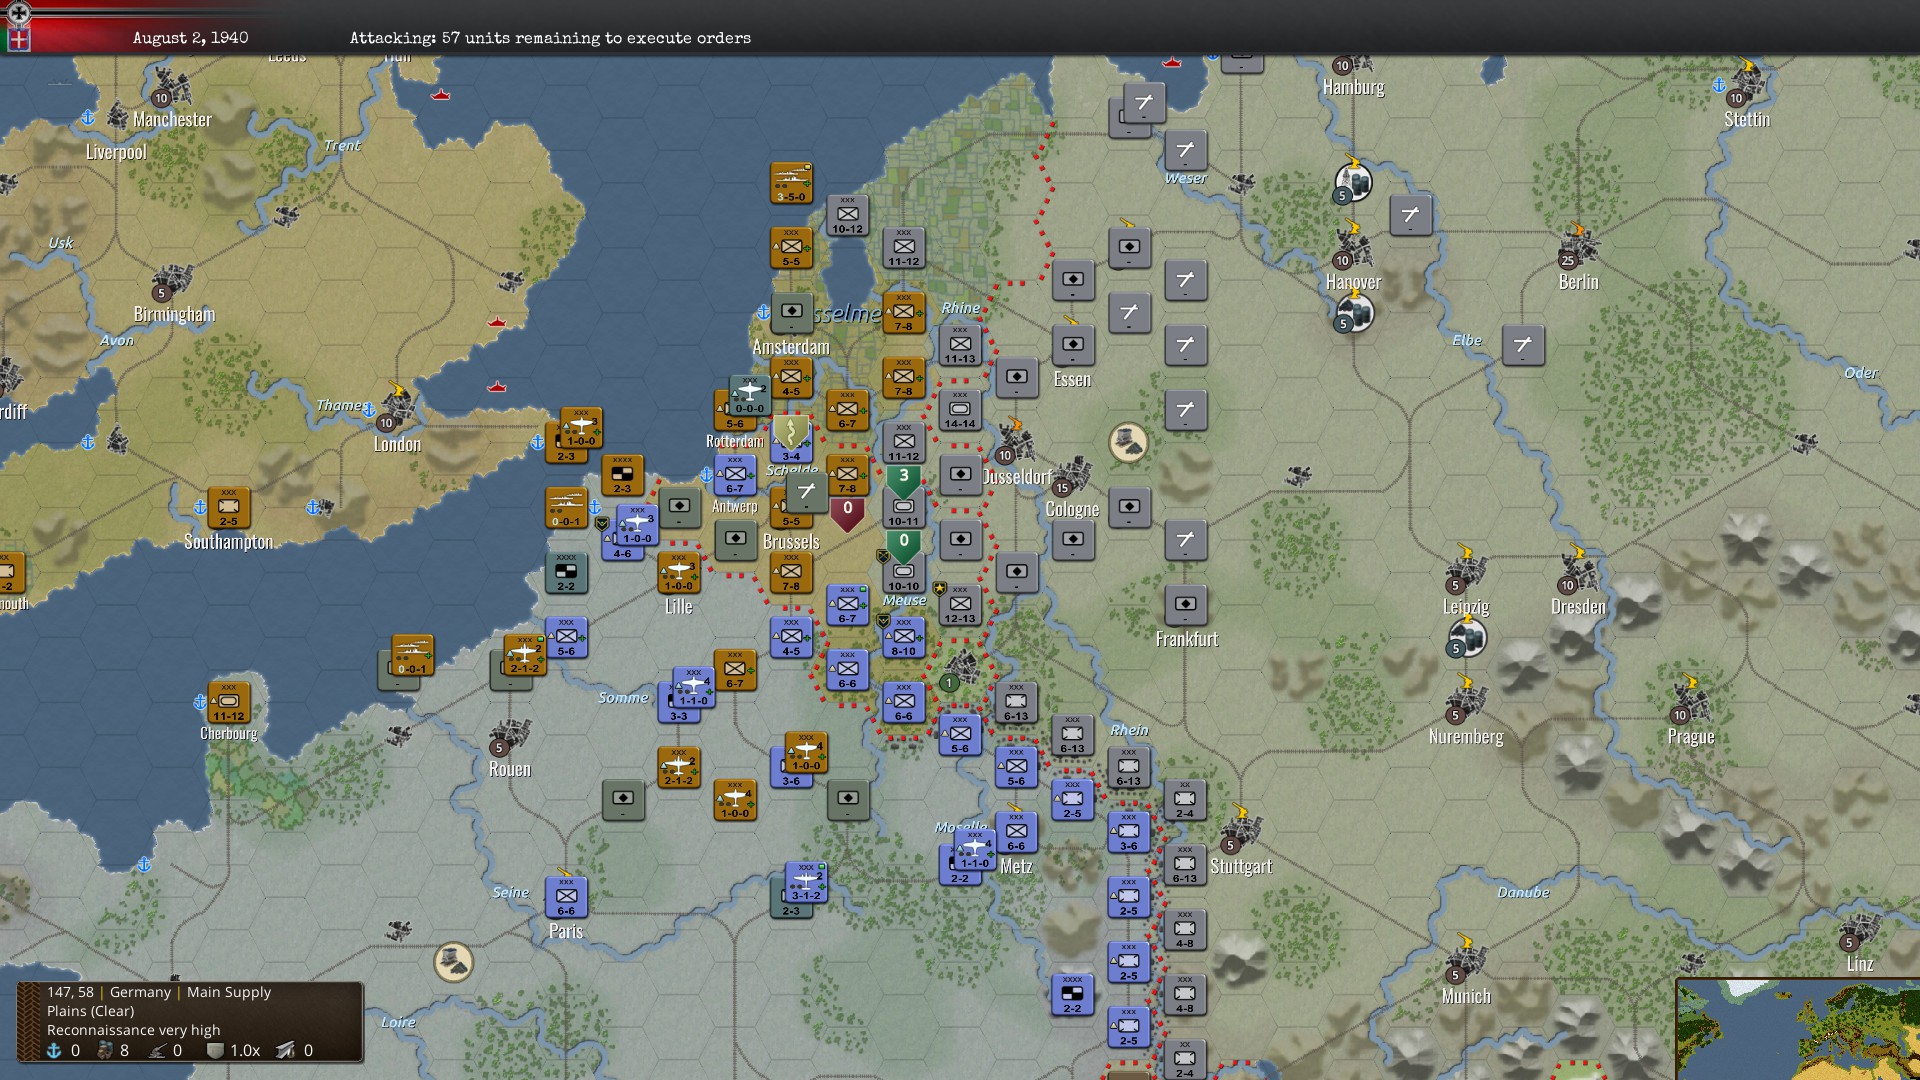
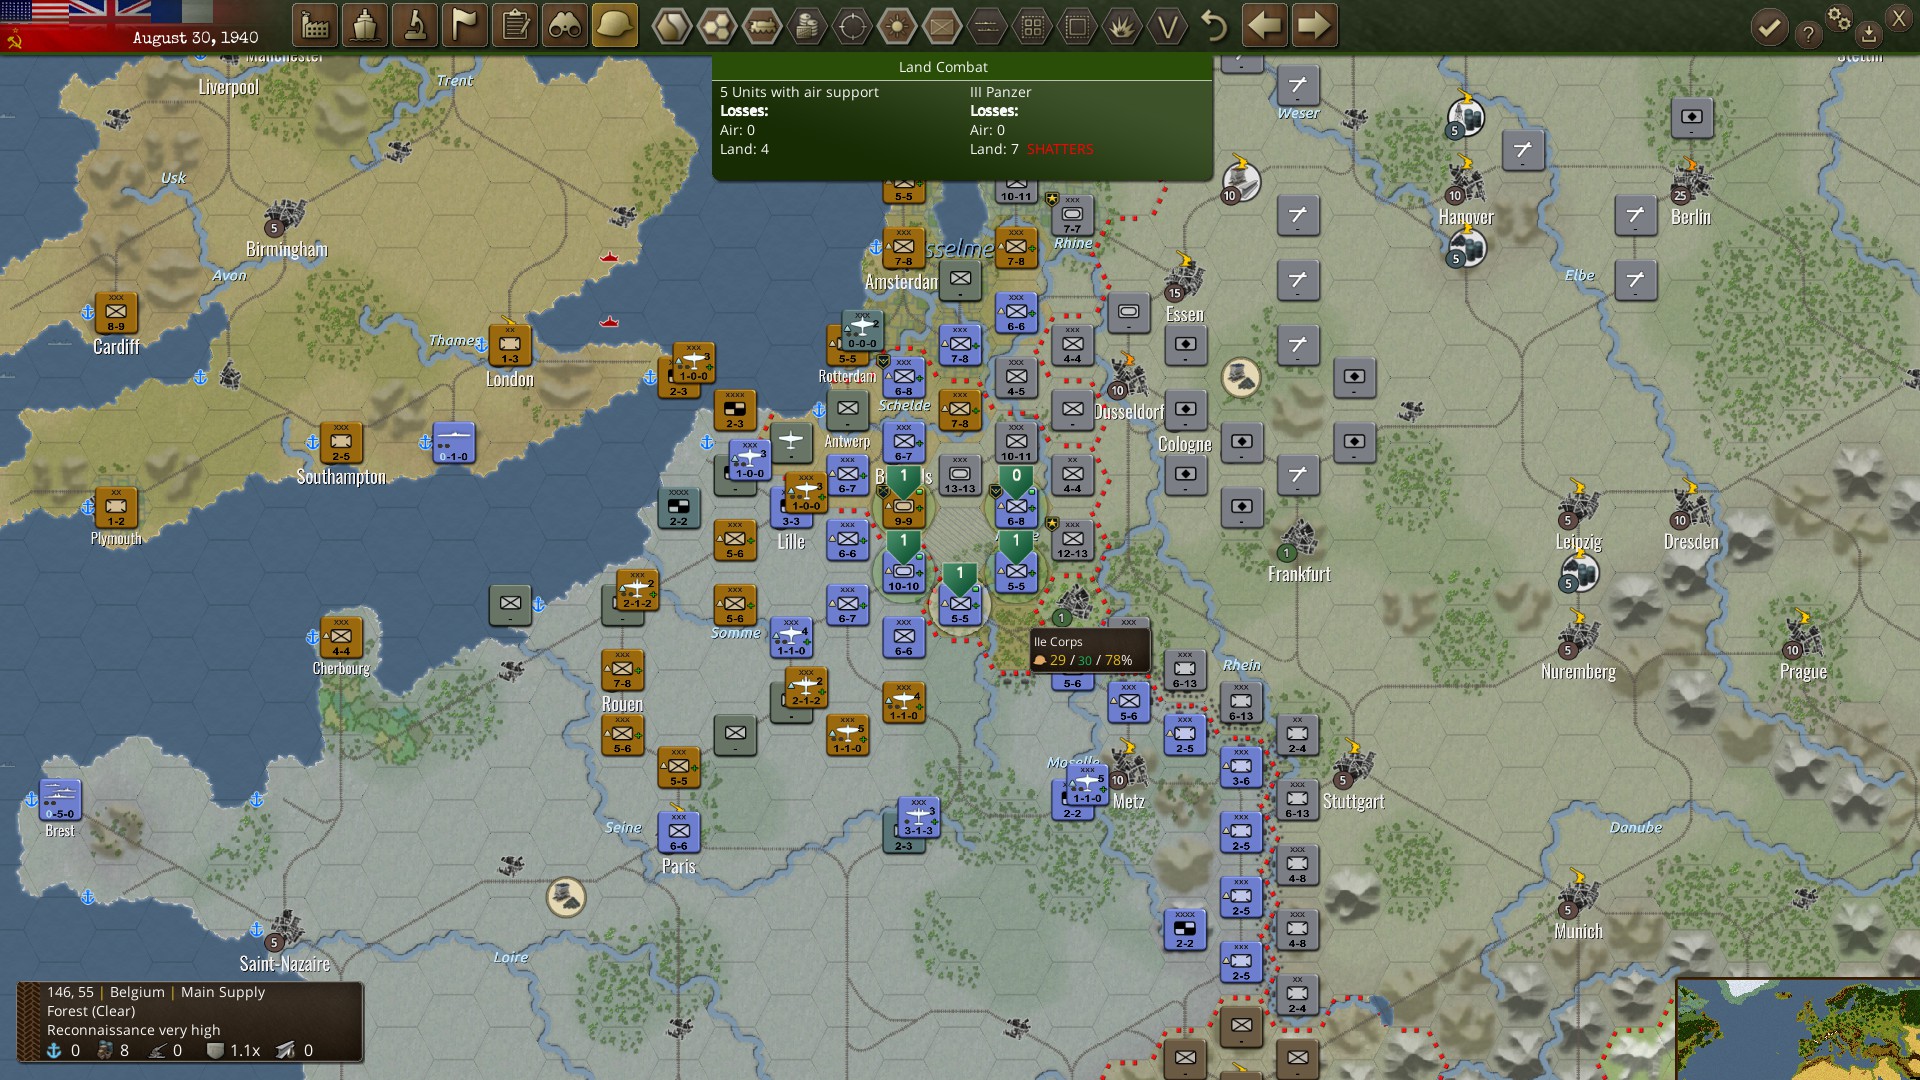
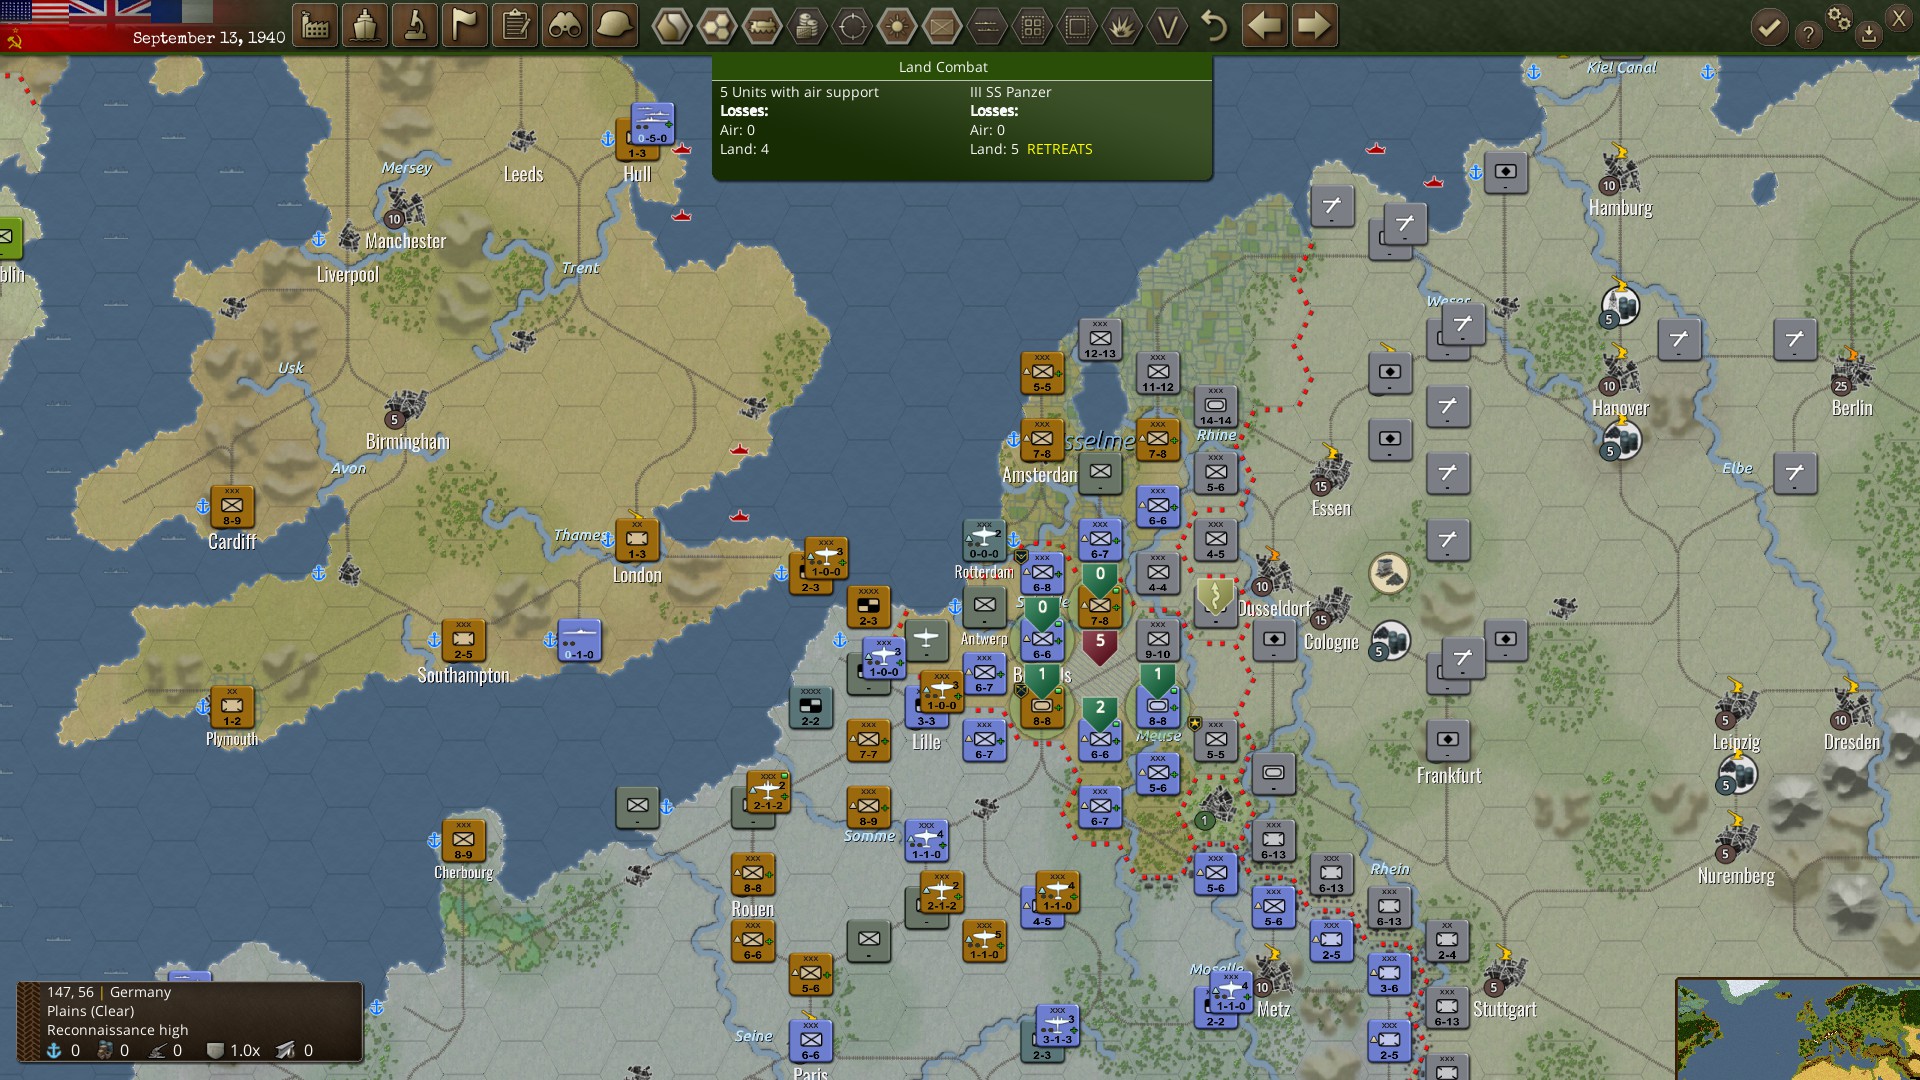
One other problem I have is that the game is fairly random, especially if I’m comparing it to Unity of Command, which had a much more puzzle game-like setup and low randomness. This is in no small part because of the way that retreating and shattering work, which is especially important in the early game. The game starts with the invasion of Poland, which is a foregone conclusion Poland will lose. However, the rate at which you lose seems to have more to do with luck than skill due to the shatter mechanic, where, if an attacker has 7:1 odds or better according to the game, a unit has a random chance to just cease to exist, even if they took no damage while inflicting massive damage to the enemy. There is a bonus an Allied player gets for having Poland last 4 turns in having a Polish air wing join the British side to serve as a reward for holding out in a situation otherwise hopeless, and my first time playing, I only lasted 3 turns. So, I tried reloading, and seeing if I could do something to hold out longer. This time I held out for 6 turns by doing basically nothing different, just because I got lucky with that random disappearing unit shatter chance.
One final thing to note is the existence of HQ units and generals. Generals have statistics like “Combat” that I’m sure is useful for combat somehow, but the game doesn’t explain how. Mobility increases the chance that enemy units will retreat and decreases your own unit’s chances of retreating (2% per stat, so Rommel with 7 inflicts +14% retreat chance on enemies, while -14% retreat chance for his own troops). Tenacity, meanwhile, is the most important stat, at least if it is high, as it drastically reduces the dreaded shatter chance of units. Tenacity of less than 6 has no effect at all, Tenacity 6 has a 10% chance to avoid shattering, Tenacity 7 has a 20% chance to avoid shattering, Tenacity 8 has a sudden jump to 50% chance to avoid shattering, then Tenacity 9 has a 90% chance of avoiding shattering. Generals can supposedly gain stats during the game, but I have yet to see anyone with a stat higher than 7.
The manual also says that generals also have a chance of being killed when in combat, and by the way it is written it seems this means they can be killed when any unit under their command is in combat, not just their HQ unit, but this may just be vagueness in the manual.
Naval Warfare
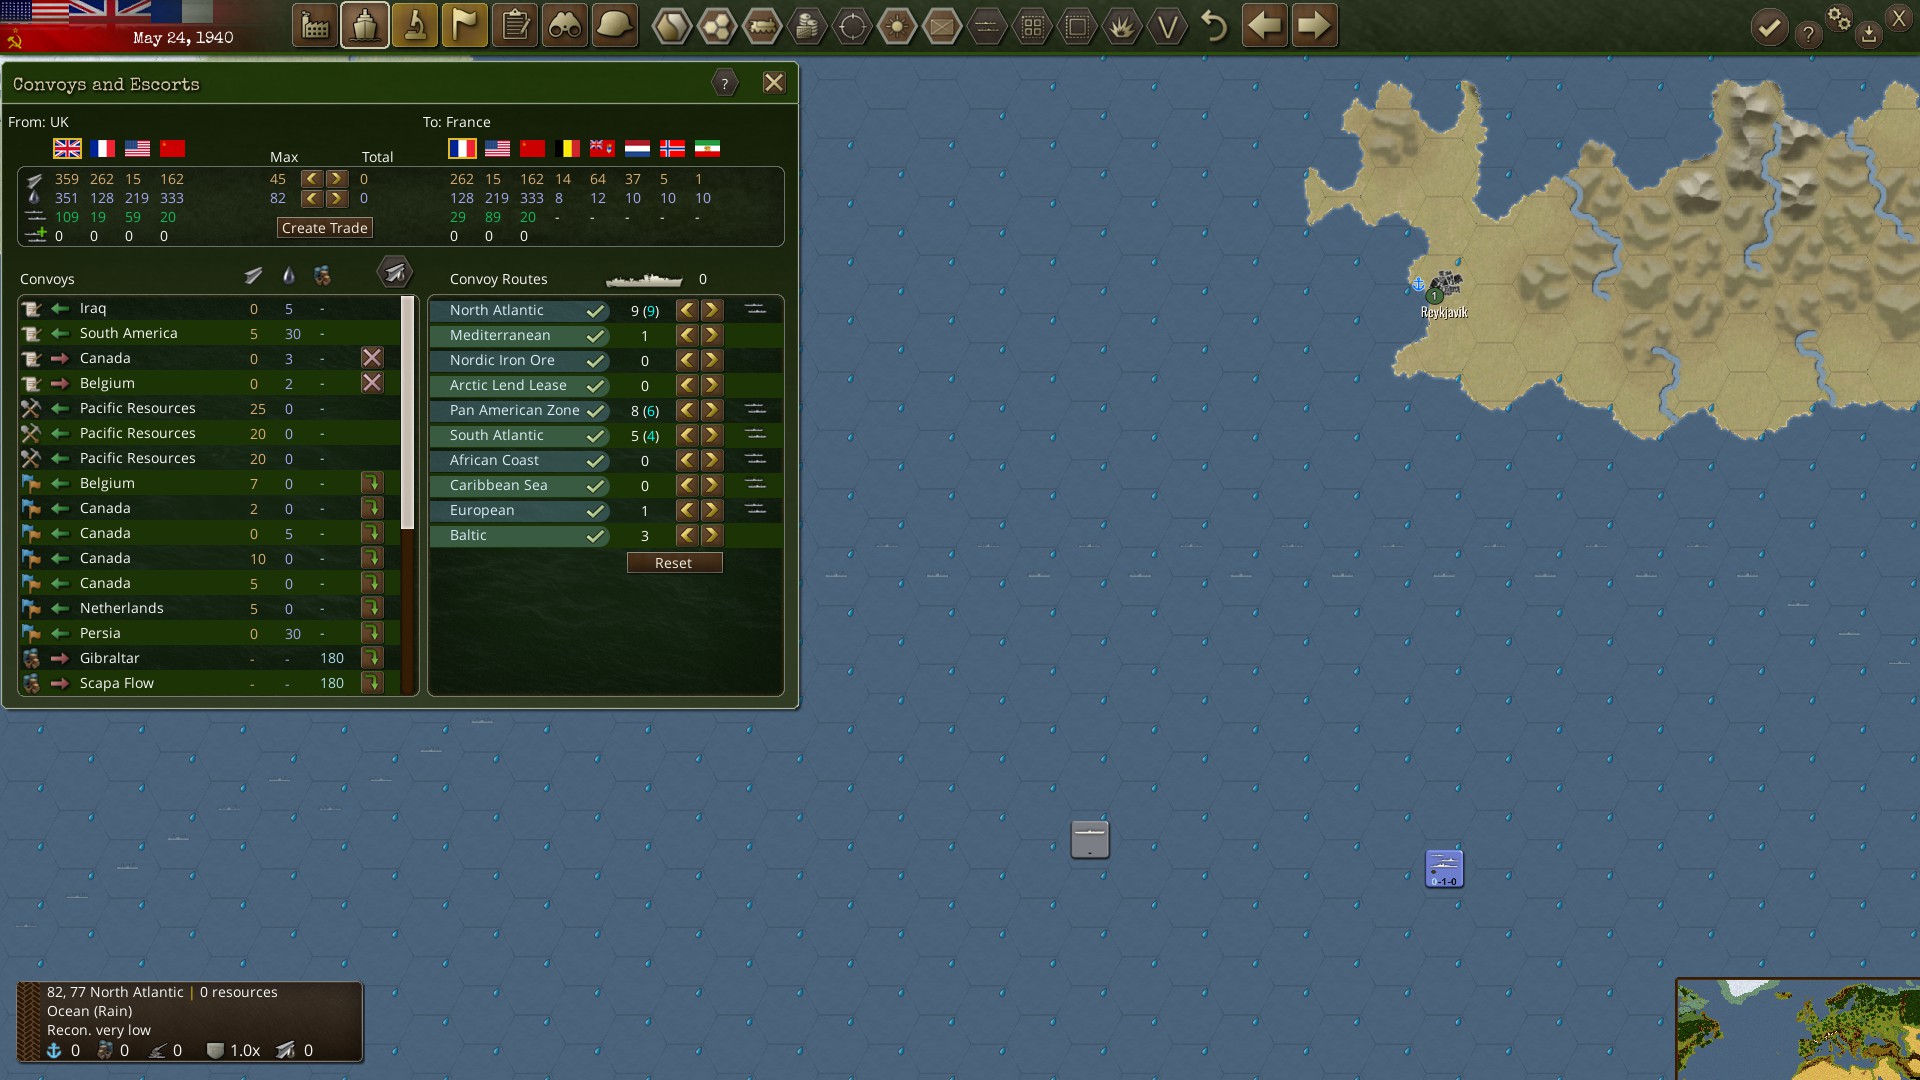
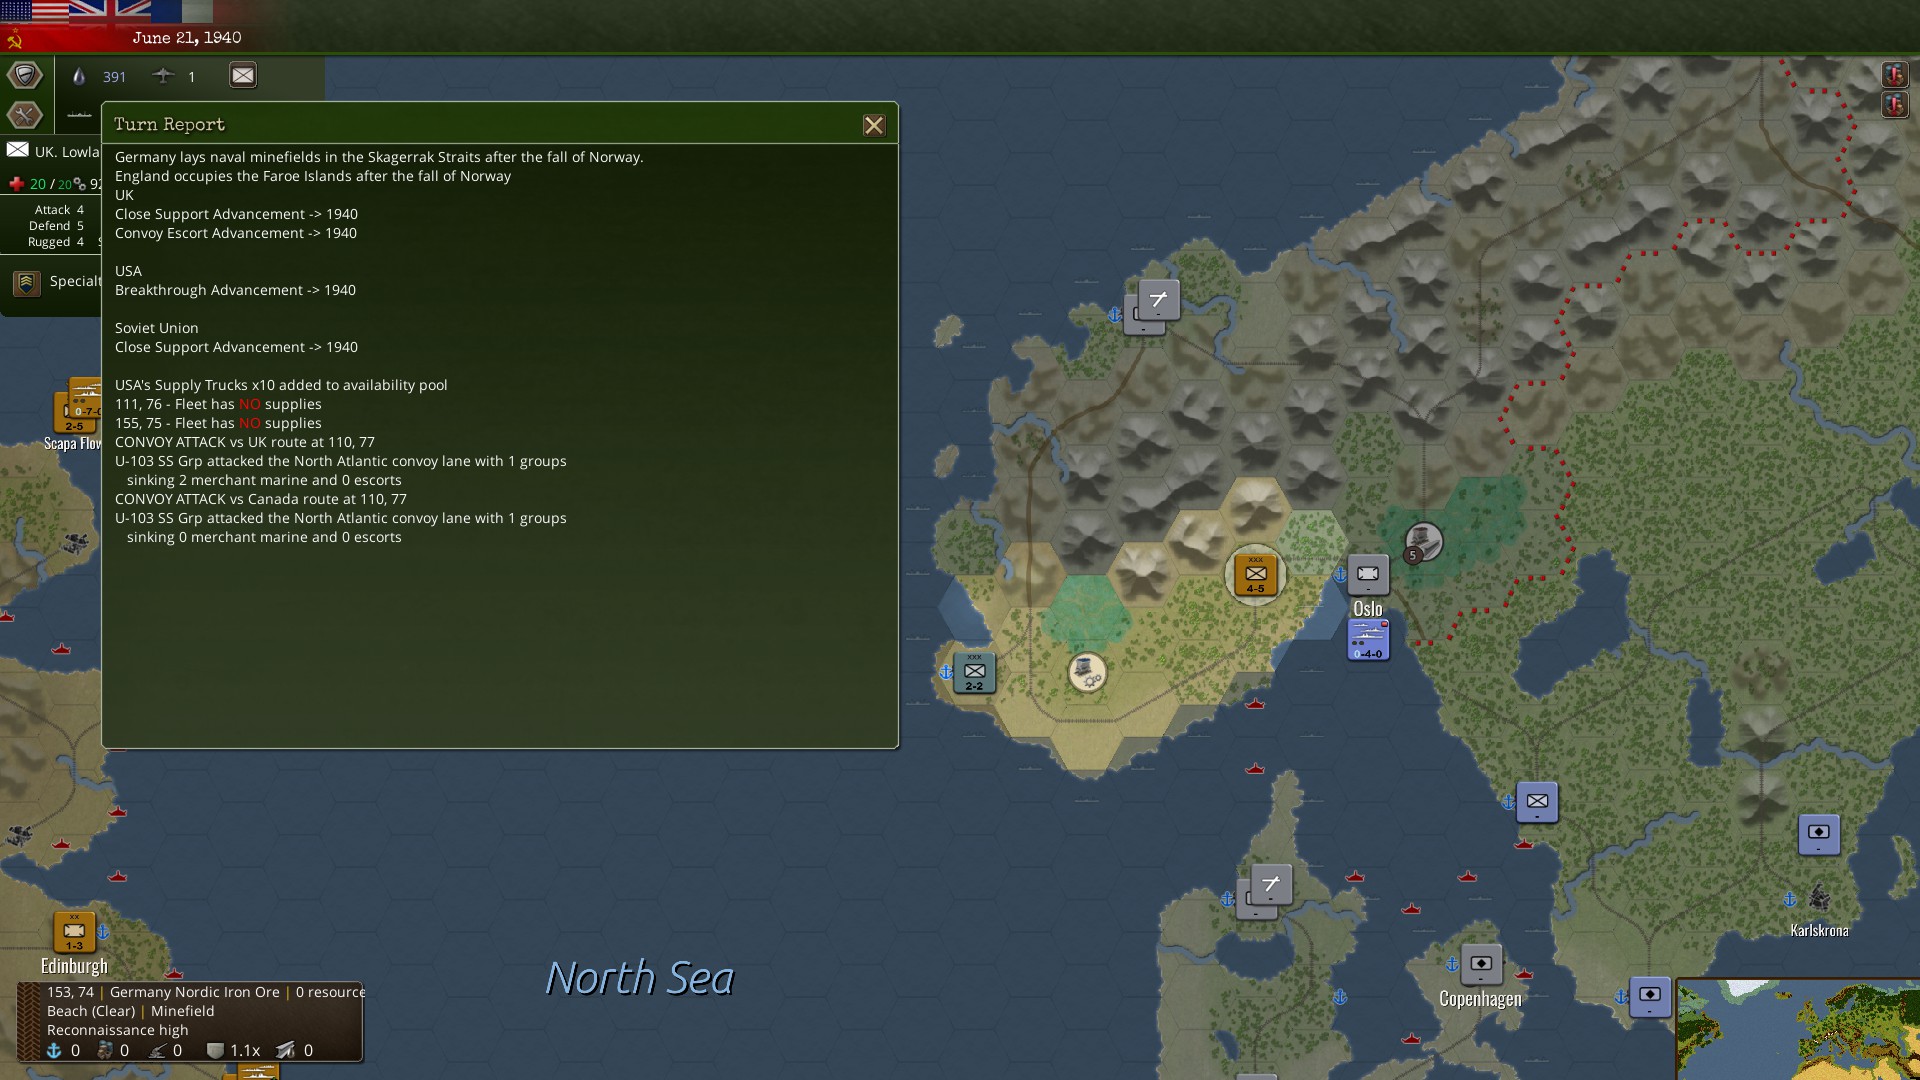
Naval combat is very different from land-based combat. Because the time scale on the main campaign has one turn equal 15 days, and naval combat was generally measured in hours, naval units (and to an extent, air units), are treated very differently. Naval units have 2 operation points, but can move 24 tiles with one of them and still have an operation point left to react, or move 48 tiles in one turn. (That’s enough to go from, say, Bremerhaven in northern Germany all the way north around Scotland, and then through the GIUK-gap and into the open North Atlantic before anyone can stop them.) Naval units that have an operation point in reserve, however, can interdict nearby fleets that try to go past them if they are at sea in the area.
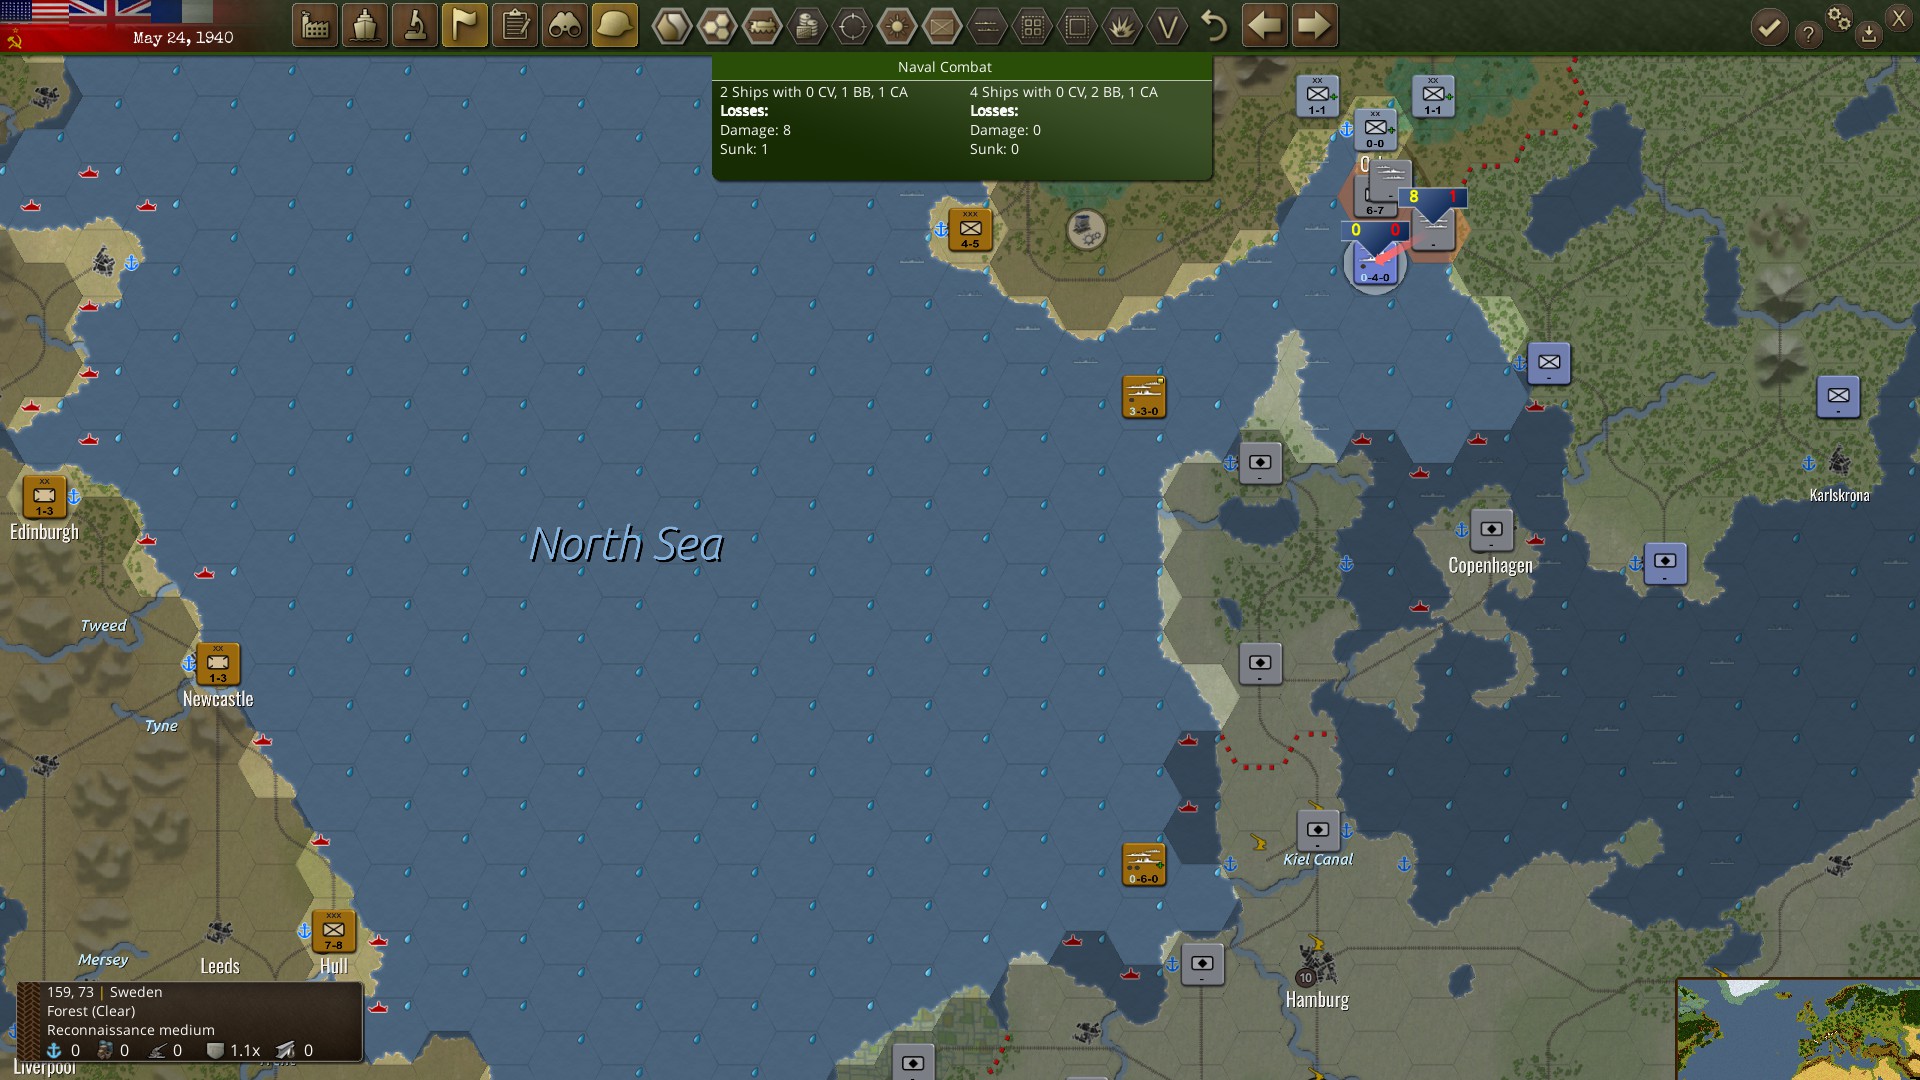
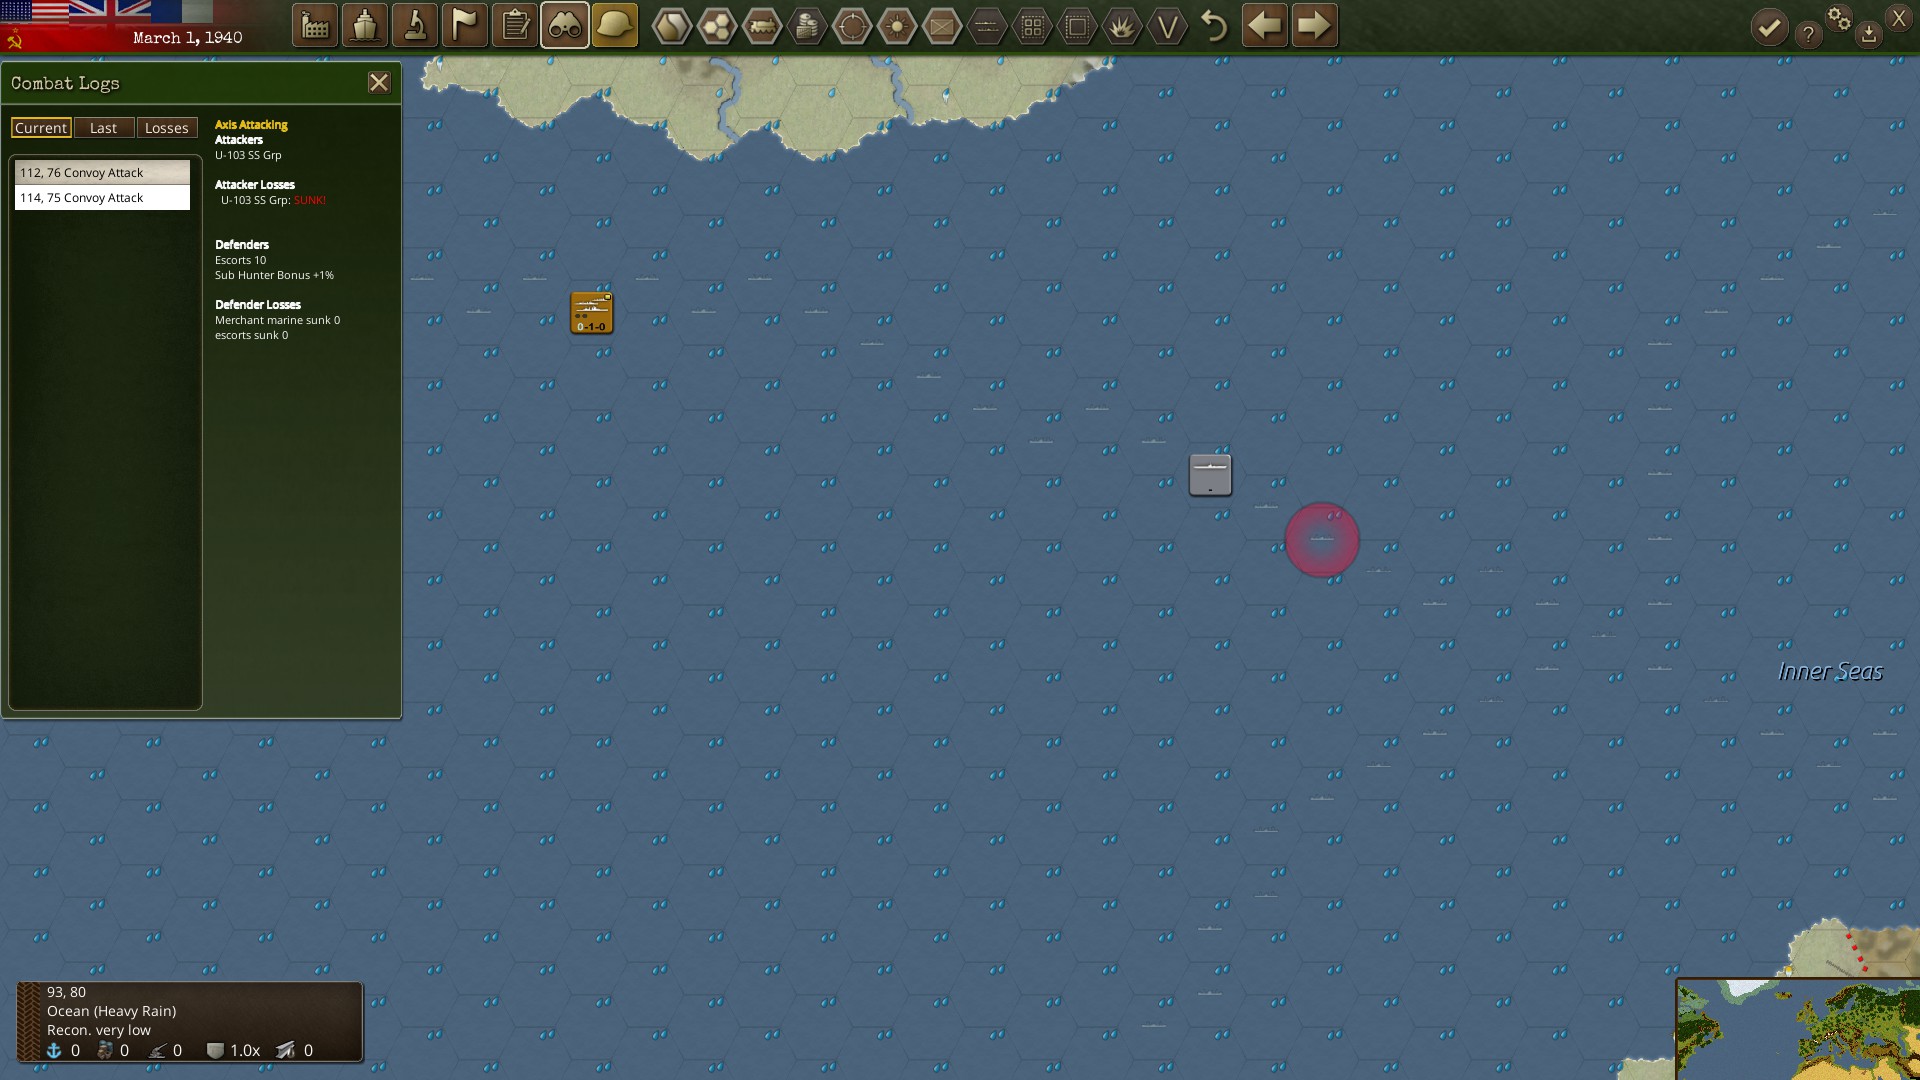
Convoys are even more abstracted, however. Submarines are basically invincible unless they are stupid enough to go into a coastal tile on an enemy’s turn or you are attacking them at port (ironically when they should be at their safest), but can be damaged by putting escorts onto convoys. Submarines attack convoys automatically between turns by just being along the line of sea hexes marked with a transport icon, while convoy escorts fight back automatically between turns just by being assigned to the convoy.
Other naval units can be put on the transport lanes to also provide defense against submarines, but they merely need to be parked somewhere near the transport token line.
The whole system is very hands-off and abstracted to a point where, while it, I suppose, is somewhat balanced and works, doesn’t feel particularly satisfying to play with, as it nearly all happens without you, and worse, what happens is not reported to you, unless you go digging in reports specifically to see what had happened. The start-of-turn report will tell you that a submarine attacked, and didn’t sink a merchant ship, but it doesn’t tell you that your escorts sank the attacking submarine, which is kind of important information you want to know, so there’s almost no feedback as to whether you are doing the right or wrong thing. Especially starting out, when I didn’t know what I was doing, this made me feel quite lost. I was apparently playing the game the right way and was absolutely beasting the Battle of Britain’s early stages by sinking nearly all the U-boats, but the game wasn’t telling me it had happened, and I kept getting reports that said I was losing merchant marine in spite of doing everything the game allowed me to do, so I thought I was somehow doing things wrong when I was doing everything right.
Another major issue with ships is that every ship besides submarines has enough fuel to last 3 turns out of port (45 days), so you tend to dash out and back into port. Ships besides submarines consume monstrous amounts of fuel, and consume it as long as they are not in port. Your oil production is a massive limiting factor on the availability of your navy.
Ships can also be placed outside enemy ports to prevent them from being able to receive supplies and send them to enemy units. This is another random roll done between turns, although at least reports actually tell you whether this one is effective or not. Blockading a port is a good way to starve a garrison, especially if they are cut off by land.
Finally, ships can be interdicted by land-based aircraft just like they can be interdicted by other navies, although they can also fail to see something right next to them, especially in poor weather.
Air Warfare
Air units are in a spot between land and naval units in terms of how actively you can use them. Air units can be set to either “mission only” mode where they only act when you specifically tell them to, or “full support” mode, where they will participate in ground assaults within their range or interdict naval units or intercept other air attacks within their range. This means you can actively tell them to bomb things, or (especially for air superiority fighters) just leave them to intercept other units that go within their zone of control on the enemy’s turn. One air superiority unit will also escort bombers when they go on bombing runs, and one enemy air superiority unit can intercept them, which results in several rounds of combat for a single attack.
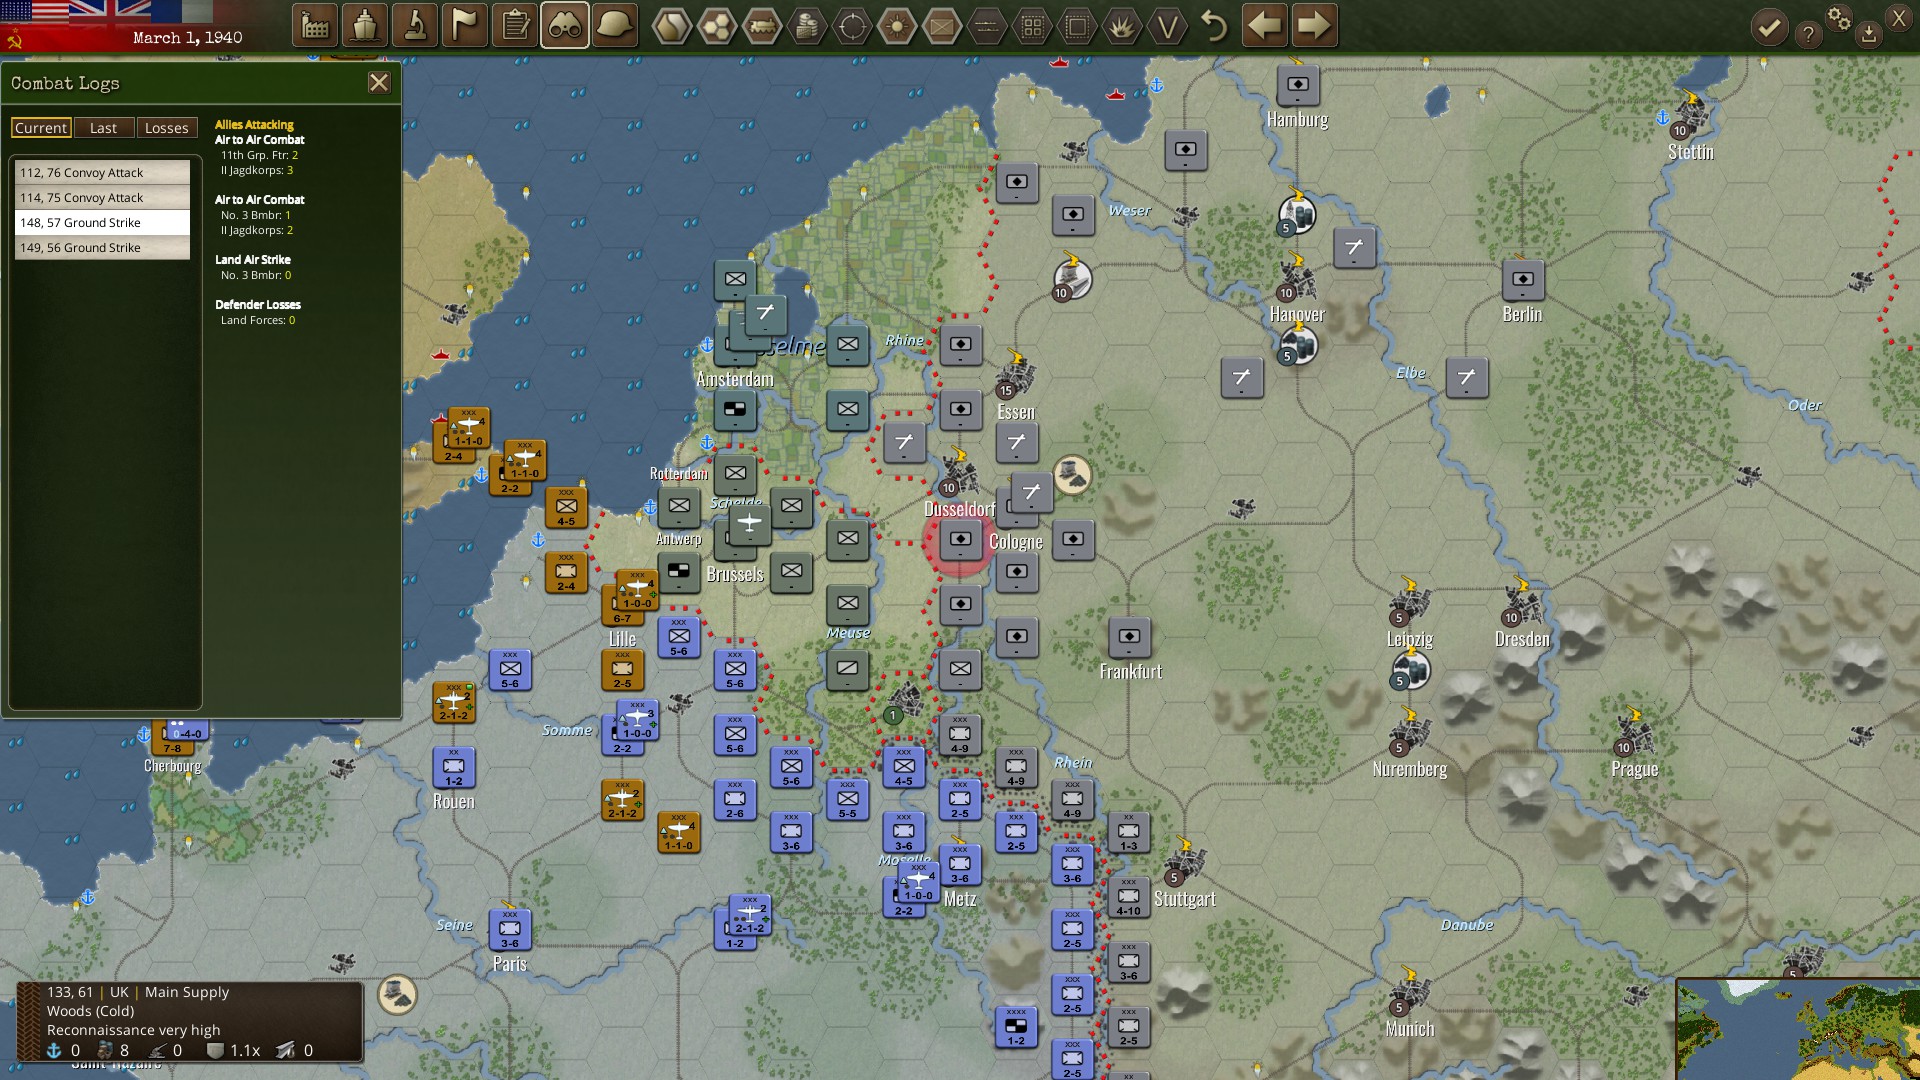
All told, it is hard to find situations where bombers are actually useful attacking specific units besides naval units (especially transports, which take triple the damage that even other naval units take) that are vastly more vulnerable to bombing. I tend to leave bombers to support land offensives, where I suspect their contribution to combat alongside other units helps get shatters more often, although it is hard to tell.
Air units can also be “overrun” if a land unit can march into their hex, which damages them, but sadly allows them to be redeployed the next turn. Damage can be repaired much faster than making a new unit, and you only pay 60% of the cost of a new unit to repair units.
Supply and Logistics
“Amateurs talk about tactics, but professionals study logistics.”
– Gen. Robert H. Barrow, USMC (Commandant of the Marine Corps) noted in 1980
Speaking as an amateur wargamer, one of the aspects I find most sadly lacking in most strategy games such as Panzer General and its descendants, and which I’ve wished had more detail in games like Order of Battle was the mechanics of logistics and supply. The best game series I’d played before this to handle supply and logistics in a way I really appreciated was Unity of Command, a game which stripped war down to simple “infantry” and “armor” units without differentiation and then made you win battles almost solely upon cutting enemies off from their supply lines. This, in effect, created a game laser-focused upon the essence of the blitzkrieg tactics Germany unleashed upon the world, and which the Russians were able to eventually grind to a halt and turn back against the Germans.
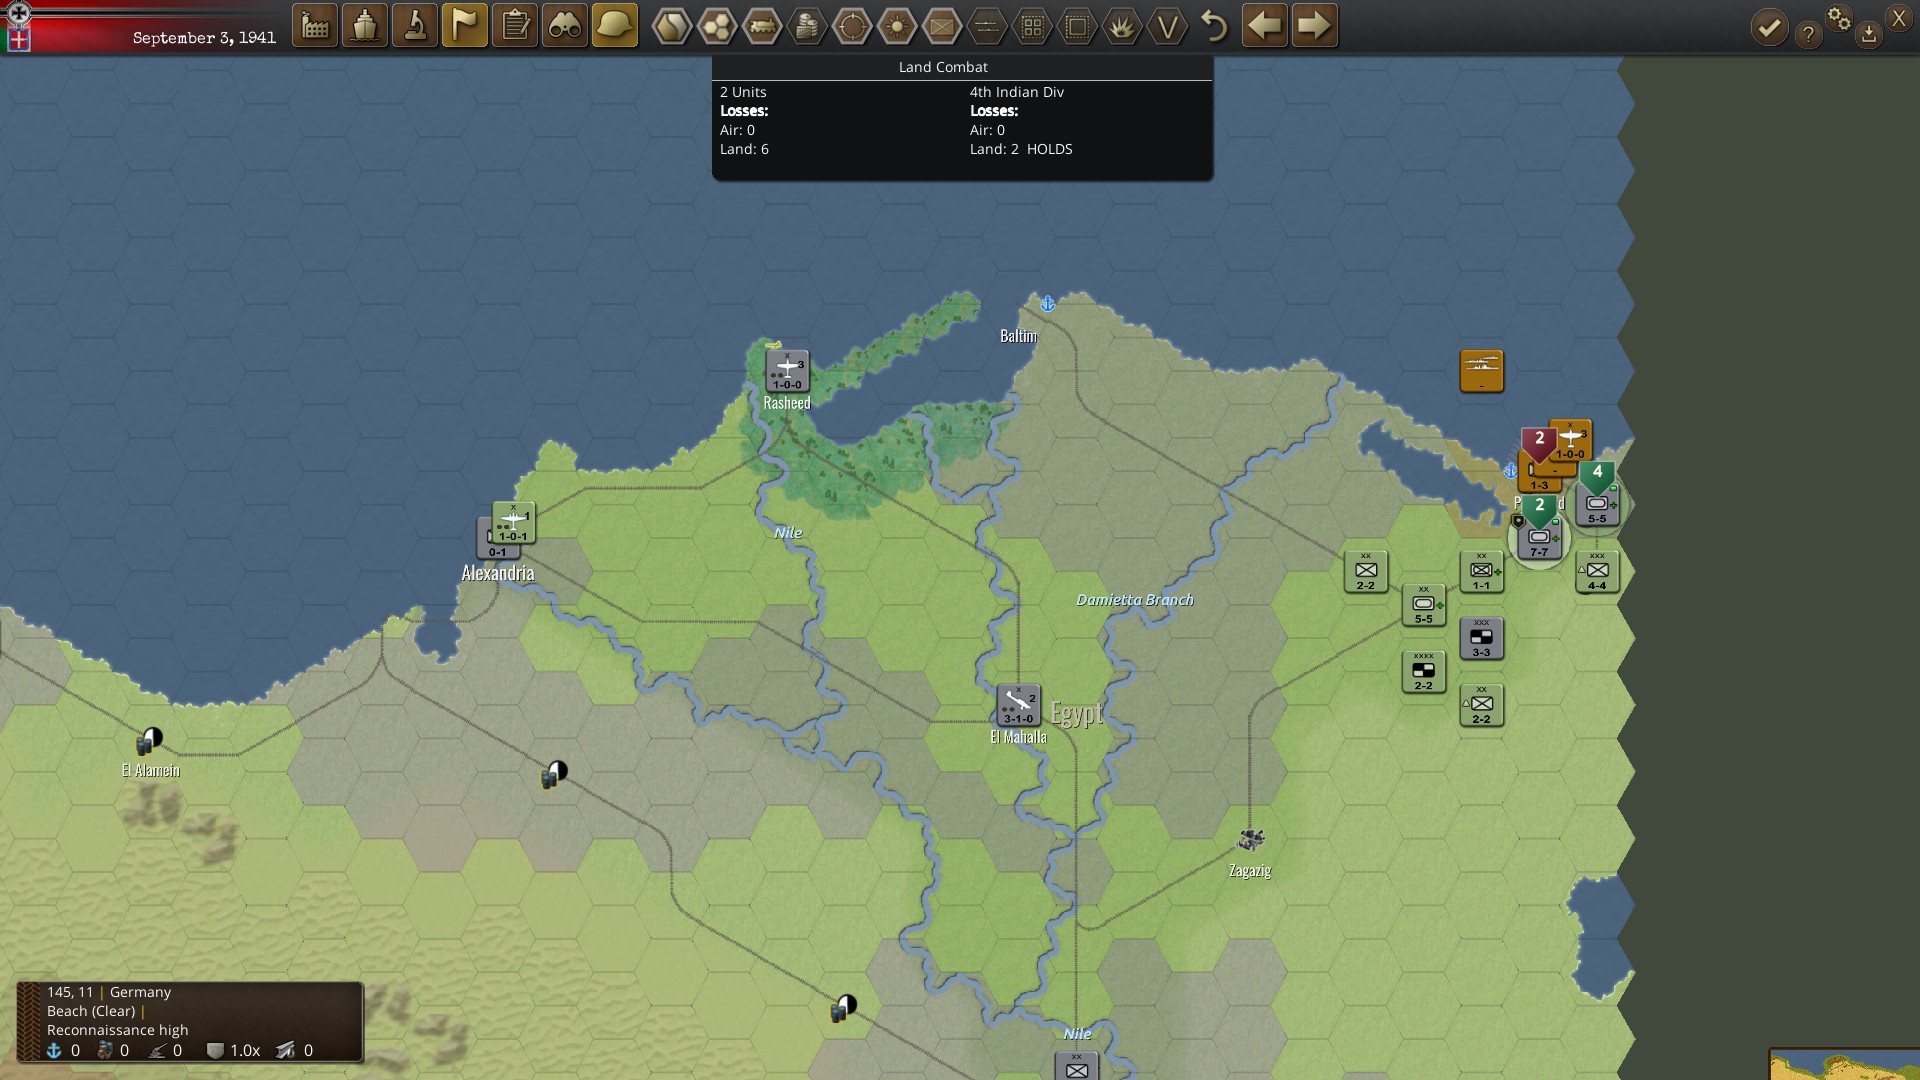
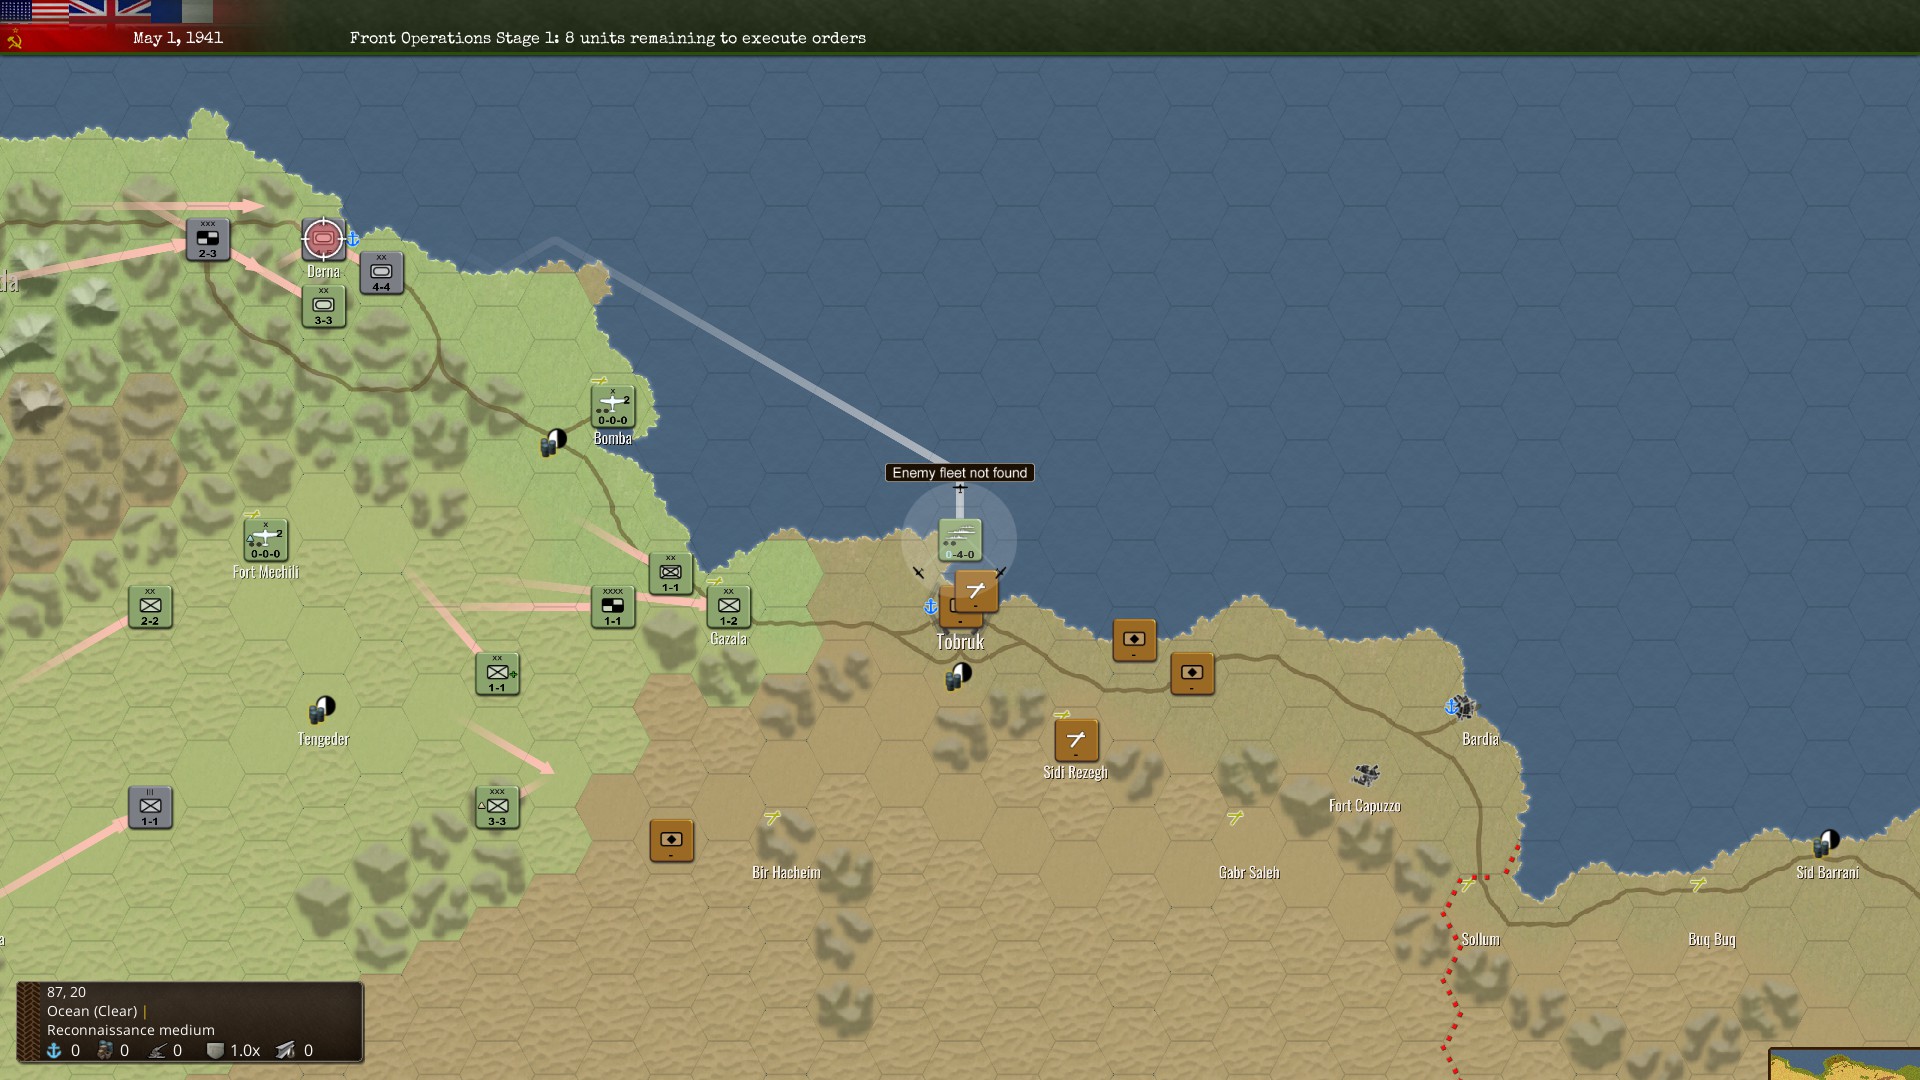
WarPlan uses an evolution upon the system seen in Unity of Command, adding in limits to supply ports that, unlike the limits in Order of Battle, are actually low enough to be meaningful. This means that while you have all the supplies your nation can muster in “Main Supply” (on the mainland), overseas, you need to ship goods through ports that have ratings. Units in this game can have strength (which are the HP or number of soldiers left standing in a unit) at around 20 or 30 for most units, with some units like Soviet armies having 36 max strength. A port can manage up to 20 strength per level, and level only goes up to 9. Additionally, ports have a maximum range, so even if you take every port in North Africa, if everyone is near Egypt, the ports near Morocco won’t help.
However, let’s talk about the most important aspect of supply – cutting the enemy off from it, and how it cripples them. Your units exude an area of control, which tints the map your country’s colors, but also represents where it’s safe for your supply convoys to go (which are all abstracted). This control extends out one hex away from your units, unless you are near enemy units, who keep control of hexes adjacent to them until you set a unit on that hex.
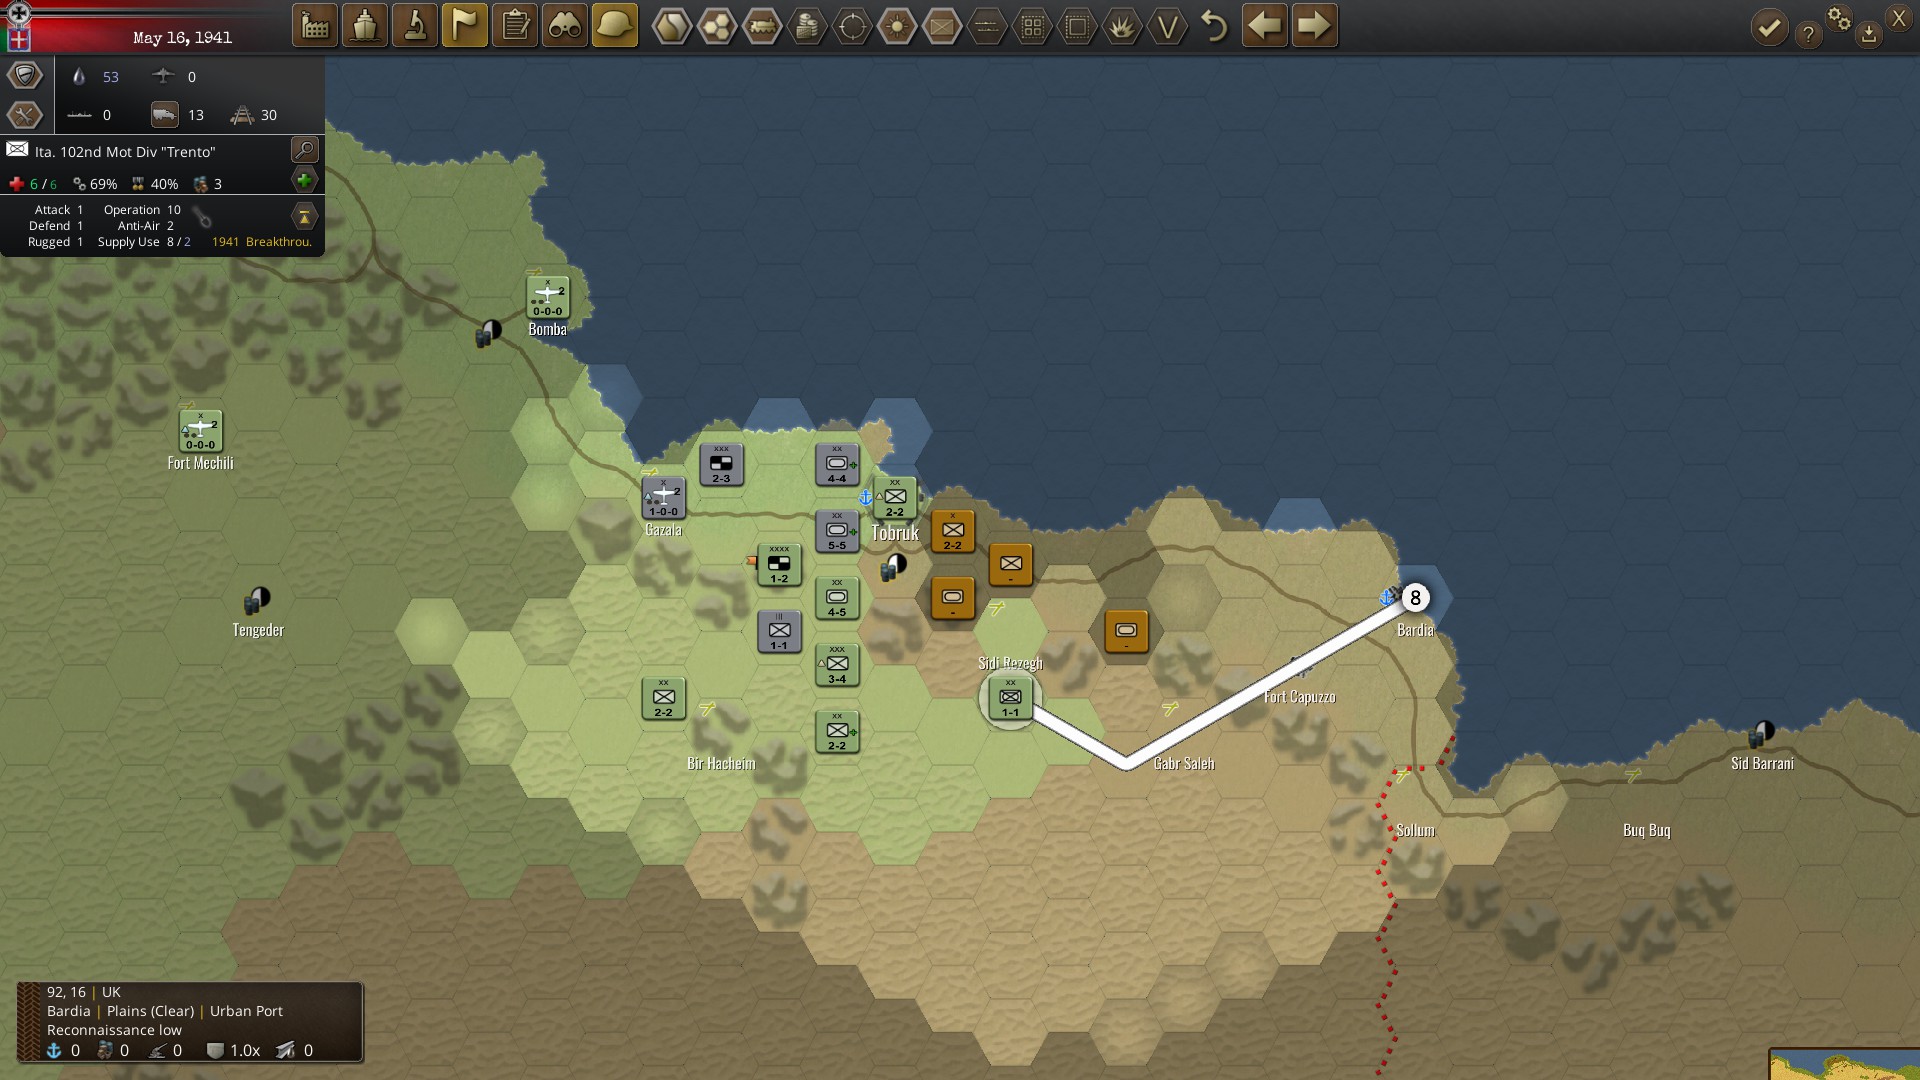
Cutting supply has moderate effects immediately, and severe effects if supply is not immediately re-established. Effectiveness drops constantly in this game for every action taken, and drops just for being in bad weather, as well. Being in supply gradually recovers effectiveness, but being out of supply prevents that, meaning that the multiplier on a unit’s combat power drops significantly for even being one turn out of supply, and they further take a 50% reduction in that unit’s operation points, which are what you spend to move or fight with a unit. Since a unit out of supply presumably wants to move back into supply, that can be a deathspiral situation. When a unit is out of supply for 3 turns, they lose nearly all capacity to move or fight, and lose 20% of their strength to starvation per turn until the whole unit either finds an enemy to surrender to or they all die. Exploiting this mechanic is vital to Allied players trying to defeat the often overwhelmingly powerful German panzer units, as they tend to be a whopping four times as powerful as even the improved Soviet army units thanks to the high German unit experience and low Soviet unit experience. Taking a panzer unit head-on is suicide, but letting it penetrate your lines, then enveloping the unit with your troops and holding out until they starve to a more manageable strength allows even the weakest of Davids to bring the mightiest Golaiths to their knees. (This was also the core of the Blitzkrieg tactics the Germans themselves used – don’t fight the whole army, just punch through a couple key areas, wreck supply lines, and wait the enemy out when they suddenly lose access to food. Even if your units are stronger than theirs, you preserve your own strength fighting smarter, not harder.)
Additionally, WarPlan uses the same method of preventing supply lines from stretching infinitely seen in Unity of Command where supply trucks need to effectively spend their own movement points to reach your units, so a unit that is past terrain too difficult (such as swamps or mountains that cost 3 or more movement points per hex) will quickly find itself out of supply. Worse, bad weather adds to the movement point costs of all terrain, even roads, so a blizzard can suddenly put a unit out of supply that was in supply last turn. (Which I’m sure won’t come up in a Russian Winter situation at all…)
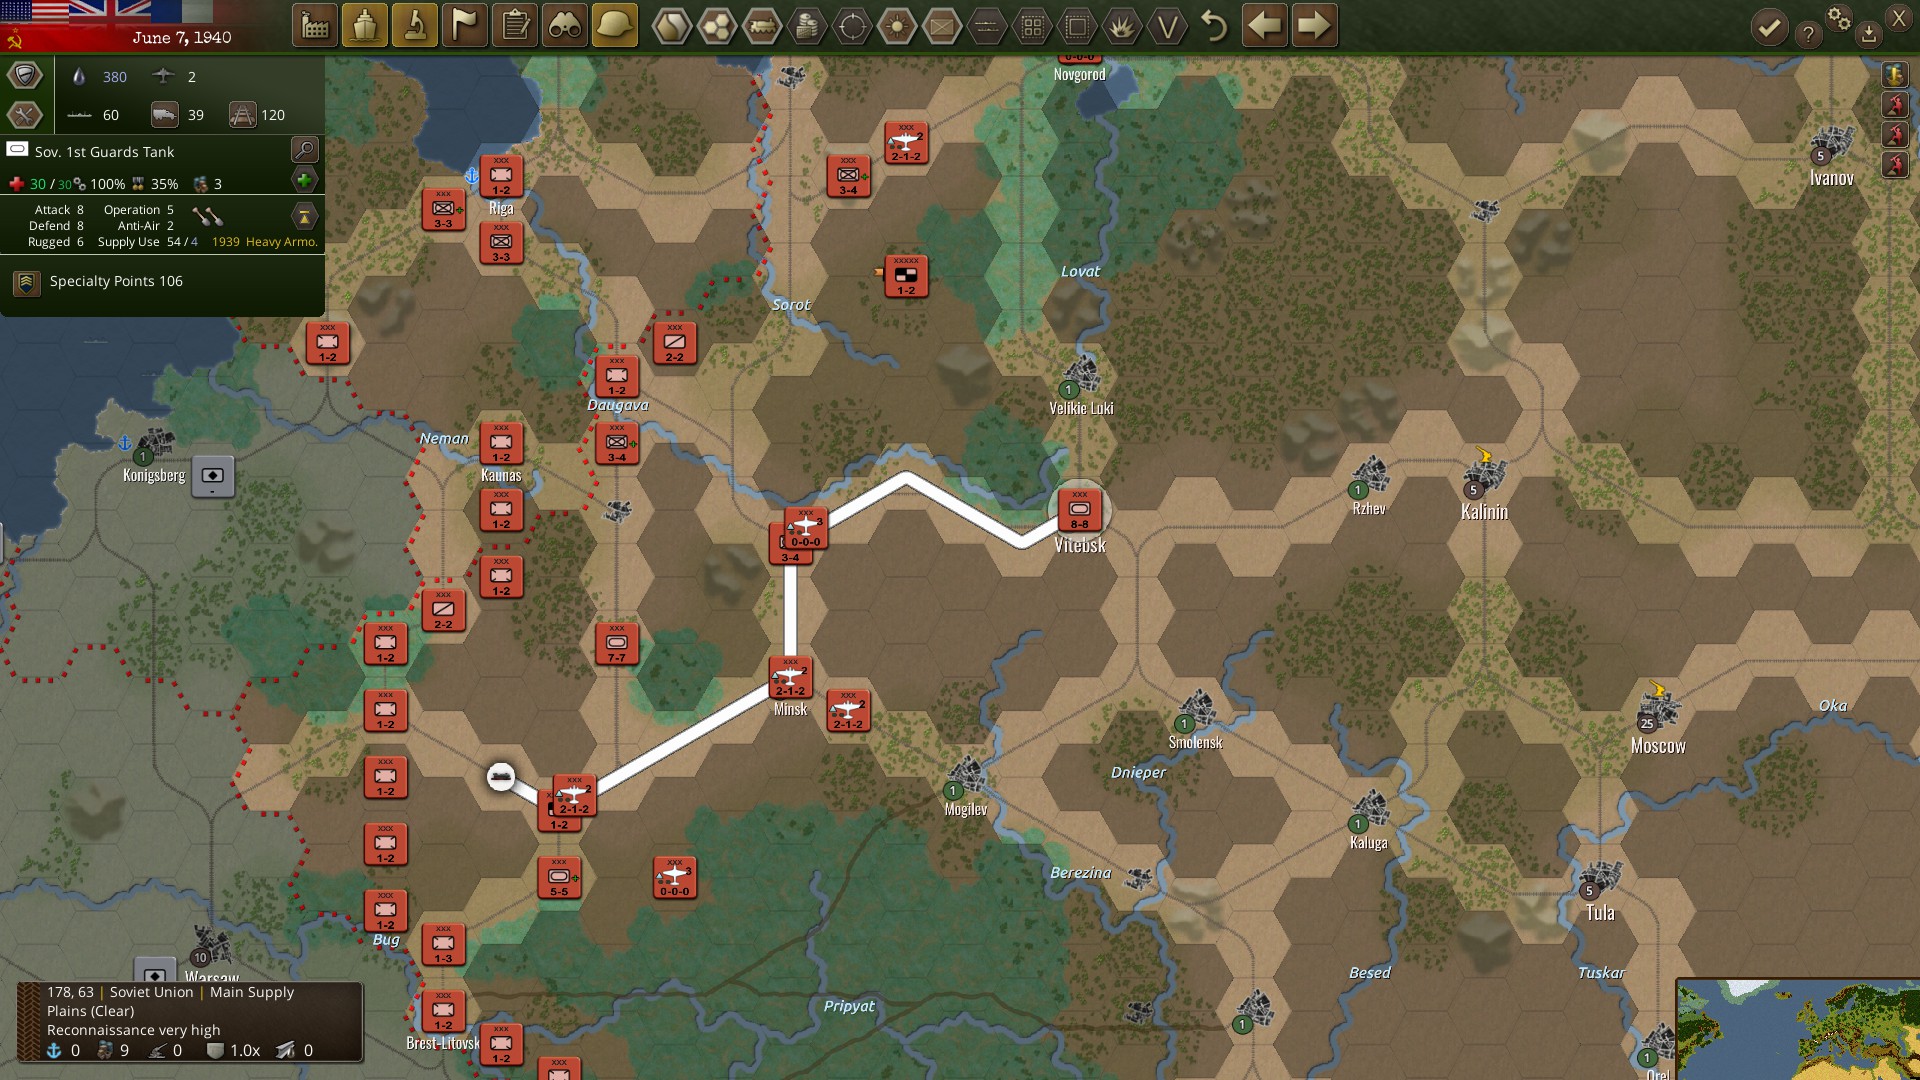
Railroads also allow the transport of goods an infinite distance so long as the railways are contiguous, meaning that every rail tile in connection to your main supply (your capital) is in 9 supply. The number of supply you are in has another major benefit – you gain a bonus to effectiveness recovery the higher the supply of the tile your unit is in, so an exhausted unit recovers faster when on a rail line.
You even have the ability to ship a certain amount of unit strength per turn on your railways. This has an additional benefit beyond simply moving your units quickly, however, as movement reduces effectiveness per operation point spent to move. Trains only reduce effectiveness by 1% (unless an air unit), and additionally do not cost oil to move your units. (I guess the trains just use a separate supply of fuel?)
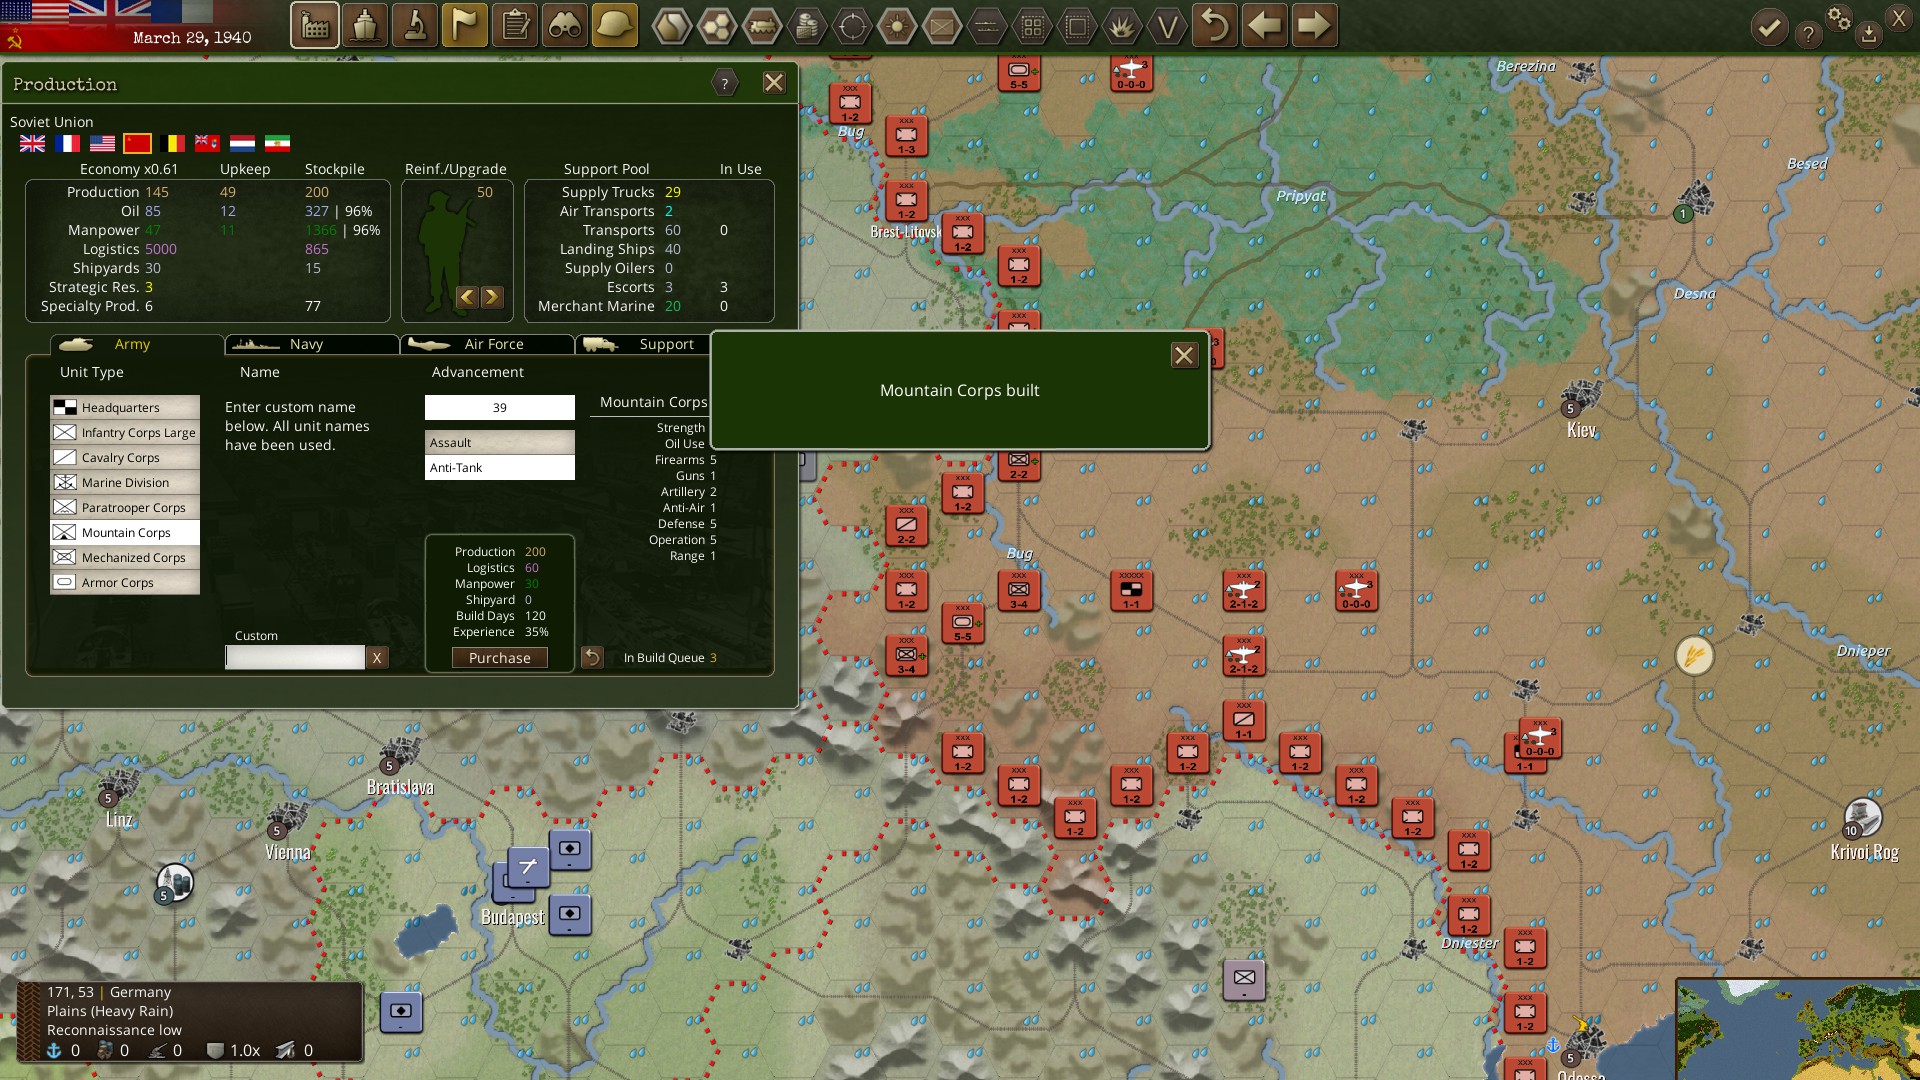
Nation Management
Like with most of the rest of the game, nation management is a very lean version of the sort of thing you find in a game like Hearts of Iron. You control the production of military units, and you have resources you need to keep an eye upon. Resources come in from special hexes, such as industrial cities providing Production, or oil fields providing Oil. Overseas production (like industries in India, or oil from South America) needs to be shipped to your nation’s capital via convoy lines that require Merchant Marine to carry them, and Escorts to protect them, or you will be unable to collect or spend them.
Oil is used by all units besides infantry (who apparently get driven into battle on electric trucks in this game) to even move, and engaging in combat consumes more. In my North African campaign, as the Axis I ran completely out of oil by the end, and had to keep my ships in port and planes on the ground as the small trickle of oil came in that could only go to my most vital Afrika Korps, making the final stretch to take Port Said much harder. (This is, of course, historically accurate, although this game lacked the supply interdiction runs, and just gives you a flat small amount of oil and supply.)
Manpower represents the number of appropriately-aged, able-bodied men who can be drafted into the armed forces, and while you start with a large pool of manpower, it refills very slowly, which can act as a brake on your unit construction. Logistics, meanwhile, represents how many units you can keep supplied in the field at once, and acts as a more hard limit on how many units you can keep in the game. Infantry takes relatively little logistics compared to armor or air units that take up the same amount of manpower, so the balance of these two limiting factors can push your unit composition. France, for example, has little logistics and no tanks to start with, making fielding an army of anything besides infantry difficult.
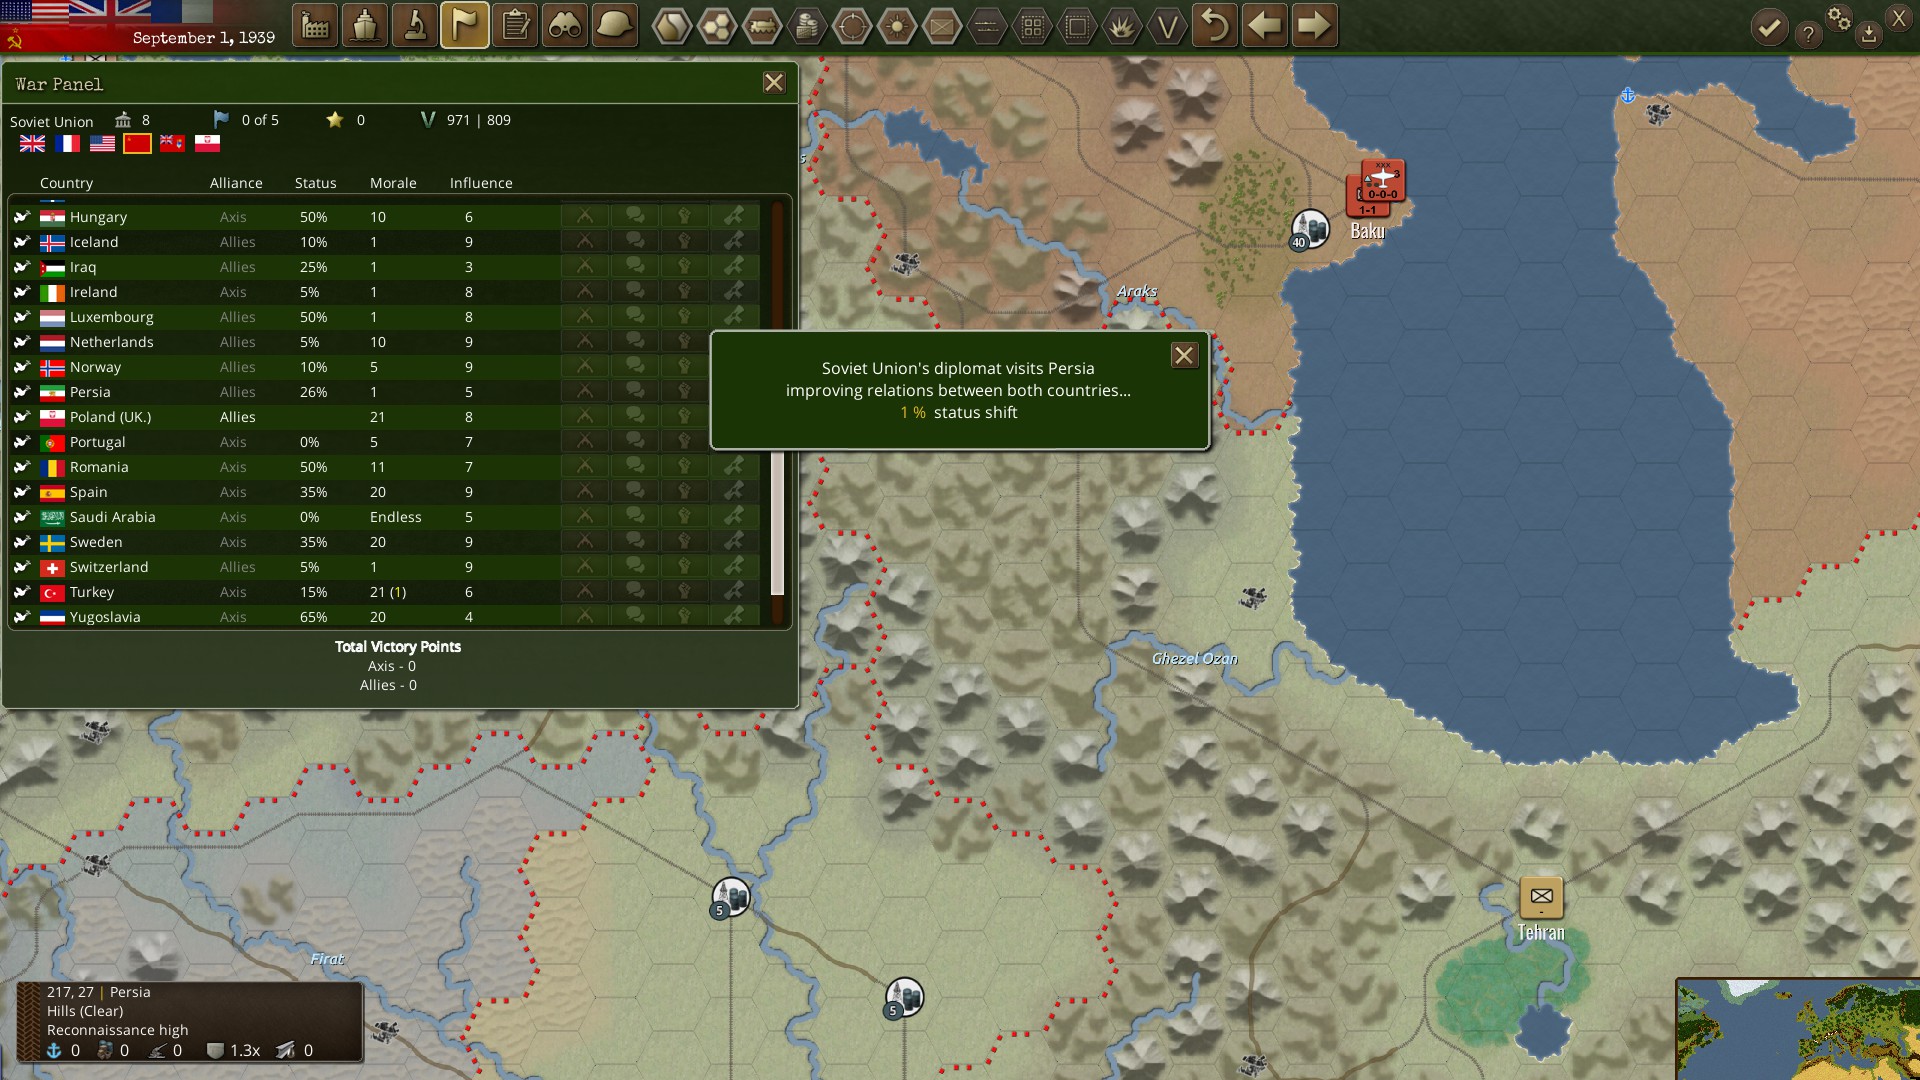
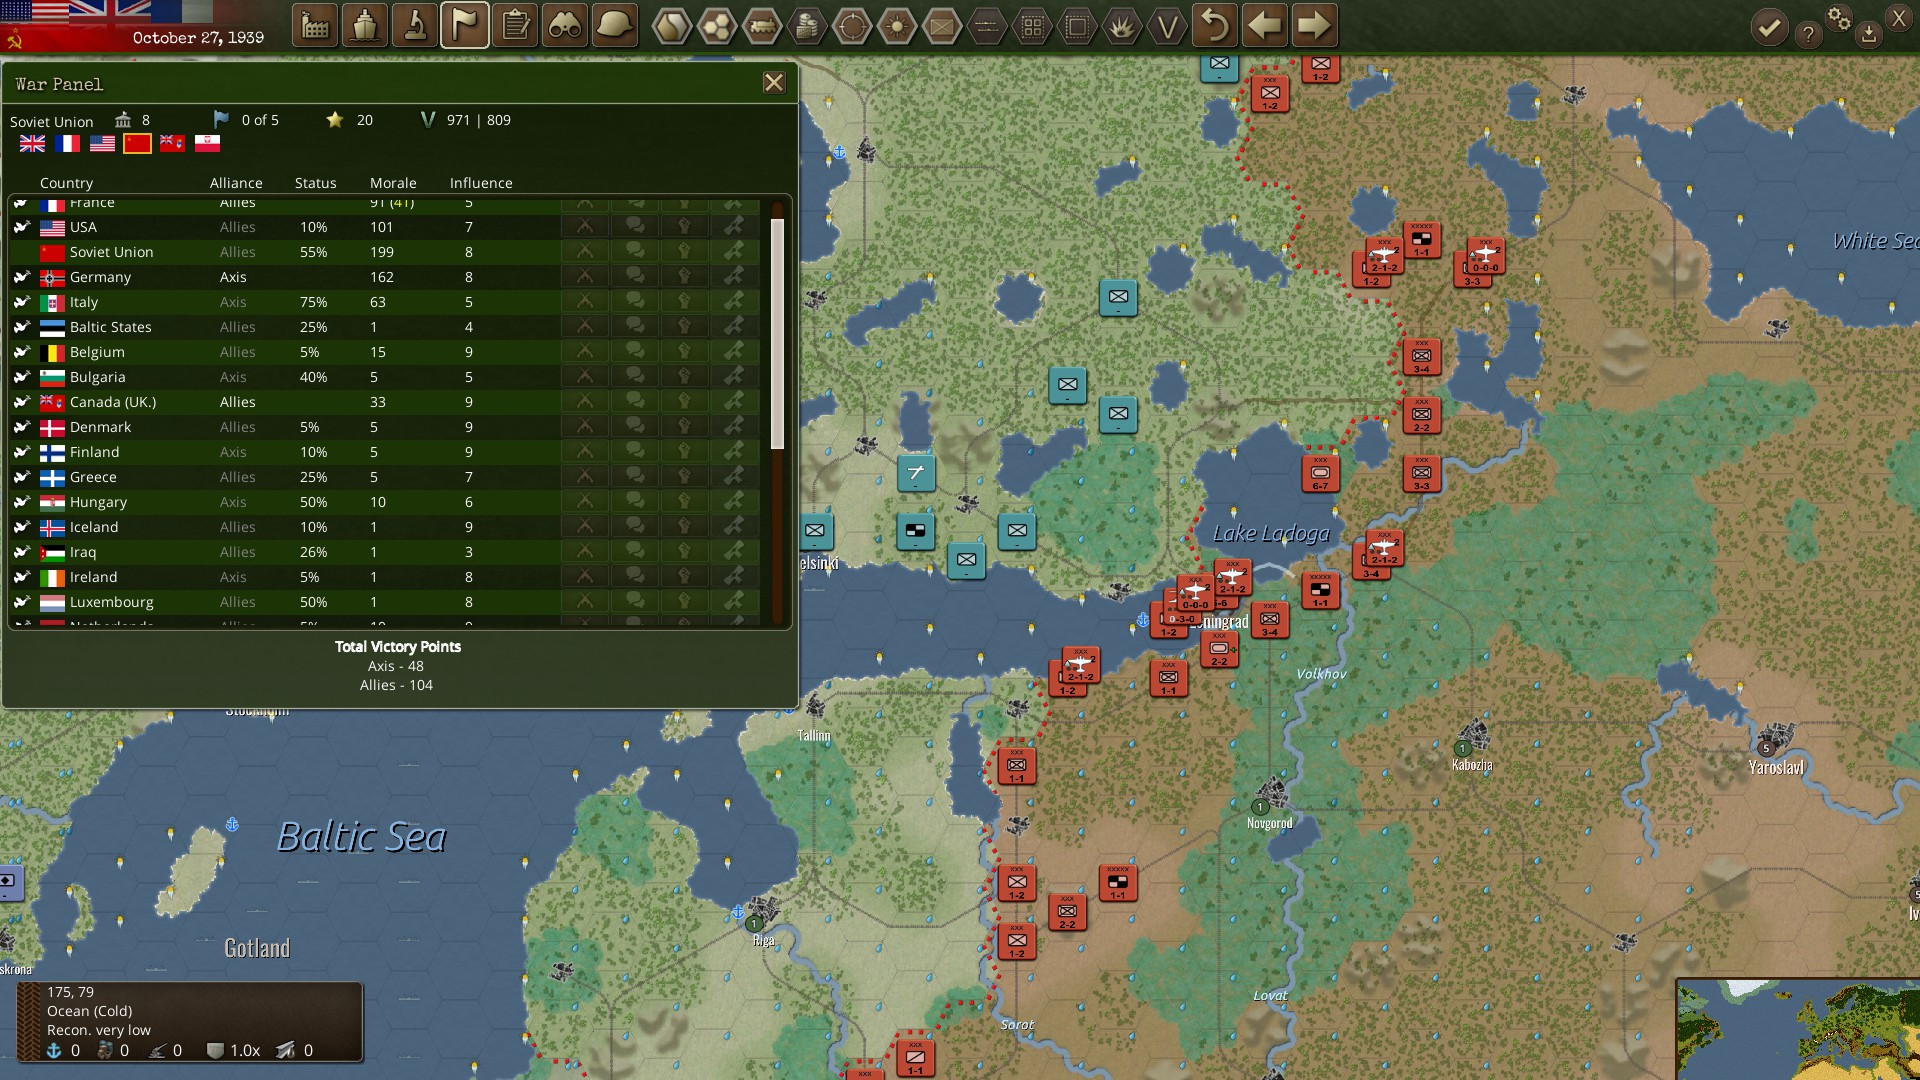
One thing to note is that there is a diplomacy menu, but it is disabled by default in the options and the tutorial says it is recommended you not turn it on. (That’s not a red flag at all!) I turned it on just to see what it does, of course. At seemingly random points, nations in your alliance (even if they aren’t in your alliance yet in the case of the USSR and USA) will gain a diplomacy point that they can spend to either send a diplomat to butter up a nation or threaten a nation. Buttering nations up have a random chance to raise a small random amount of favor for your side, or it will do nothing besides waste your diplomacy point. Threats have a small random chance of making a nation favor your alliance more and a large random chance of making them favor your enemies more. When a nation hits 100% for one side or the other, they join that alliance. Note that there are many scripted events that will override this or throw massive changes to the percentage to favor a nation. For example, Romania will join the Axis automatically if France falls, so negotiating with them is a waste of time unless France seems like it’s going to hold the Germans off. Likewise, a nation that will be attacked by your enemy will join your side on its own, so there’s no point in negotiating with Denmark or Norway, which will be forced to the Allies side when Germany invades them, regardless. Some other nations have massive scripted percentage boosts that are avoidable, but which also override diplomacy, such as Spain having a +200% inclination to join the Axis if the Allies invade Portugal.
All this said, it leaves relatively few nations left that are worth negotiating with unless one of the scripted triggers for a nation joining fails to trigger. There is a clear favoritism towards the major belligerents, and minor nations lack even significant production capabilities to contribute to their alliance, much less the capability to field a small contingent of military units. South America is literally just three tiles of production that are vaguely gestured towards off-map, but you can still use diplomacy upon them. There just isn’t an interest in adding details to anything that didn’t happen in real history so you can create your more interesting alternate history.
Dunking on the Victims
Historically, many of the nations that fell to Germany early in the war did so because of a combination of having outdated military technologies and doctrines and the sheer swiftness and surprise of the attacks overwhelming defenses before reserves could be called up.
WarPlan, however, doesn’t have an “element of surprise” shock mechanic to inflict upon enemy nations that would lower their readiness. (Even though the effectiveness mechanic would work quite well for this. They could simply inflict some major, say, -70% effectiveness debuff on all the units of a nation to represent being unready at the moment, which would allow their units to be decimated while under the effect of surprise, but allow any unit that survives to regroup and be effective as a fighting force if the opponent failed to exploit the element of surprise.) This means that most nations that lost the war have armies with units that are severely understrength. For example, all of Norway’s units are only 2 strength out of 10 when other major nations get units with up to 30 strength units. They also have less experience, but not being able to even reach a maximum strength that could allow those units to defend themselves is crippling so as to basically say that the reason Norway lost was not because of disorganization or the element of surprise, but because the Norwegian forces are just inherently inferior. This also is especially bad for some of the neutral or minor particpants like Persia, which get massive oil fields, but no production or military to speak of.
One really odd example of the disparity, however, is Belgium. The Netherlands (and Denmark and Norway) have extremely pathetic militaries, but while Belgium has units that are man-for-man weaker than the major nations’ armies (they have one less firearm and one less gun value), their 30/30 strength units are actually capable of holding the line against at least German infantry units. If supported, they can actually hold the line against at least the Germany infantry (although the German armor are absurdly powerful early-game.) Belgian units, for example, have twice the power of Dutch units, and about 2/3rds the power of British units.
The Soviet Union, as another example, suffered massive losses early on because Stalin refused to believe warnings that the Germans were massing for an attack (because he believed that attacking the USSR while not dealing with the UK was crazy, and Hitler wasn’t crazy, right?), had executed all his top army staff in massive purges, and left his unready troops’ supply depots too close to the front lines where Germans could capture them. This is represented in the game as Soviet units starting out with 20% experience (when 50% is average and Germans start with 70% – remember, these multiply combat power), while any new units built have 35% experience. Additionally, Soviet units are made up mostly of rifle corps that max out at 20 strength, but after a set event, these rifle corps all turn into armies with 36 max strength.
In fact, because the game doesn’t handle the idea of a nation being in any war except in war with Germany or the Allies, the Winter War between the USSR and Finland also takes place via arbitrary events that pop up. You get told that losses were very terrible when you put all those units into that region, and you lose 50 manpower from your nation’s pool for it.
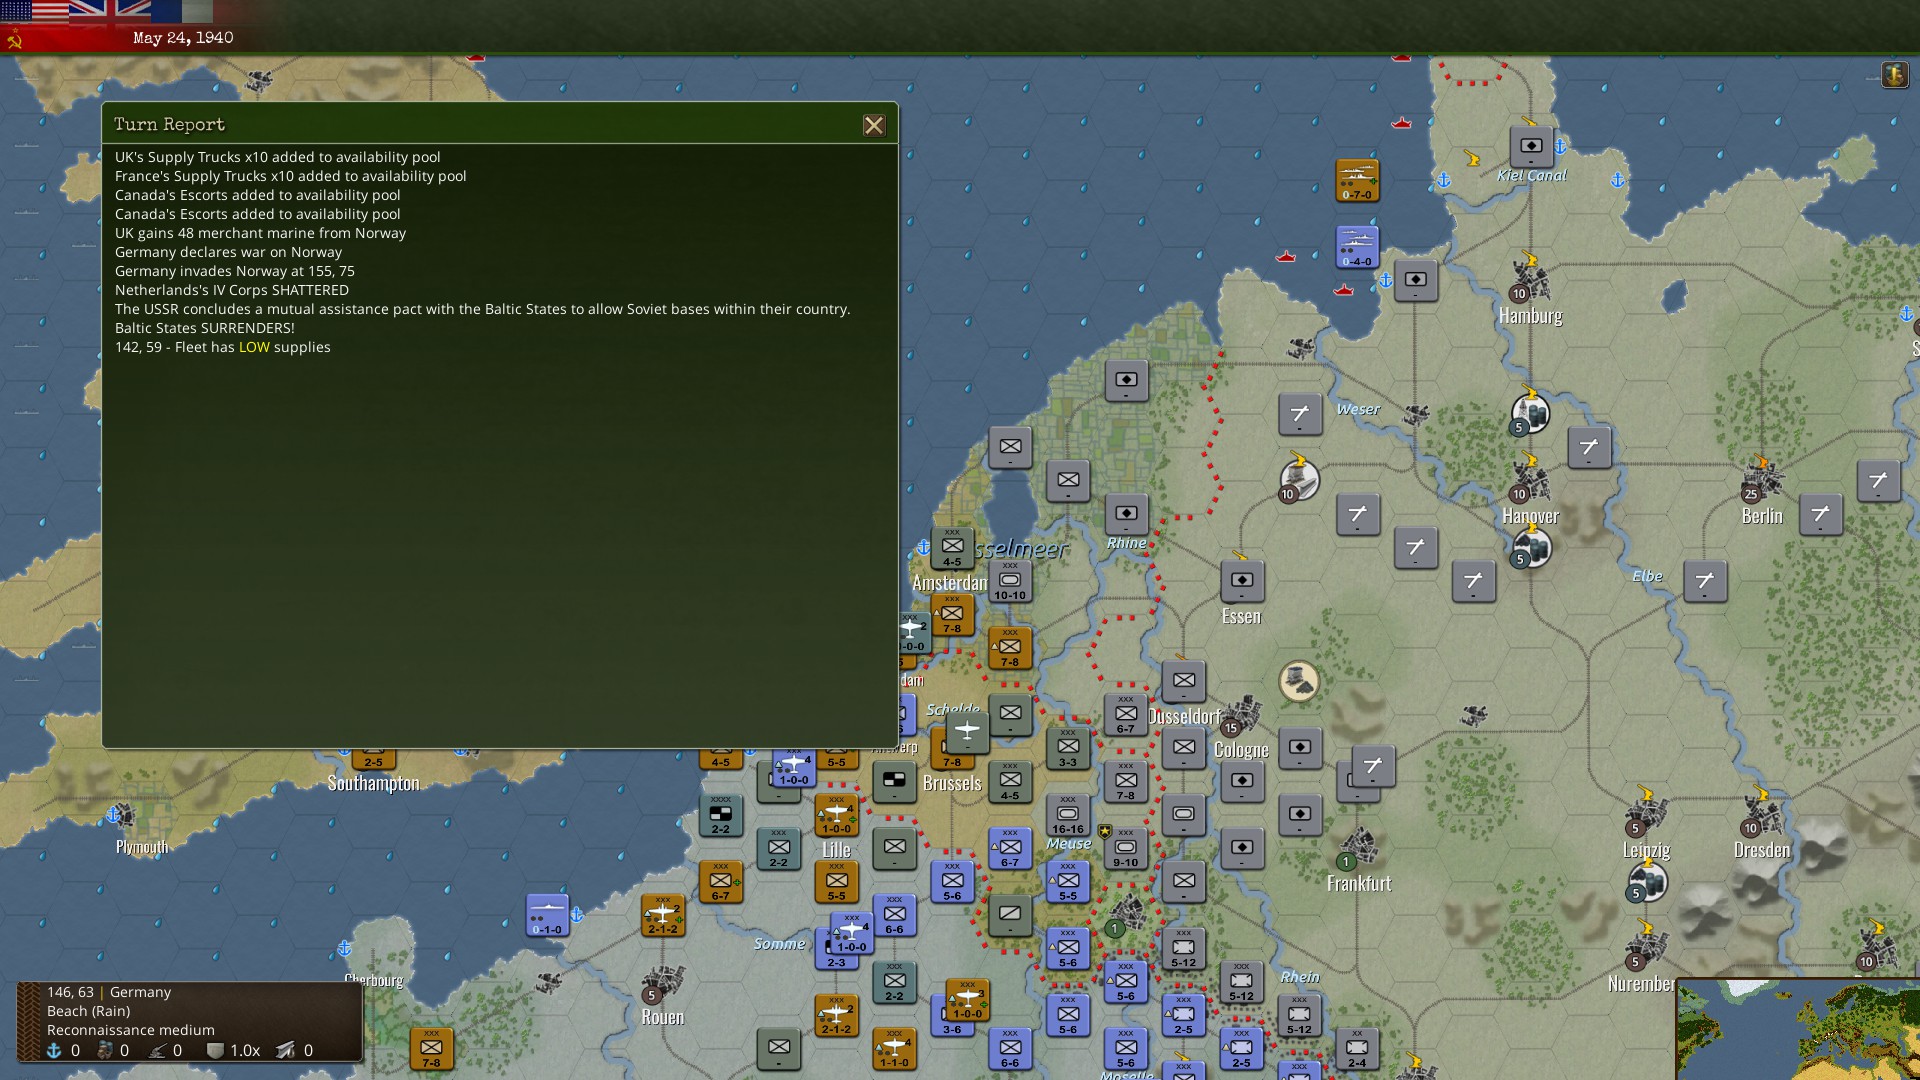
Gee thanks, sounds like something I would have wanted to have actually participated in, rather than something just dumped on you in an event to stay “historical”… Basically, any time something is supposed to happen “historically” in this game, it’s an arbitrary scripted event that fires off regardless of the actual context of what you are doing in the game. You can take all your forces away from the Finnish border (or even the Polish border), and the game will just arbitrarily hand over territory to the USSR at random points. Same goes for Iceland – the UK just arbitrarily grabs it in a pop-up with a message about occupying the nation by force against the protests of its citizens while I’m not moving a single unit in that direction because I’m fighting in Belgium and Norway at that point.
The worst example of this, however, was how Norway is scripted to fall. Norway will surrender when just a single German puts his pinky toe over the border into Oslo, they start their landings one hex away, and the Norweigians have a 2-strength unit up against a 30-strength German one. Yes, historically, they were quickly defeated, but in this case, my combined British/French fleets sank the entire Kriegsmarine, landed troops and marched them in to retake Oslo as soon as the event triggered, and even blockaded Oslo’s one unit of German troops to try to force them to give it up. Didn’t matter, the script says Germans have total, uncontested control of Norway, and they laid down a minefield blocking the Denmark straight with the French Fleet inside. They even gave the Germans free garrison divisions from nowhere and an air unit. The only bright side is that they didn’t take away the port I was using to advance, but only because I had a unit sitting directly on it as part of my continuous ferrying of troops into the battle for Norway that was very much contested…
Historical games should allow what happened in real history to be a possibility, but having arbitrary events that force the game out of your hands so that history can play out in spite of your efforts as a player or the actual context of what is happening in the game are deeply jarring and unsatisfying.
Predicting the Weather
One more thing I have to note as a moderate negative is that I am not a fan of this game’s weather system. Many strategy games of this type will have randomized weather that will involve different weather patterns tile-by-tile, which can mean that a rain cloud is covering just one unit at the moment that a turn takes place. This does not happen in WarPlan. The same weather is stretched across huge, obvious “weather regions”. These regions cover from southern Russia all the way to northern Spain, including
Another issue is that weather regions are obviously delineated between land and sea. The ocean is its own weather region distinct from the land, so weather patterns that stretch from the Arctic Ocean north of Norway through the North Sea across the North Atlantic to the coast of the eastern United States will be one solid weather pattern except as soon as it touches land, where England has the same general European weather region.
(In fact, I’m pretty sure the United States is in the exact same weather region most of Europe, from the UK and France to Poland gets! If it snows in Warsaw, snow clouds gather over Washington DC, while skipping over the whole Atlantic!)
Another problem I have is that not only is the weather covering far too large an area, it is absurdly consistent and unseasonable.
Weather by the hex, or even clumps of hexes like other strategy games do it may not strictly be realistic (although it certainly can be), but it does create interesting situations. Sometimes storms just cover the target you want to hit with airstrikes, and you have to go with a secondary plan. This game just makes all airpower invalid on certain turns.
Worse, while the game’s extremely predictable weather tries to create that “Russian Winter” scenario by making it constantly blizzard in Russia throughout the winter months, it makes far too much snow and rainstorms during the winter months. Just taking some looks at average rainfall by month in places like London and Paris, I can see it rains roughly the same year-round in those places. In this game, it never rains during the Summer, but from October to May is a single continuous rain-snow-heavy rain-snow-rain again superstorm that lingered specifically over the land of Europe for eight straight months.
The actual Fall of France took 6 weeks from the declaration of war on the Netherlands and Belgium to taking Paris. In this game, after declaring war on the Netherlands, the Germans had to wait 6 weeks before they could do anything other than glower at us menacingly from across the Rhine because it was still part of the Eternal Storm, and the weather was too harsh to carry out any maneuvers. (This ironically gave me several free turns of rail movement to shift my much stronger British units in while moving the absurdly nerfed Dutch units out, giving me a much stronger hand to play against the Germans when they did finally invade. Up until Germany declared war on the Netherlands, I couldn’t move my units in due to it violating territorial boundaries, so thanks for declaring war into a storm, Hitler!)
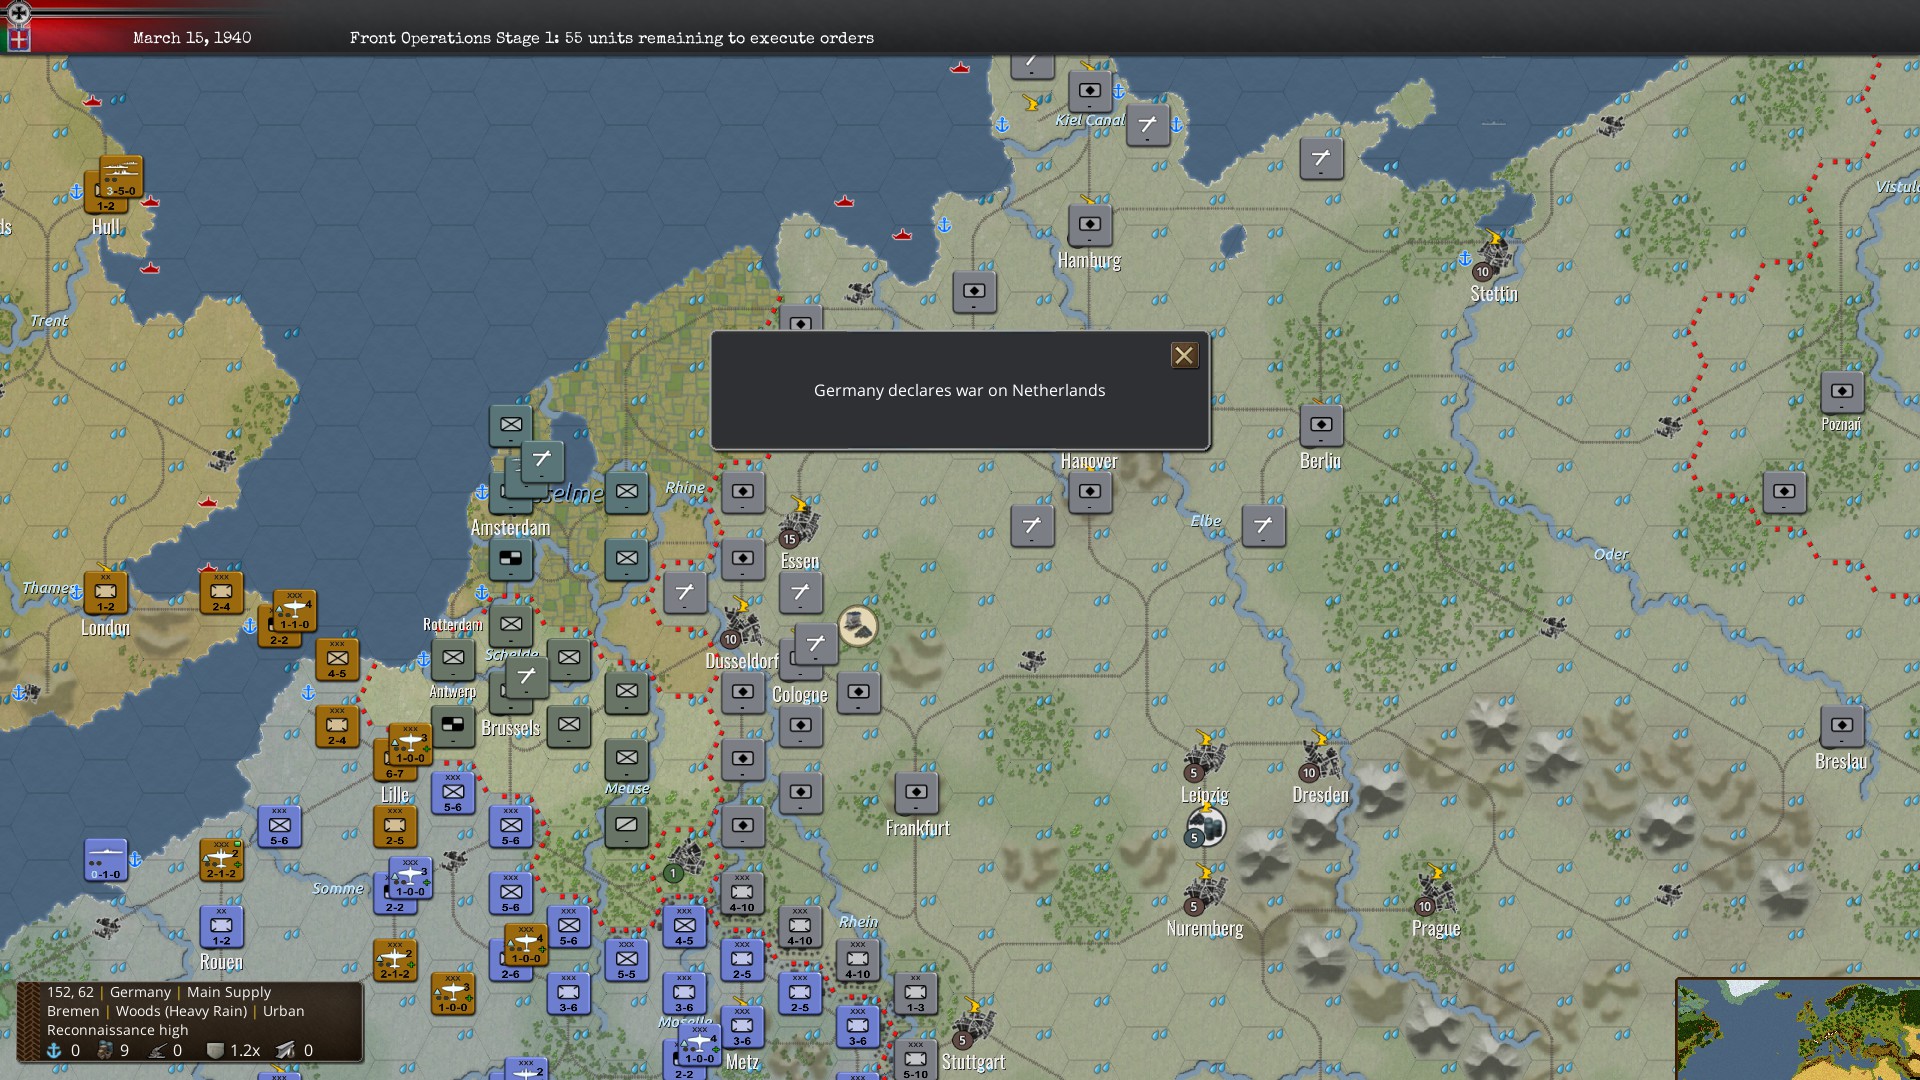
This in fact led to my being able to hold off the German invasion of France and even the Netherlands with surprising effectiveness.
The Maginot Line
If you’ll pardon a historical aside, the Maginot Line gets a lot of flak from laypeople as being a worthless waste of time and money because “the Germans could just go around”, but that was a known problem. France wanted to extend the Maginot Line to Belgium and Luxembourg, but Belgium took exception to the idea that they would at best just inevitably be victims to another German offensive where they were walled out of safety, and at worst, France was overtly building fortifications against Belgium itself. The compromise reached was that in the case of war with Germany, Belgium would invite the French in to help defend their own flank of the German border. England and France’s early concessions, giving away whole nations to Germany, however, shook Belgium’s confidence in France, causing the deal to fall through as the Belgians tried to make their own negotiations with Germany just before Germany invaded through them. Hence, the reason the plan failed has more to do with the breakdown in coordination and suddenness of Germany’s attack than the inherent failure of French planning.
I bring this up both because I enjoy the history and want to correct a misconception, but also because it describes how this game works in good detail. After the weather thing because that whole dreaded Russian Wint– I mean, Belgian Spring thing meant that I could actually reinforce Belgium en masse, and put up the kind of defense that France planned to put up, yet never was able.
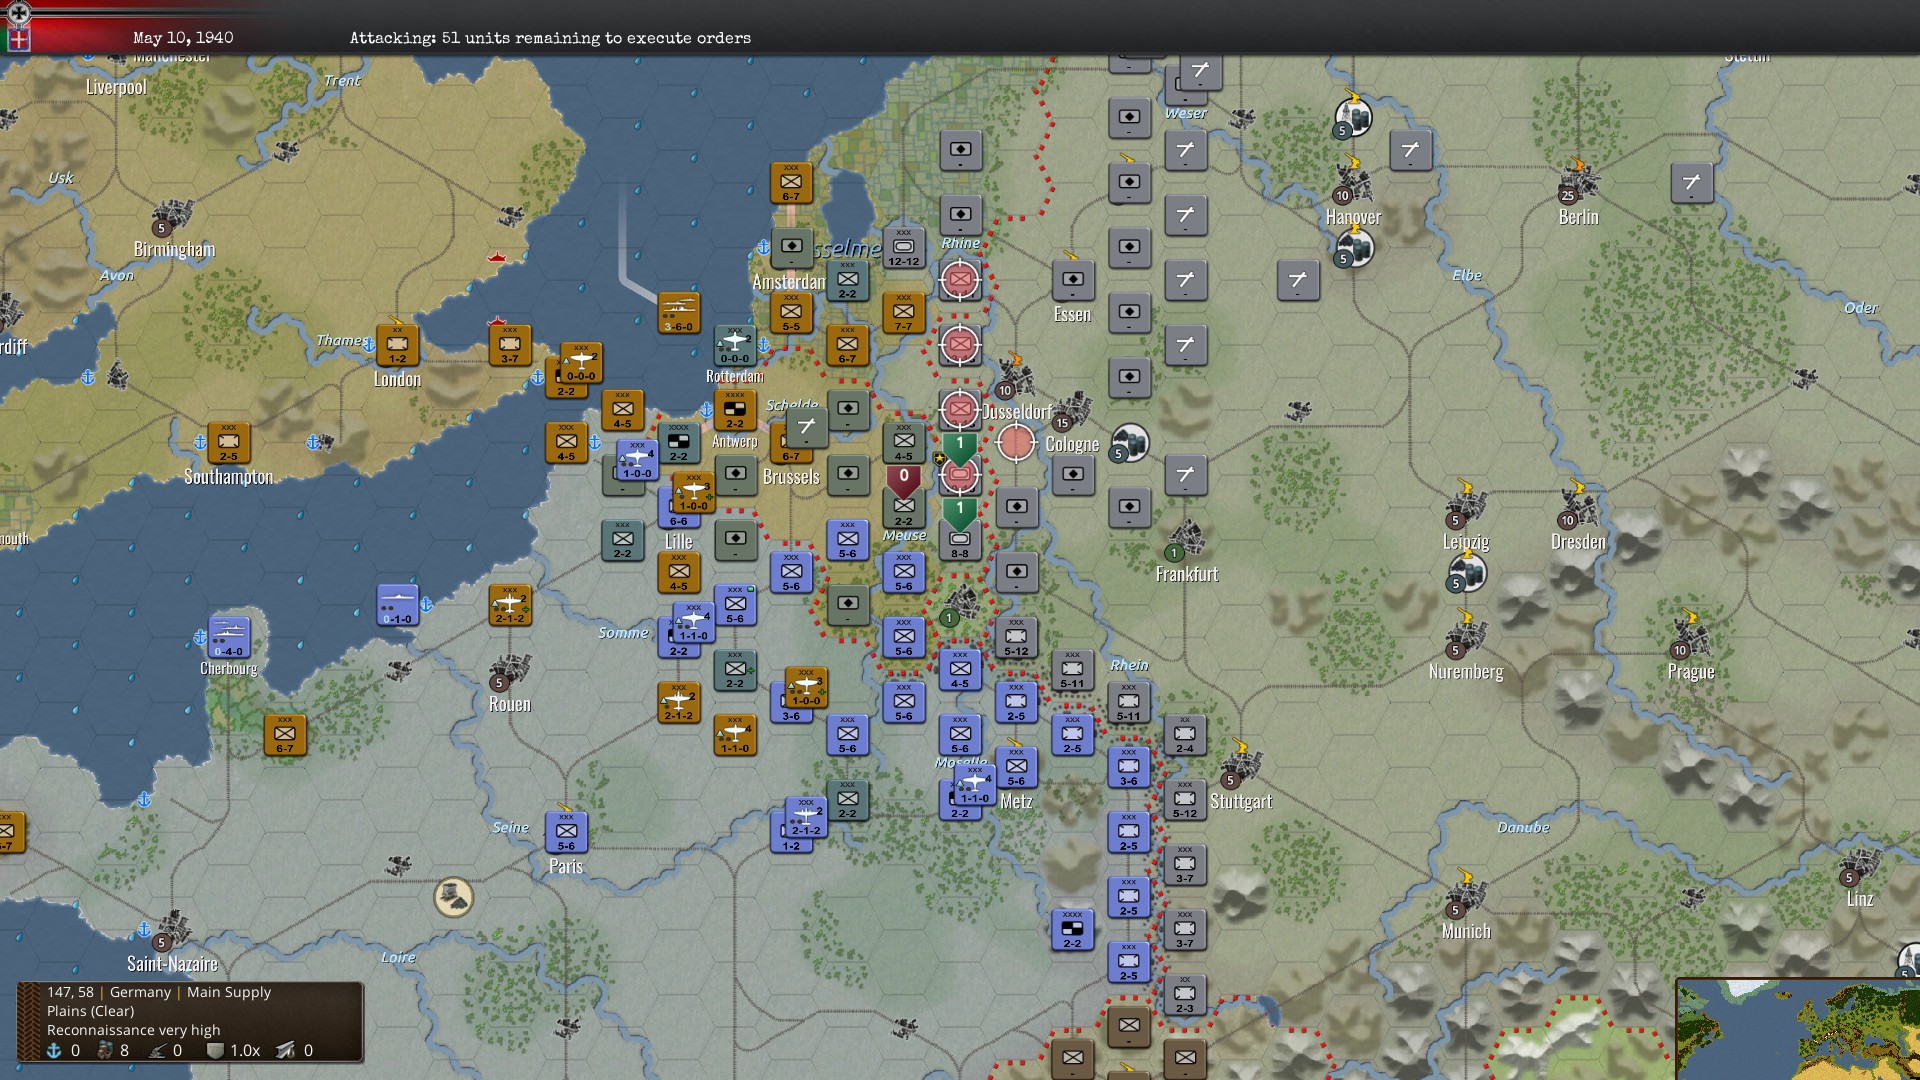
The Rhine, IJssel, and Meuse rivers all make natural fortifications in this game, as river crossings halve the combat power of attackers. Since attacks are already something that take 3:1 odds to have any real shot at wearing the enemy down faster than your own troops, this is a major defensive advantage as long as you can maintain a dense front and avoid flanking, and while the Allies have inferior troops at this point, numbers are one thing they do not lack. (This is especially true if you’ve been spamming large infantry corps until you hit the logistics limit which is very low for France like I have.)
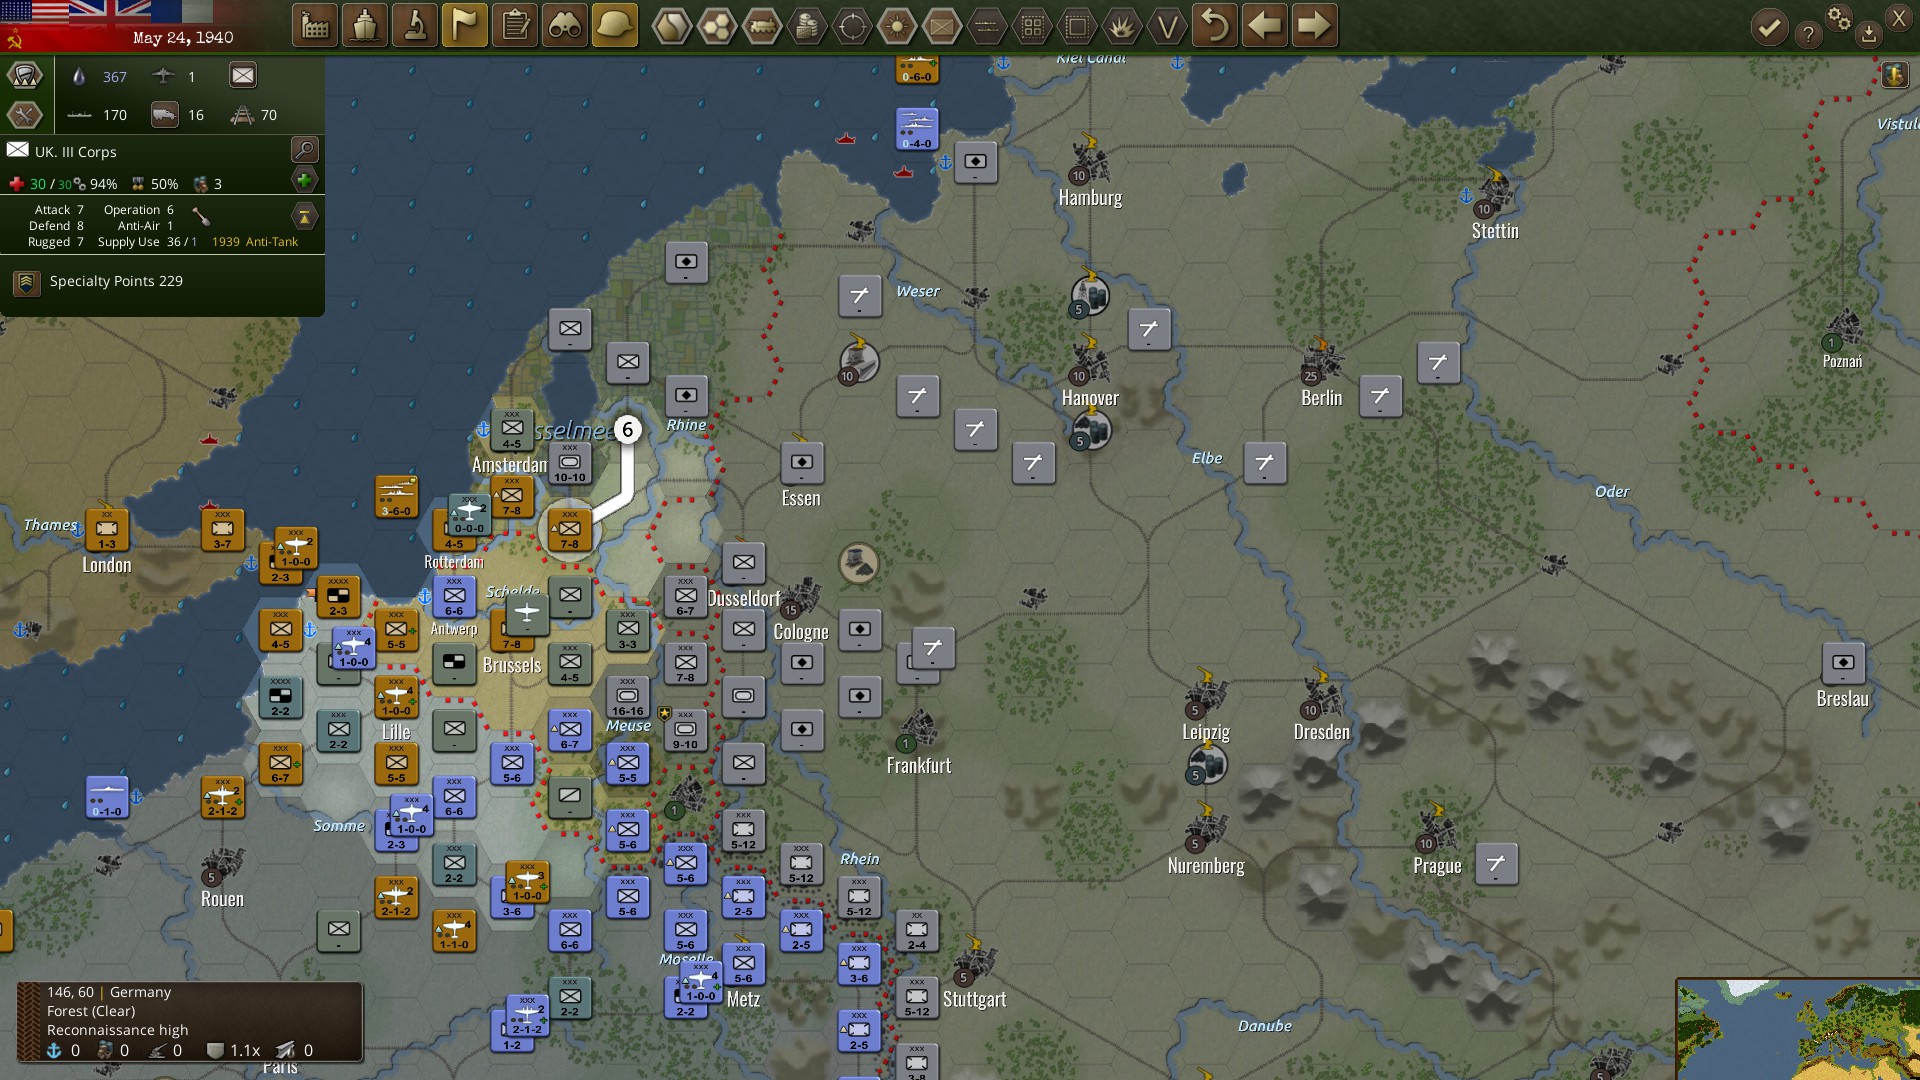
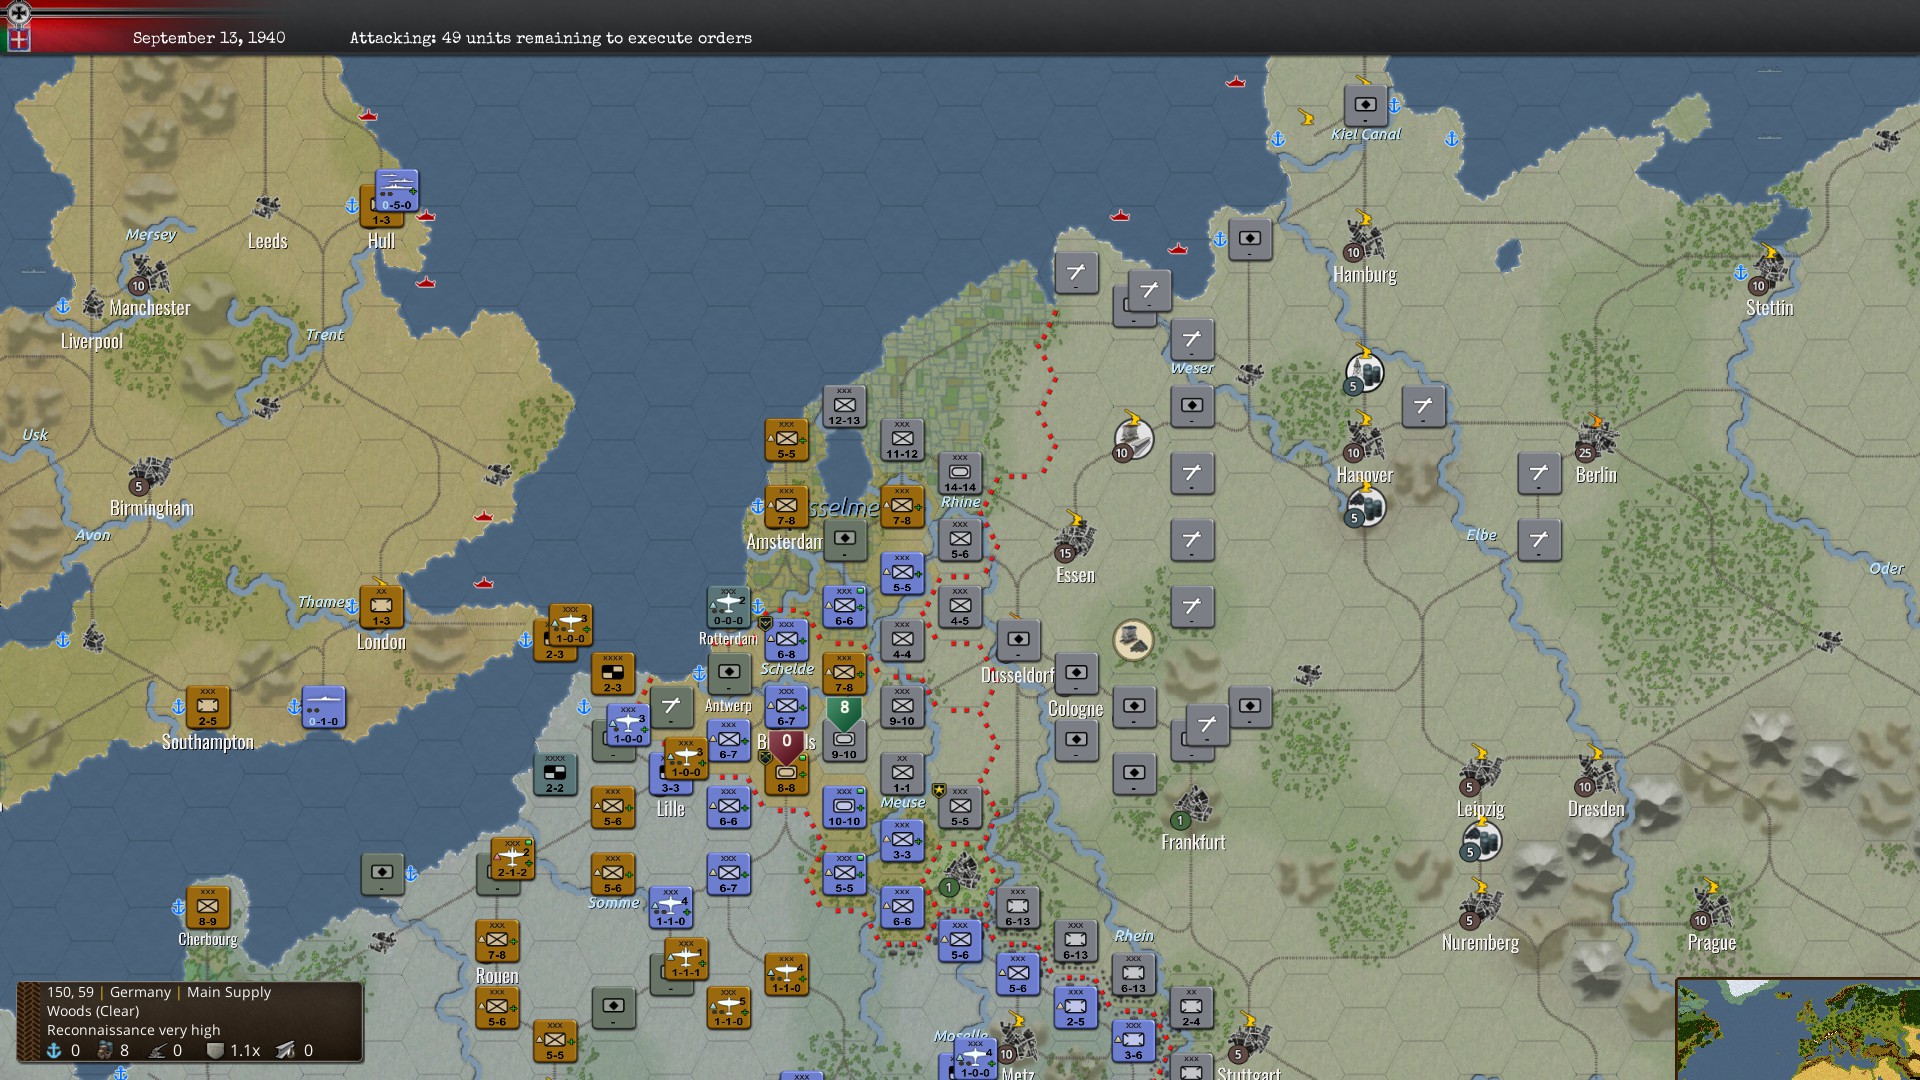
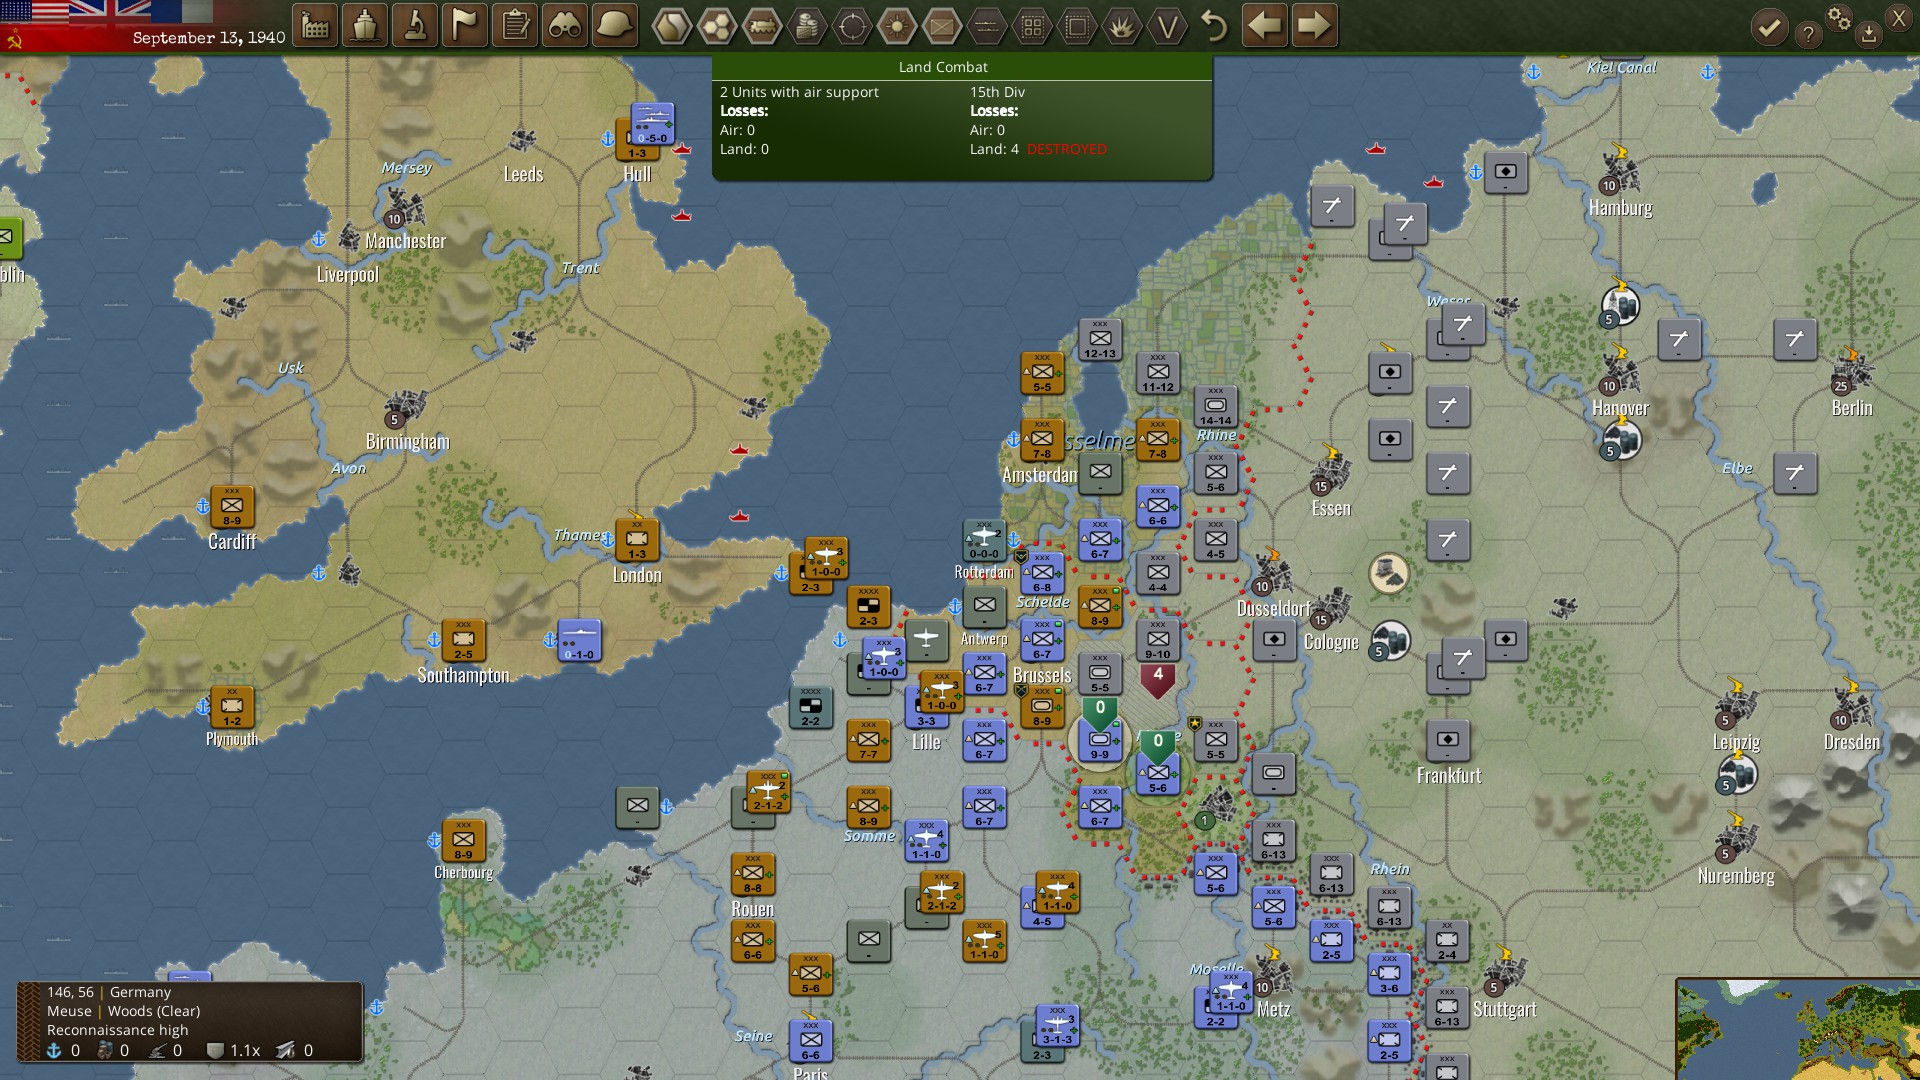
One thing I have to note as very important is leaving your troops room to retreat – they can only retreat 2 tiles at most, and cannot retreat in a path that puts the adjacent to another enemy unit, or they will shatter (and be completely destroyed as a unit, even if you get some manpower refunded). (Note that the Germans are shattering instead of retreating when they plug the holes they punch in my line with more units, as that leaves their tip-of-the-spear units no room to retreat. I shattered 4 panzer corps and 2 infantry corps this way during the Summer of 1940 in exchange for 2 Dutch, and 1 British corps.) That said, you want a unit behind a front-line unit while holding a line so that there is something blocking an enemy from pouring through any hole left by a retreating unit, and to be able to march forward to take their place.
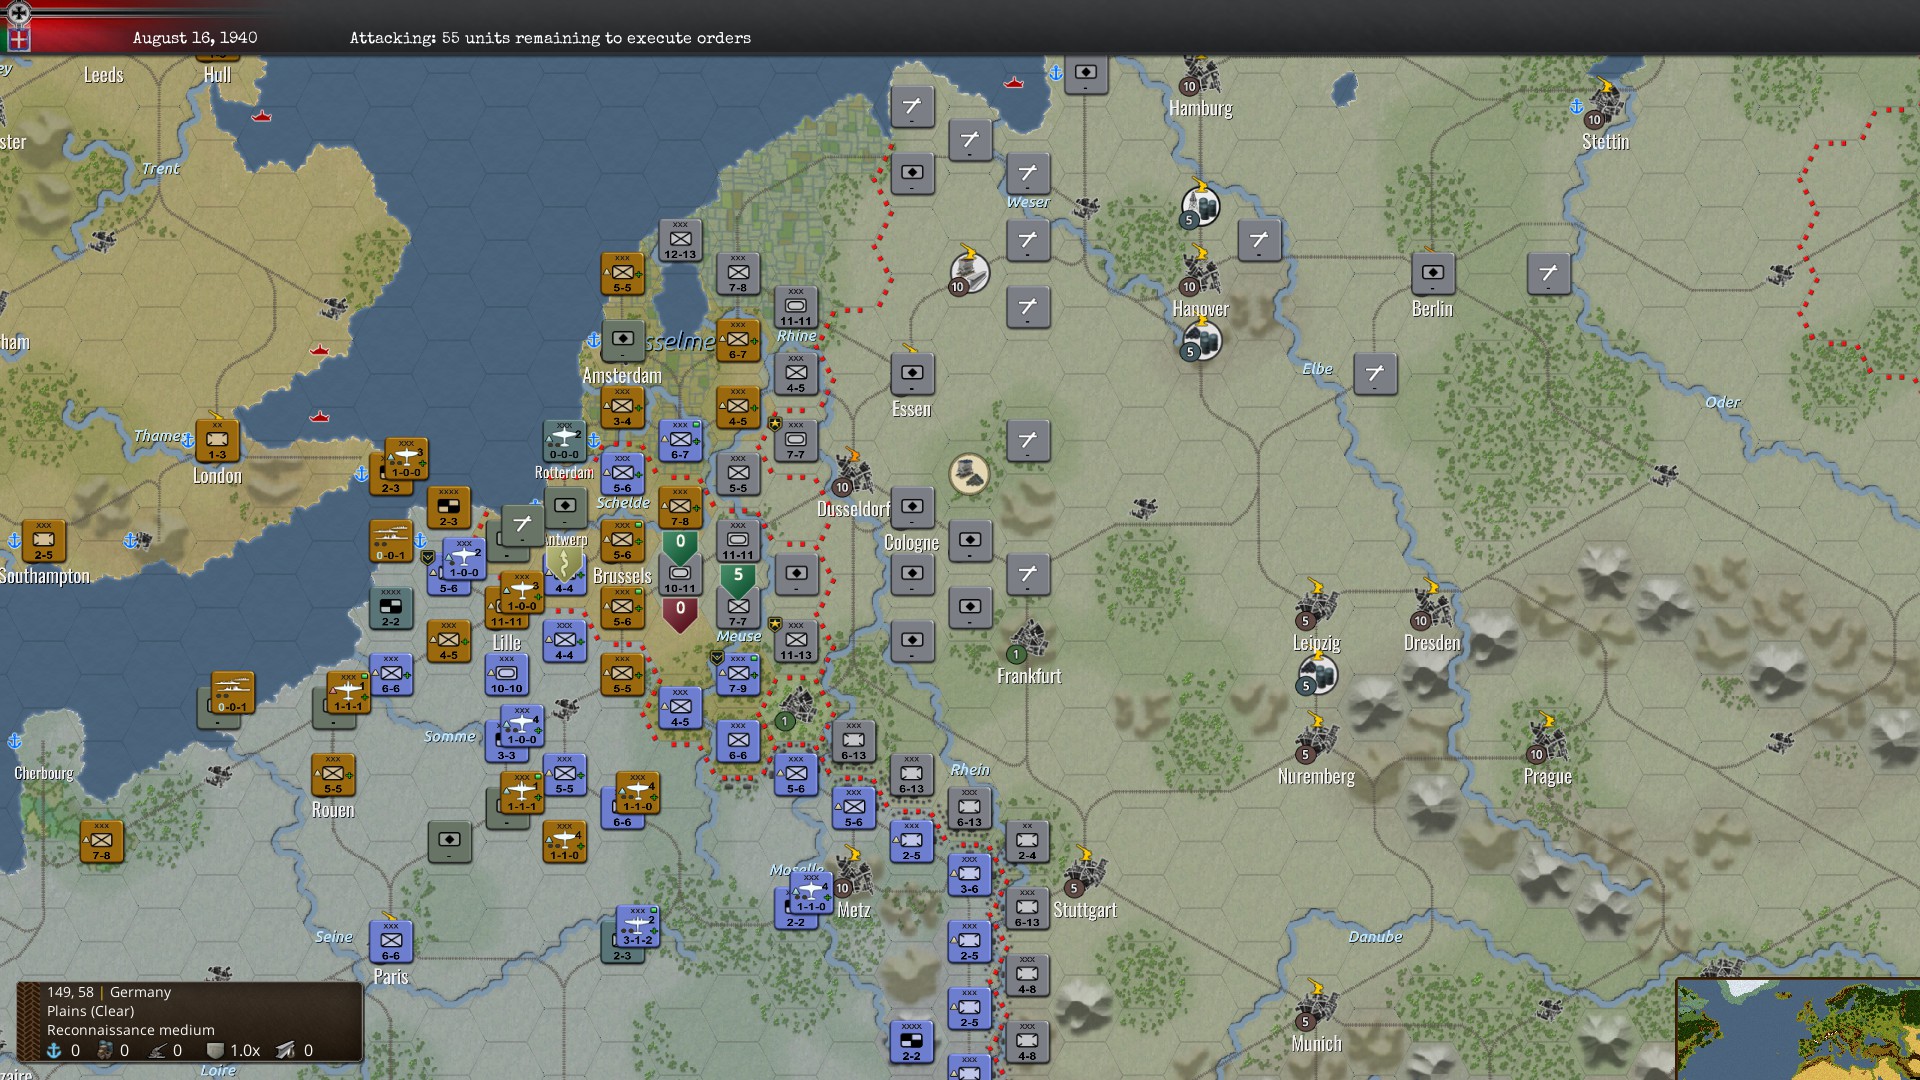
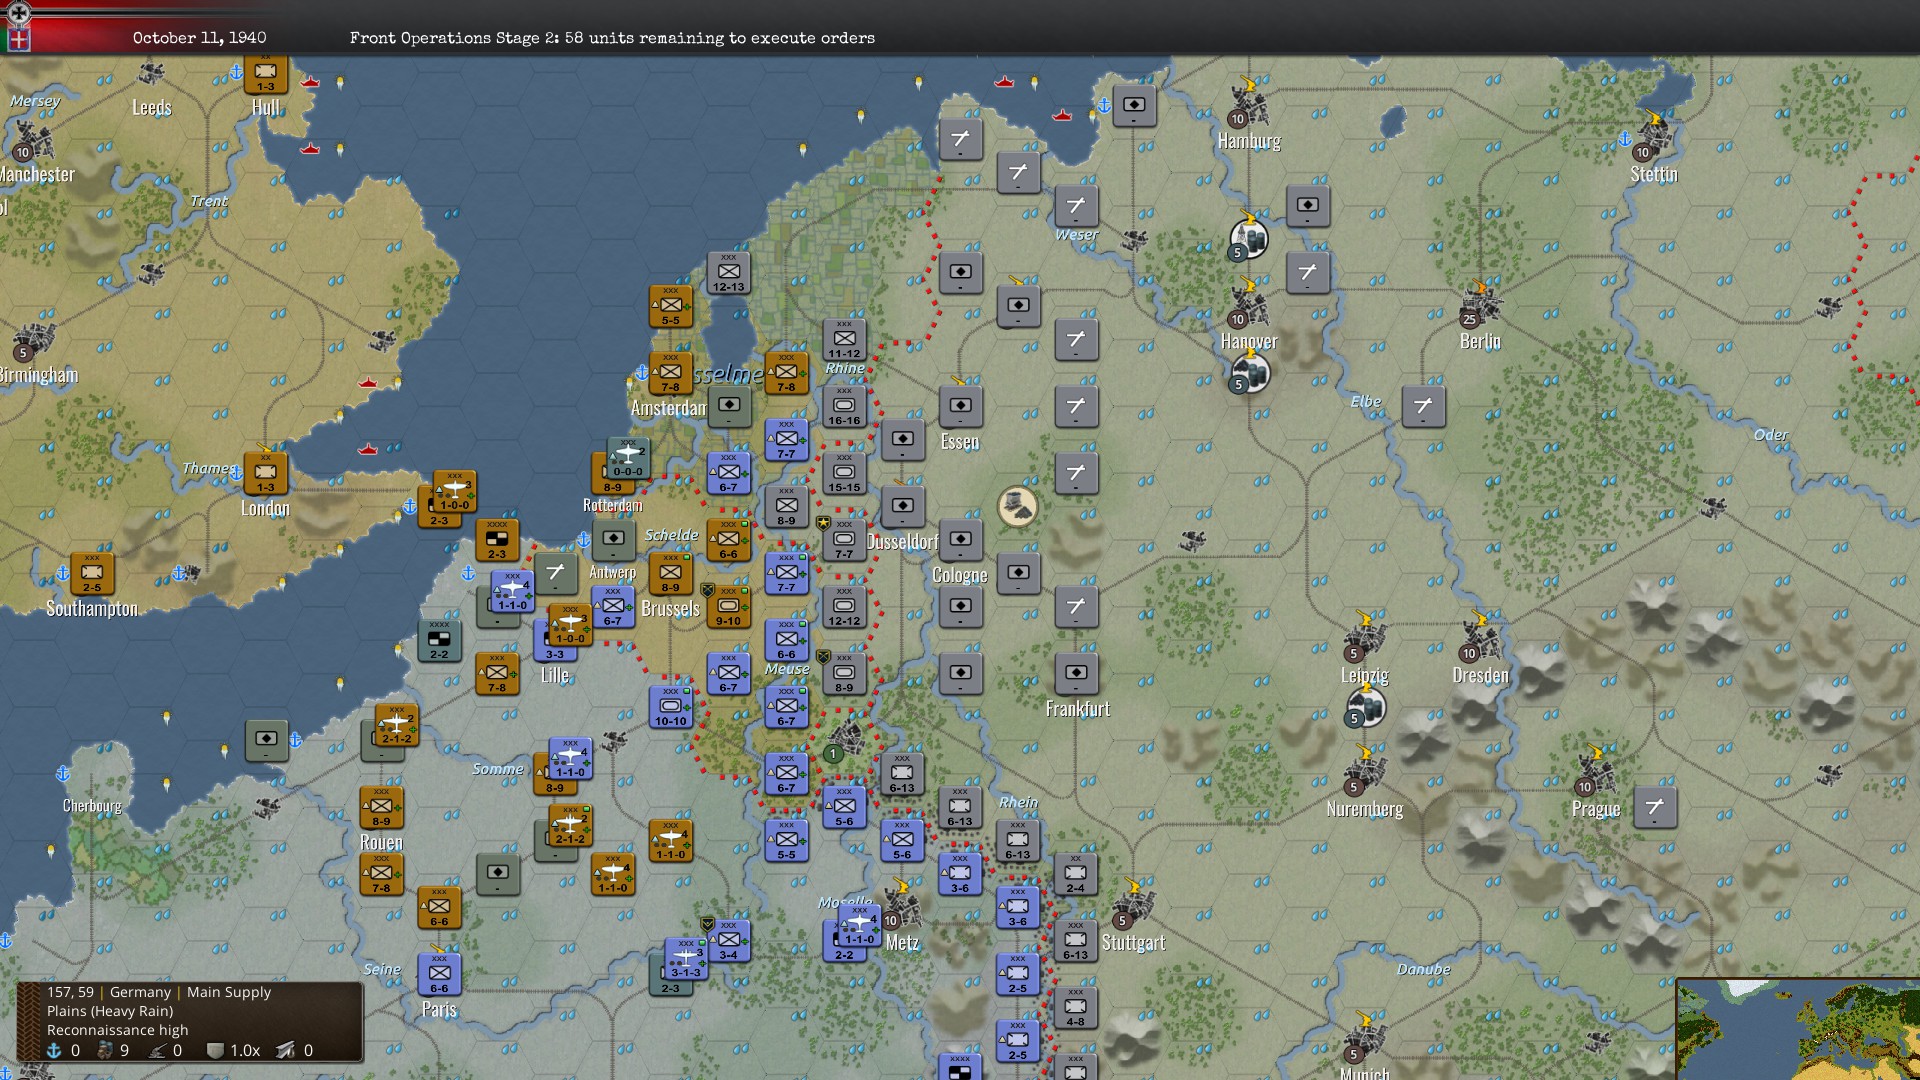
Constant effectiveness loss on the front lines means you need to constantly cycle units from the front lines back for rest while cycling new units in. Since effectiveness recovers faster in better supply, and supply is propagated via rails, this means you want to drag your tired units back far enough away from the front to give some retreat room and on top of a rail line so they get 9 supply to get a larger effectiveness recovery from supply. (Up to +18% from being in 9 supply, however this is reduced as you get closer to 100%.)
Although I sadly had my chance to go on a counter-offensive in the Fall of 1940 ruined by the onset of October blizzard season in the dreaded Russian Wint– I mean, Belgian Autumn, the scripted plot events say that Stalin is now concerned by the Allies’ inability to contain Hitler (I’m doing fine, thanks), and is preparing for the USSR to enter the war. The game lacks a branch in the script to handle it if Germany for some reason fails to take France, so Stalin will just declare a reverse-Barbarossa even if Germany isn’t ready to invade. (To be fair, Stalin’s been annexing plenty of territory in the background, so if Germany looked unable to win in the west, he’d totally rush through Poland to stab at Germany’s under-defended flank.)
The Germans are stopped by the snow starting in late October – snow further drops attack power by 50%, so attacking across a river means having quarter strength, and that is just suicide. By this point, however, it only stops my own counterattack, however. The enemy units, depleted to a third of their original power, are now safe, and worse, even though I had destroyed 4 panzer corps, which were nearly all the Germans had at the start, the respite of winter was enough to see them rolling 6 new panzer corps to the shores of the Meuse. However, before the weather will clear, Spring will come, and with it, the reverse-Barbarossa…
Opacity of Information
And now for the worst aspect of this game – the interface. I’ll break this down into two parts: Player feedback, and player controls.
As I mentioned above in the section on naval combat, especially convoy protection and interdiction, there are many things in this game that give you extremely little information unless you specifically go out of your way to find it. Even when you do go out of your way to find information, you often don’t get enough information to understand why anything is occurring unless you already have a very strong grasp of the game’s mechanics (and sometimes not even then), so it is very hard to understand why something isn’t working.
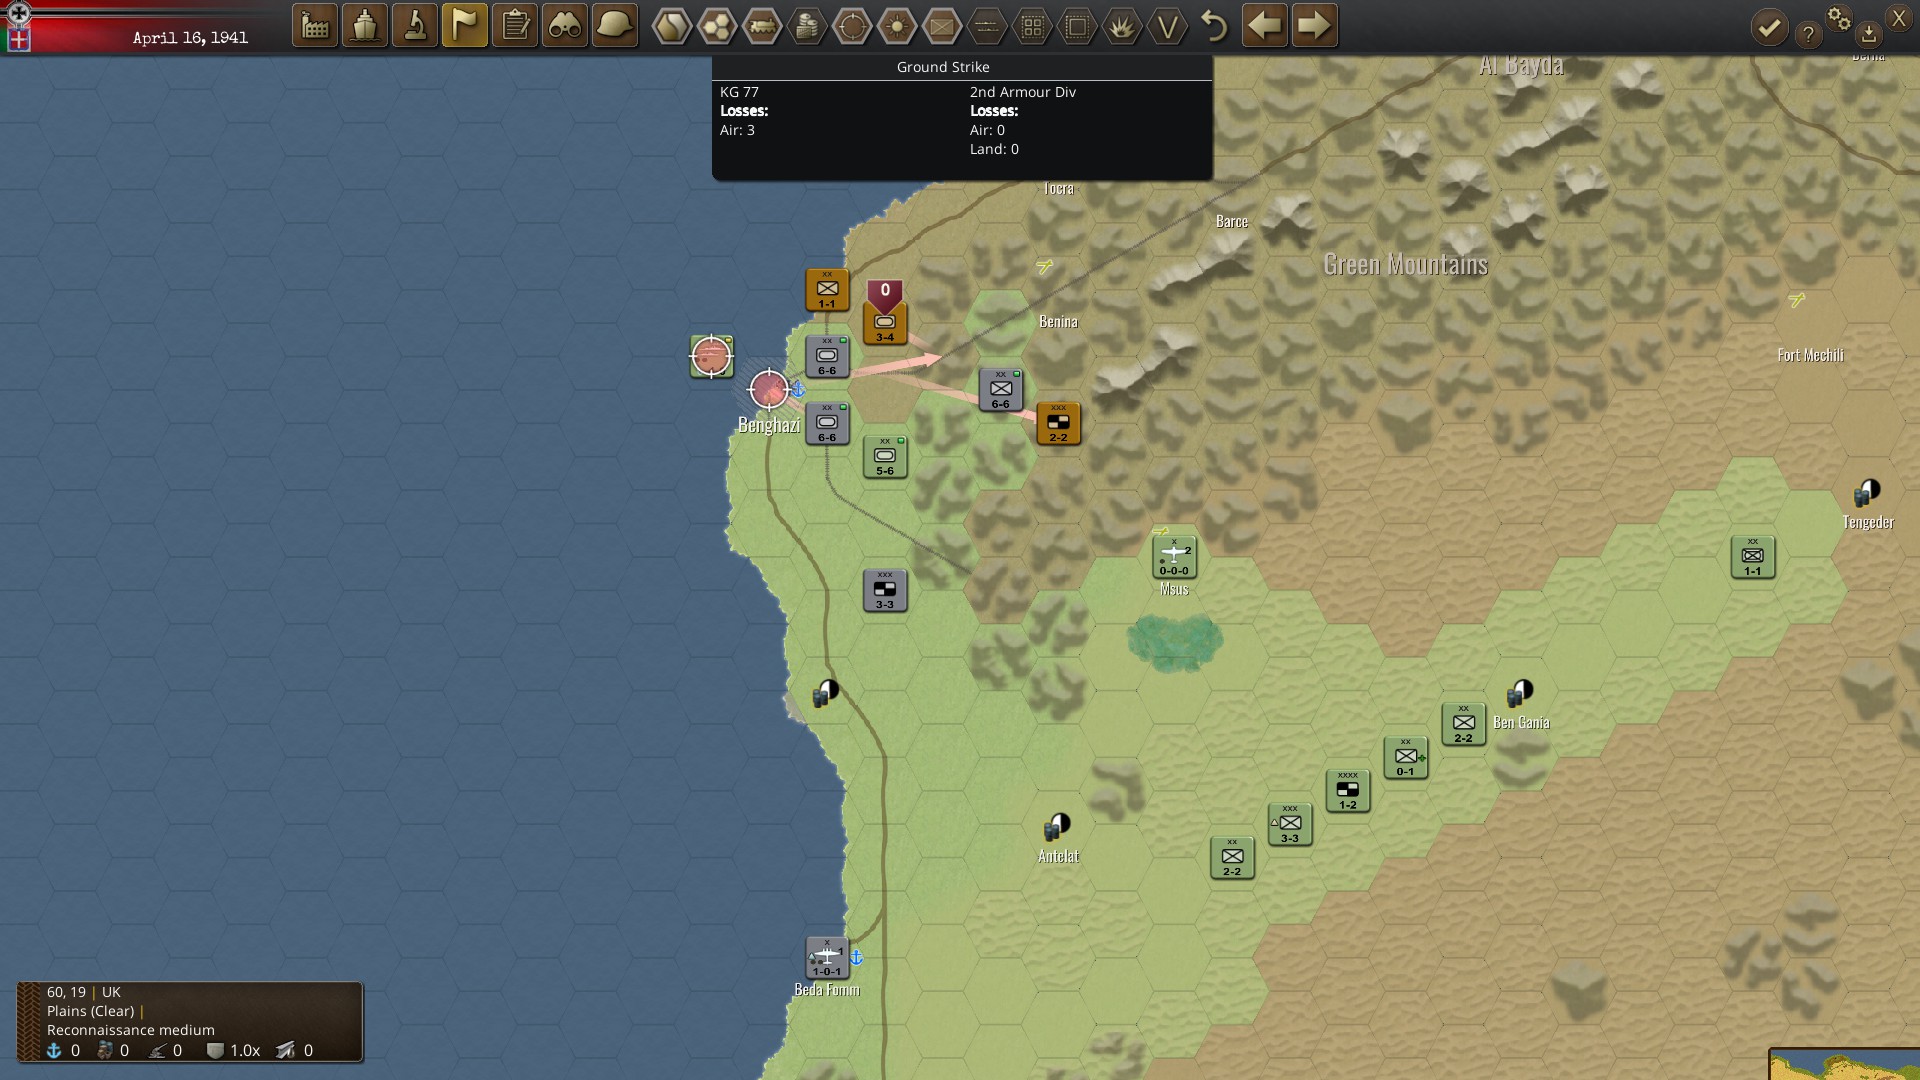
I played through the North African mini-campaign first, just to get a good idea of the game’s mechanics in a simpler setting with less variables (I recommend this be the way you learn the game, as well, if you play), but one thing that is notably different in North Africa is that the “scale” is smaller, with regiments and divisions instead of corps, and the game doesn’t seem to handle smaller air units very well. I never saw a bomber attack that was useful, while even without air cover, land units could easily swat attacking bombers out of the sky with whatever anti-air capabilities they possessed. I eventually just stopped using them as anything other than support for ground attacks because that might be useful, but the game gives absolutely no information about whether it is or isn’t. Bombing is, however, supposedly useful because it reduces the effectiveness of an enemy target even if it does little damage… too bad there’s no way to see enemy unit effectiveness to understand if you had an effect!
This is not helped by the fact that combat in this game is just plain very random. Because I didn’t understand what or if I was doing anything wrong, I savescummed a lot of bombing attacks in North Africa just to try seeing if I’d get different results, and I certainly did. Sometimes, I’d take 3 losses for no kills, sometimes I’d take no losses for 1 kill. A lot of the time, the bombing had no effect whatsoever on anything but effectiveness.
Looking in the manual, it mentions that the game has a specific order of combat, where artillery goes first, then defender anti-tank guns fire at tanks, then attacker tanks fire, then defender infantry fire, etc. The problem is that you can’t even tell during the mid-game action who is inflict or taking what damage, so you have no sense if you are doing anything wrong.
Then there is the problem that you have absolutely no idea how all your resources are being spent. Every unit takes up things like logistics, and there’s a big, useless chart of every unit in the game, but there is no information on that chart about any useful information like how much logistics they are using (which is what makes it a useless chart). There is a panel in the production page where I can allocate production to repairing units, and I can set units to be priorities for repair, but how much will it cost to repair a unit, and how long will it take? If I am trading resources like fuel to other nations, it shows up as more “production per turn” for them, but doesn’t subtract it from my own nation’s, so even the production panel’s statement of how much production I have can be a lie. There are far, far too many aspects of the game that the game gives you no insight upon which are actually pretty vital to having a good grasp on how the war itself is going. Apparently, the game doesn’t want to tell me any useful information I need to plan my WarPlans around like that!
And that’s not even starting with the many things the game doesn’t tell you about the situation on the map, as well. Again, naval units can travel extreme distances in a single turn, and the only warning you get when an enemy builds a new naval unit and then sends it out into the sea to hunt your convoys is the sound effect of a ship moving during their turn, so pay attention. Otherwise, you have to go scan the Atlantic every turn just to check and make sure the Bismarck didn’t break out and start surface raiding without anyone paying attention. Buildups on a border are the sure signs of an incoming invasion (pay attention, Stalin!), so it’s important to watch how the enemy is using their rail network. The tokens are visible with fog of war just hiding what kind of tokens they are, so you have good reason to pay attention to their troop movements, but the game wants to make sure that all happens when you’re looking at the wrong part of the map, and zooms through it.
Controls
WarPlan is a game almost entirely controlled by the mouse, a few small buttons and toggles, and a couple of hotkeys. The mouse works fine, but everything else is a pretty big problem.
Any game that heavily relies upon the mouse should expect the player to only have their left hand on the keyboard while their right hand is on the mouse at all times. That means hotkeys should only be present on the left side of the keyboard unless the key is exceptionally rarely used. This game makes its main way of scrolling using the arrow keys and you can’t use WASD. (Sadly, this is something from 50 years of wargaming that this game didn’t learn anything from…) To get around this, you can also right-click and drag the map… but only when you don’t have a unit selected, because right-click is the move or attack button when a unit is selected. Remember how I said that ships have a range of 48 tiles? That’s a lot. The kind where you’d want to click to select them, then move the screen by right-clicking and dragging until you get where you want to move the ships, only to find that right-clicking moved those ships to some totally random spot in the ocean. (Better hope they weren’t interdicted, because that prevents the “undo” button from working… and the “undo” button doesn’t have an hotkey, because why would you want to use that?)
This is also one of those games that doesn’t understand why someone wouldn’t want to make the “next unit” key be something like “N”, and “previous unit” be something like “P”. Ergonomics? What’s that?!
Of course, because I’m complaining about these things, this game has violated the one rule all PC games should obey: Always make all of your keybindings customizable! It doesn’t take much effort, and it makes your customers happy no matter what kind of keyboard layout they have or what kind of 90’s control scheme they use, so there’s no reason for a developer not to do this!
That said, even if they were customizable, that wouldn’t help the keys that you use all the time, yet have no hotkeys, anyway. Rail movement is something you’re guaranteed to use a dozen times per turn, but it has no hotkey, and it’s a tiny button in the top left corner, for example.
This was yet another game I wound up using the Steam Controller for, as I can play the game much more easily if I can just rebind the keys as I see fit.
Tutorial and Manual
The Steam store page for WarPlan features the first two “tutorial” videos, which are just YouTube videos of someone I presume is the developer talking through the way you use the interface. These are the first of six videos. The “tutorial” only covers how to use the interface, and does not cover anything about the mechanics of the game not directly handled by the interface itself, including, but not limited to, how combat is resolved. You know, unimportant stuff in a wargame.
I also have to stress again that just having some videos where someone dryly states things is the worst possible way to learn a game. Long, rambling conversations about how the camera can be panned with the arrow keys or moving to the side of the screen will bore viewers to the point they stop paying attention, and it’s nearly impossible to find a specific point in the video to refresh themselves if they find out they didn’t understand something later on.
To find any actual information, you need to read the manual, which is a pdf that comes with the game. This works fine enough, and it is reasonably detailed, although I wish some of the mechanics such as how much effect more firearms on an infantry unit actually has in combat were actually explained concretely rather than just vaguely “this represents having more rifles”. A notable deficiency of the pdf however, is the lack of any kind of page numbers in the table of contents for the manual or any kind of chapter headers to jump to specific locations so you don’t have to flip through the pages to find the place you are looking for. This means that you basically have to start the game by reading through 92 pages of a dry manual. Truly, recapturing the spirit of 50 years of wargaming!
Another major problem is that the manual and tutorials online are out of date, and the game’s been seeing changes since release that makes much of the information obsolete. For example, above I mentioned I felt like I couldn’t do anything about U-boats attacking my convoys? Well, in the manual, it said that surface ships can’t attack U-boats that aren’t stupid enough to beach themselves, but carriers are capable of attacking submarine units directly. Well, guess what? That’s only in the original version of the game. This was changed so that you cannot attack U-boats with carriers unless they are on a beach or in a dock, and there is absolutely nothing in the game or the manual or the tutorials to tell you this change took place. You have to go to the forums and ask around, and it turns out it’s a question that’s asked somewhat frequently.
Multiplayer
I played single player, because I’m more interested in the mechanics and having to learn from scratch fairly quickly to get a review out in time than having a challenging game against a smart opponent. That said, this is a game built mainly for “PBEM+” (Play By E-Mail+) multiplayer, which basically means you take your turn, then send it to your opponent to take their turn.
A full campaign starting from September 1939 hypothetically takes 156 turns (provided you end on May 1945, which you may well not), so if you play one turn per day (both you and your opponent), then this is a five-month long game to play. The developer says he takes 20 minutes to take a turn, and other players tend to take 30 minutes or so (I sure took longer, but I’m poking and fiddling a lot), so he expects a game to last 78 hours per side, and he also says he expects players to get more than one turn in per day. (So more like a two or three-month full campaign, and that’s if it goes the full campaign.)
Because it is I-go-you-go with e-mailing turns around, a turn in multiplayer lasts as long as you can get away with annoying your opponent by not sending in your turn or you just get it over with, and the game isn’t significantly different from single-player except in that you can’t reload and savescum and the opponent isn’t going to play like a bot.
Sound and Graphics
The game’s main menu starts off nearly silent, then swells to some bombastic war movie soundtrack that might hurt your ears if you turned up the volume to hear it. Note I said “war movie” not something a marching band would play. This is a game whose soundtrack is just a collection of alternate theme songs to some dramatic war film pieces. You’re spending fifteen minutes trying to decide whether to invest in destroyers or merchant marine when they won’t be available for 7 months or trying to guess where you should allocate escorts for convoys this week, and the freakin’ symphony is blasting your ears out like Tom Hanks is being revealed to have been standing in front of Private Ryan’s grave the whole time. The music would be perfectly suited to some Medal of Honor-style game’s opening credits, but for the game you’re playing, the tone is somewhat off. This is a game whose extremely dry, God’s eye view of Earth as you let little tokens representing tens of thousands of men march off to disappear in deaths you can’t see deserves something like a cold classical piano piece, not the theme song for the movie Patton. This is also the sort of game that has a single composer who can’t possibly make enough music (for the money he’ll be paid, anyway) to cover a game of this length without repeating the music more than you can stand, so you’re likely to just play your own music.
Sound effects consist of about a dozen clips of what I am sure were just public domain film reel sounds of bombs dropping, tank treads rattling, etc. The same clip of boots stomping plays every single time an infantry unit is moved, so you’re going to overplay these effects even more than the music. That said, you probably shouldn’t turn them off, because hearing the sound effect ships make are often the only warning you get that an opponent’s navy is on the move.
Graphics are generally just NATO-style symbols on cardboard token-like icons by default, however there are mods to add in more impressive graphics than differently-colored “X”s or “O”s, which replace tokens with profiles of various ship hulls or infantry helmets. Even with these, this game isn’t particularly graphically impressive, and you certainly are going to need to let your imagination do the lifting if you want this to be a narrative of the actual war rather than a bunch of units on a board. If this game were made 15 years ago, the only real difference would likely be the supported resolutions. Simplicity, however, isn’t a negative, and as long as the icons are visually distinct, I find no problems.
In that vein, the only problem I have is that what terrain a hex actually is sometimes disagrees with what is displayed. There are some spots on the map that look like plains but are listed as woods, and much of the coastline of Europe can take some hovering to see if it’s considered open ocean or beach or sometimes full solid land.
Verdict
Perhaps the best comparison would be that WarPlan is a more “serious wargamer” version of Hearts of Iron. Past the dated interface, WarPlan cuts all the fat of micromanagement from the overly dry tokens-on-hexes wargame to leave a game focused upon the attrition of battle. Its focus upon logistics is its high point, creating a game about cutting enemy supply more than just rock-paper-scissors unit matching that many military games focus upon.
This sort of game is obviously fairly niche. Most people are likely to run just from seeing the tokens-and-hexes interface. That said, this is a much more user-friendly experience… in terms of mechanics. The game’s interface could seriously use some redecorating.